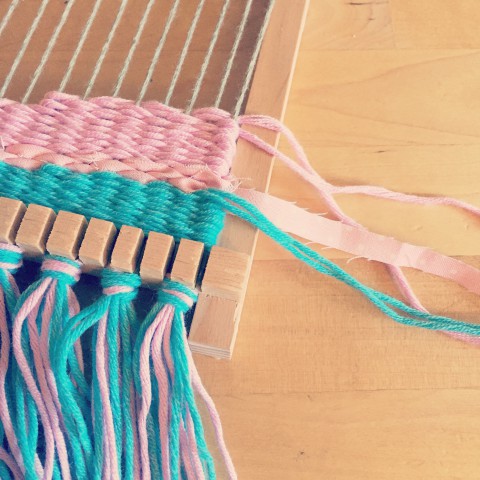
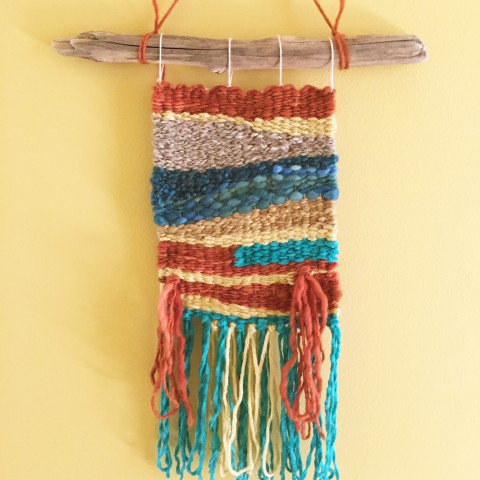
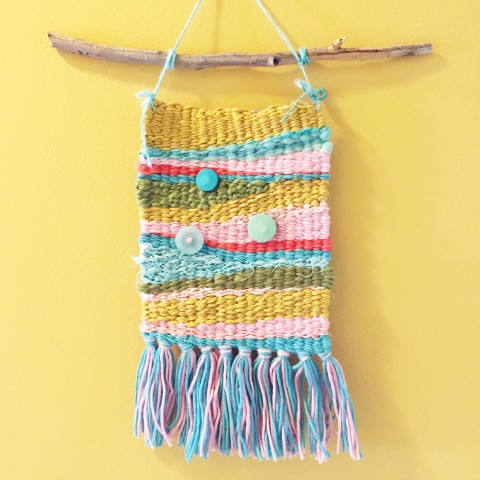
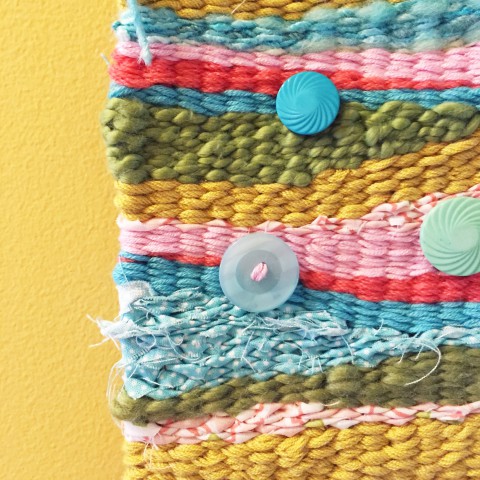
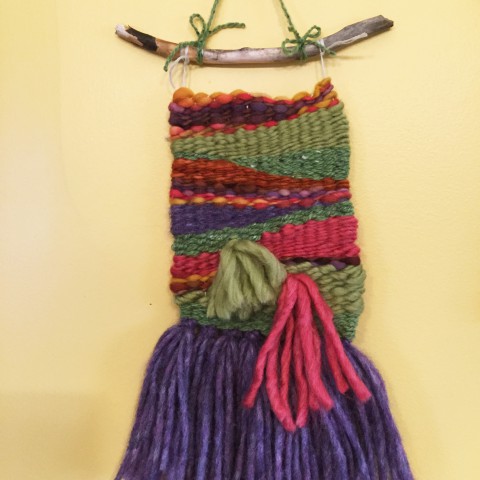
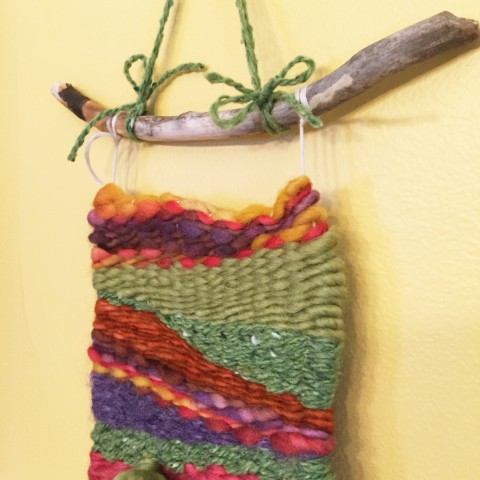
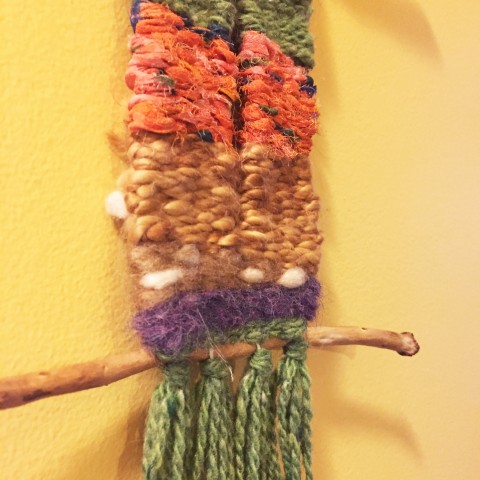
Last summer, I attended a loom weaving workshop through Crafted. Since then, I’ve dabbled here and there with my little loom. It’s really refreshing to pick it up and work on a weaving every now and then, when my hands & brain get a wee bit tired of stitching Love Catchers.
I don’t think my weaving creations are something that I’ll get into selling. I’ve made two for us and two as gifts. And that’s really how it will continue to go. It’s nice to have something crafty that I can clearly slot into the category of “hobby” instead of “business”. Colouring with Sammy is really the only other “hobby” I feel like I do regularly. I keep thinking it would be fun to try out a large weaving one day {especially since I would LOVE to have one hanging in our living room}, but for now, the small loom provides quick satisfying projects when I need them. Perhaps the large weaving is best left to the professionals {and oh my, there are so many wonderfully talented weavers out there}!
Here are my humble creations, so far:
Looking for some weaving inspiration, check out a few of my fave:
]]>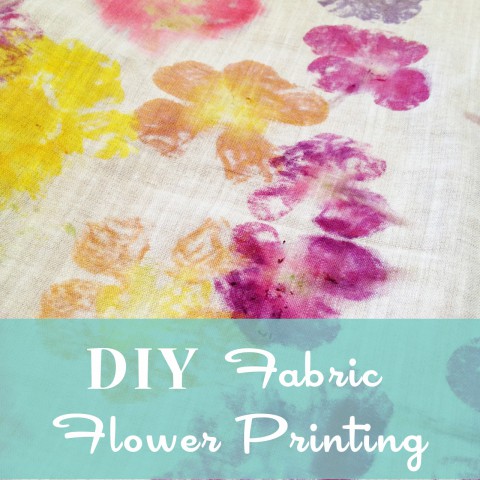
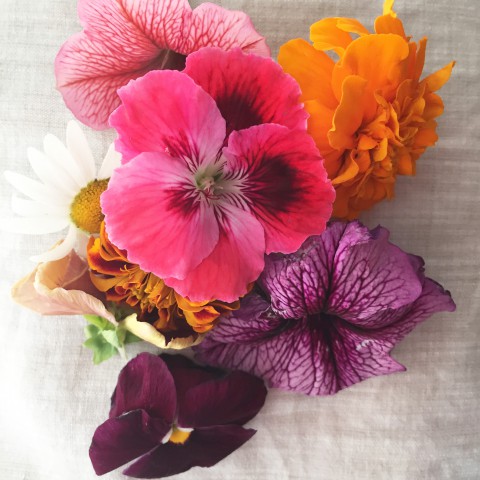
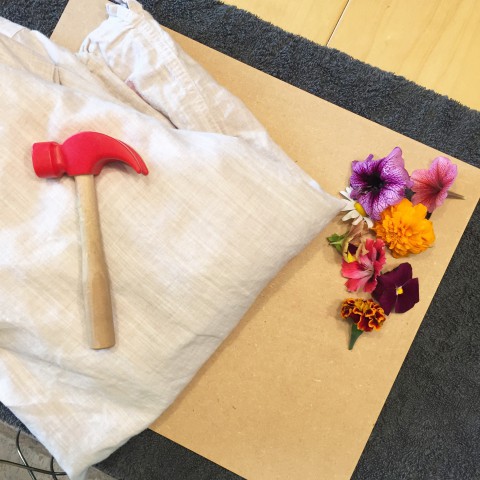
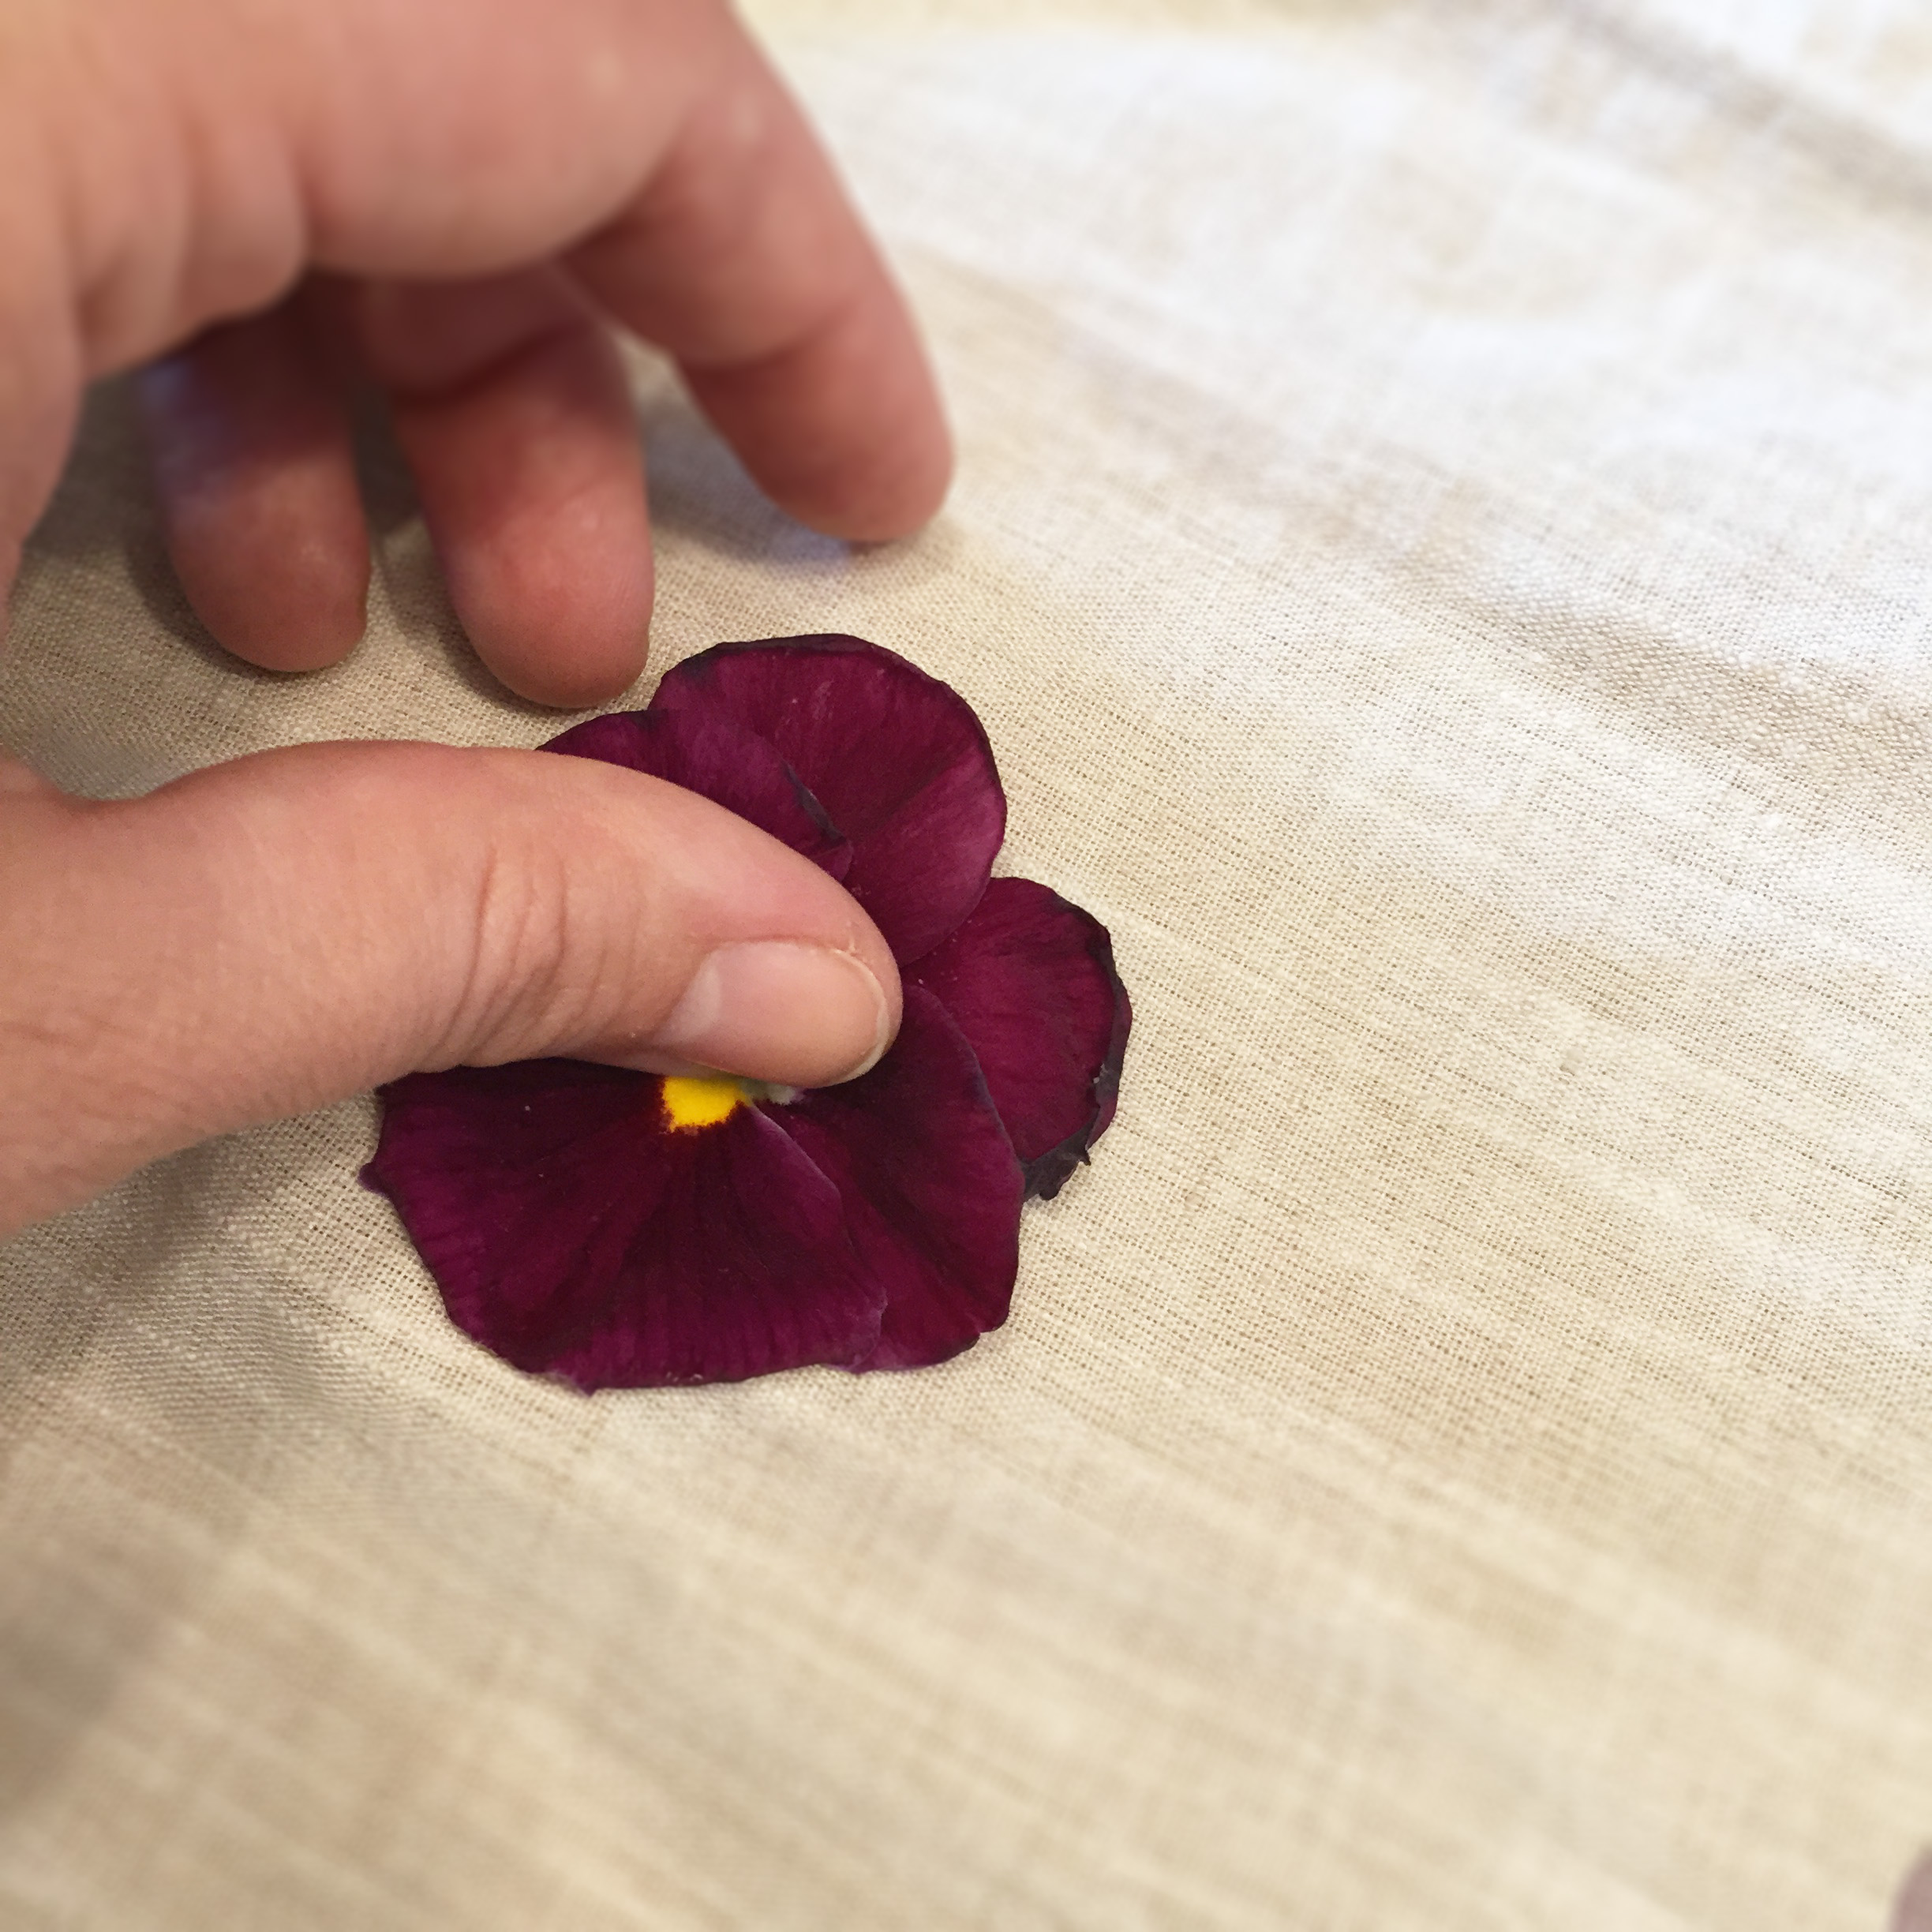
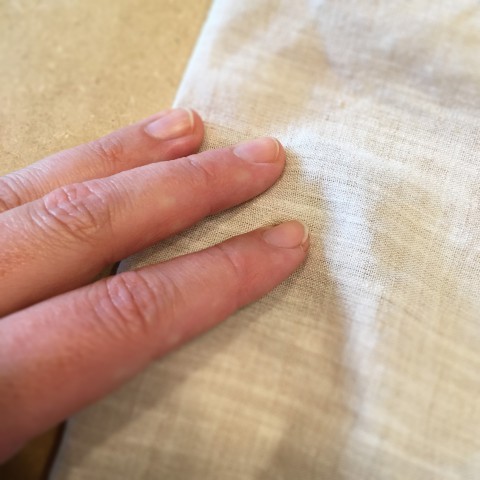
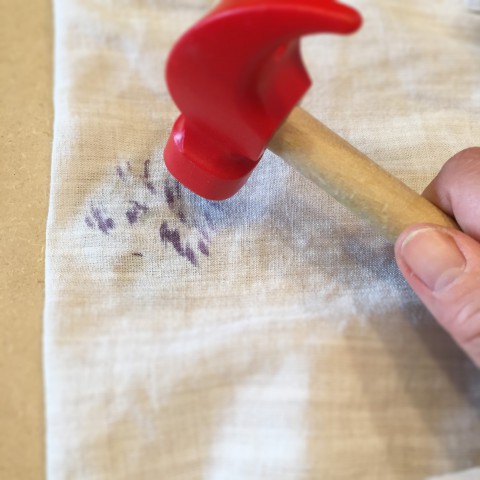
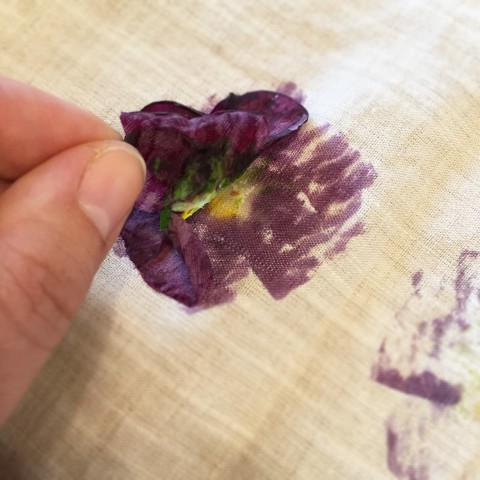
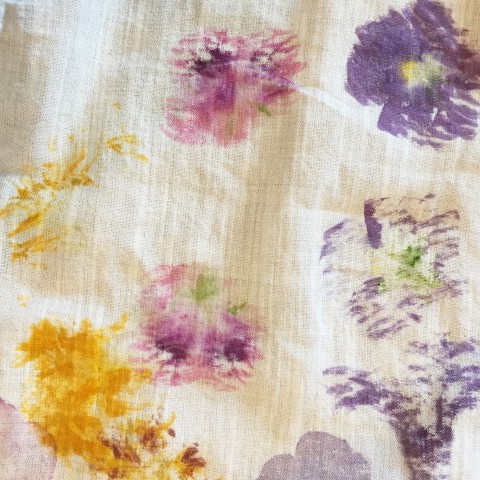
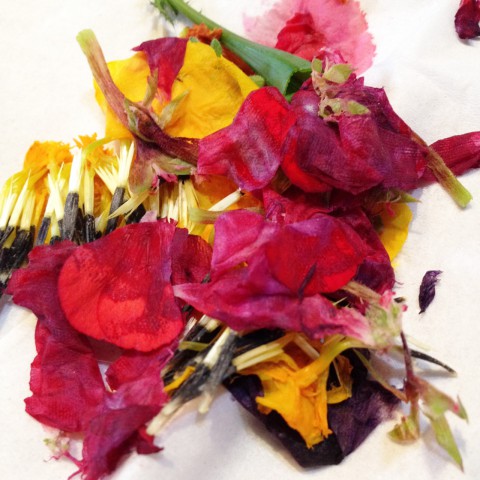
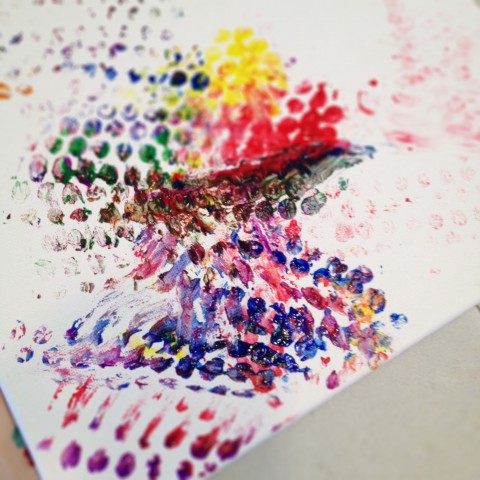
This is actually an activity that Sam and I did last spring, but I never got around to blogging about it. With gardens full of fresh flowers, summer is the perfect time of year to give this fabric printing technique a try. And you heard me right, this is something you can certainly do with your young child, as soon as they show an interest in using a toy hammer.
Here are the supplies you will need for this project:
- variety of fresh cut flowers or petals
- plain, cotton fabric in a white, cream or light colour (1/2 yard piece would be good, especially if doing with a younger a child, although you can use smaller pieces of fabric once you get the hang of it)
- a hammer (even a toy hammer will do, if it has a bit of weight to it)
- a large towel (to protect table surface)
- wooden board (to provide flat surface over towel)

Ok. So I have to admit that I actually did this project with Sam well over six months ago, back when he was a toddler. Somehow I didn’t get around to posting about it until now. Go figure.
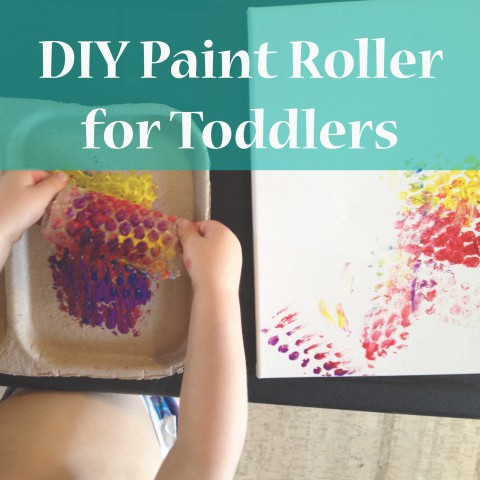
This is a simple project for you to make when your creative time with the kiddos needs a little refreshing. Sam was getting bored with the typical paint options, so I put together his own little paint roller to add some fun.
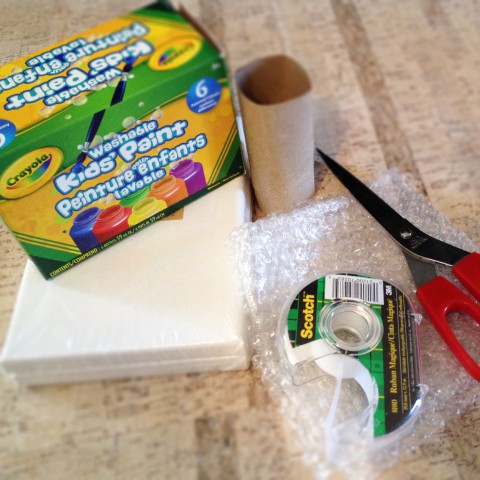
Here are the supplies you will need for this project:
- empty toilet paper roll
- bubble wrap
- scissors
- tape
- paint tray (we have cardboard trays that I saved from something, but use whatever you prefer, as long as it is wide enough for the the toilet paper roll)
- canvas (or paper depending on what you want to paint on)
- washable kids’ paint


After thoughts:
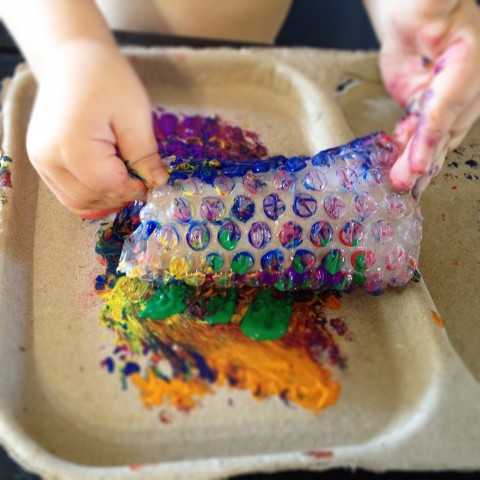
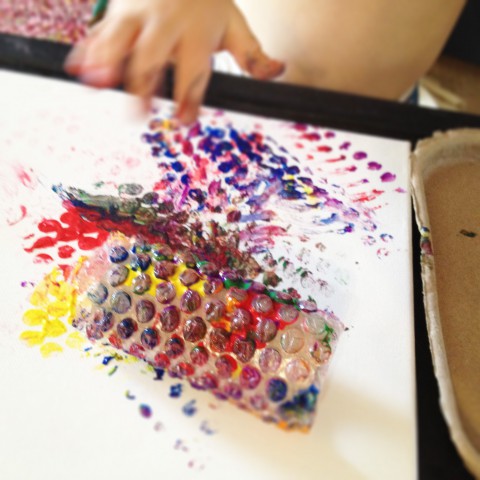
The toilet paper rolls are a nice size for the little ones to use, but you could also try empty paper towel rolls. And of course, I hope the the bubble wrap is inspiration for you to try other materials too. It’s fun for them to see what textures different things create. Here are some other DIY Paint Roller techniques to consider:
- glue yarn around an empty toilet paper
- stick those foam sticker shapes onto an empty toilet paper roll
- cut your own shapes/designs out of craft foam sheet & glue to roll
- glue leaves (or other natural objects) onto an empty toilet paper roll
- glue buttons onto an empty toilet paper roll (just thought of this one & really want to give it a try)
Also, just a note to mention, that at the same time I was writing this post, my friend Kerri was experimenting with bubble wrap painting on FABRIC!! You can see the results of her project on her newly started blog Soham Design.
]]>
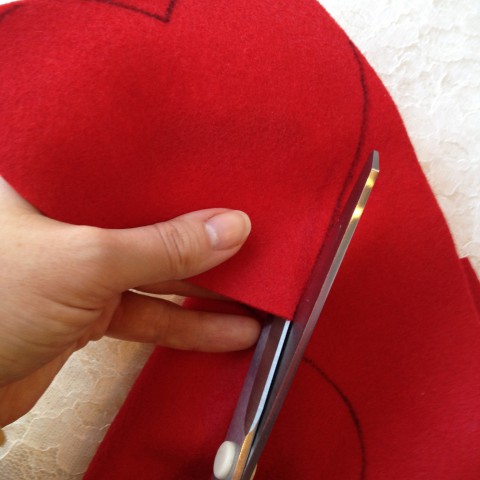
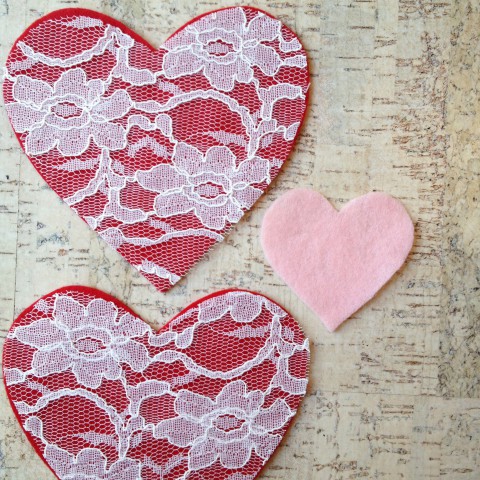
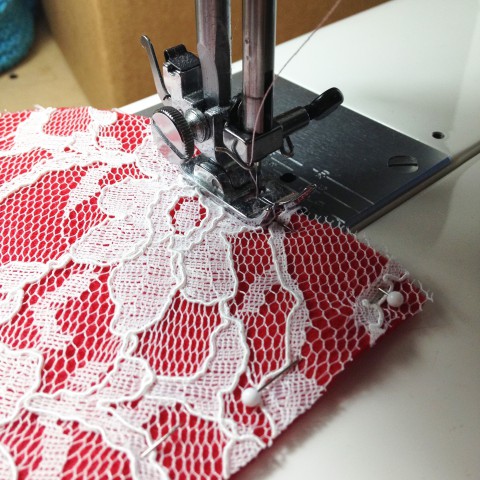
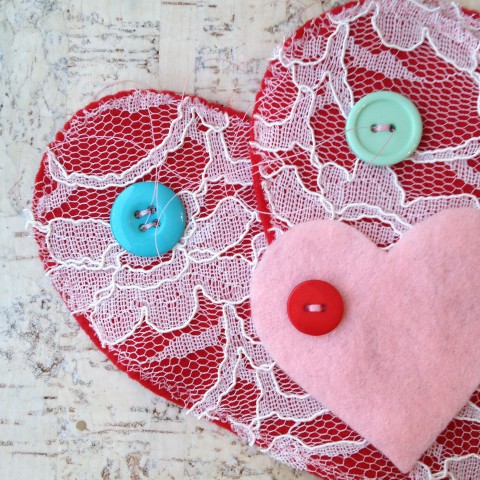
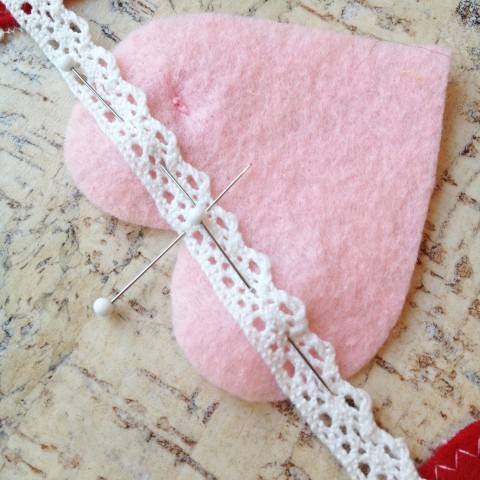
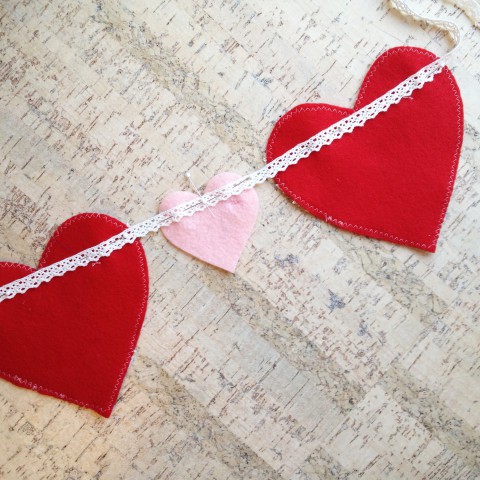
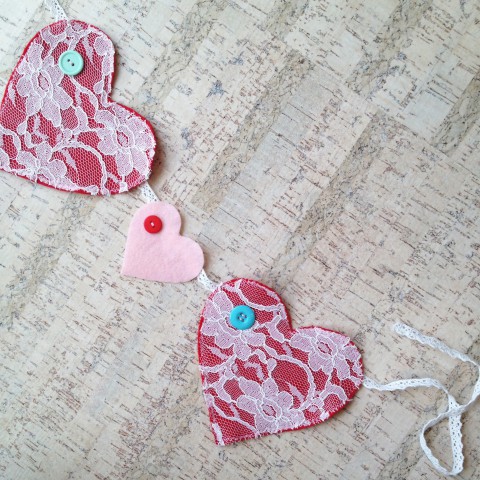
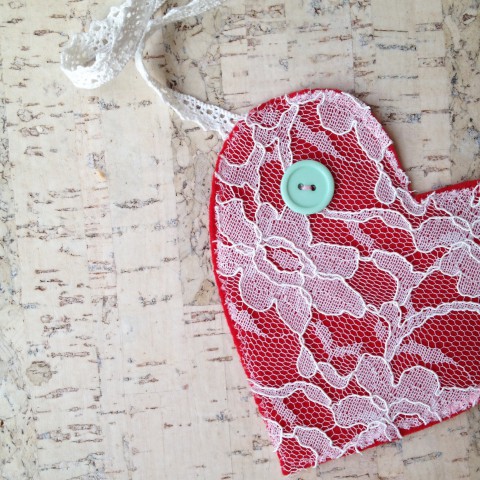
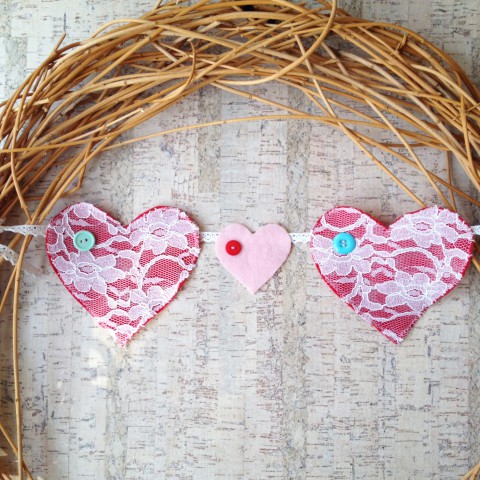
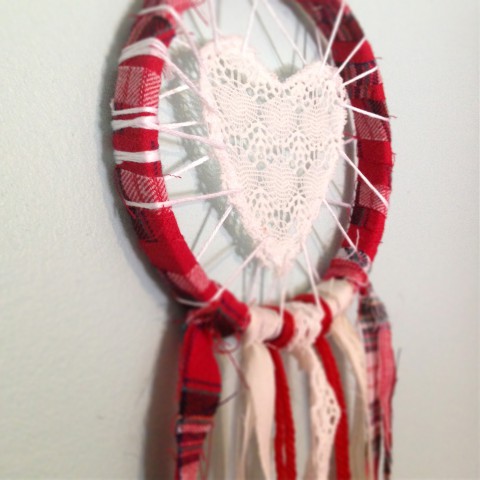
Although we don’t typically do a lot to celebrate Valentine’s Day at our house, we do decorate a wee bit. It’s nice to have a few pretty things around the house in the dead of winter. I especially enjoy a pretty wreath on the door (I get so sad when I take down my Christmas wreath). A wreath on the door always makes me smile when I arrive home. This year, I decided to spruce up our twig wreath with a shabby chic inspired garland. Annnd… I even remembered to document the process thoroughly so I could share it as a tutorial with all my lovely readers! That’s my bit of Happy Valentine’s to YOU!
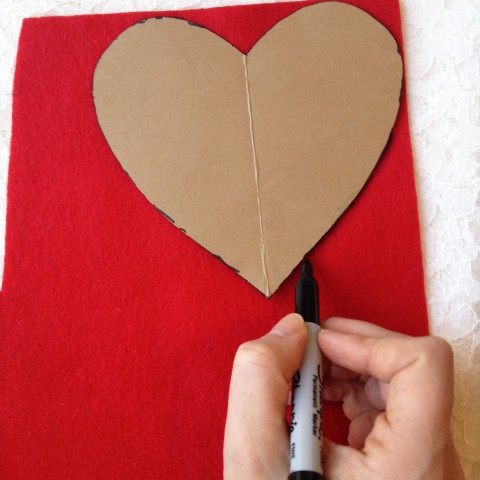
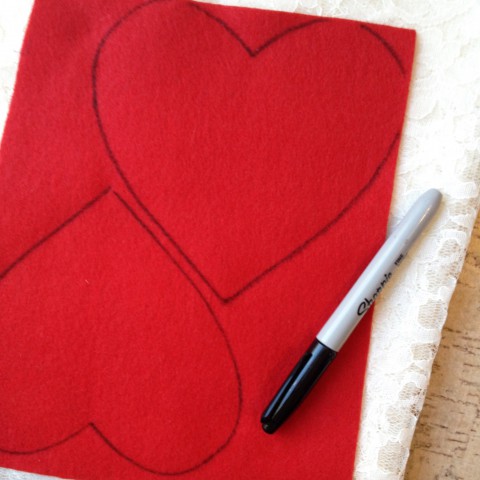
Now, the number of hearts to make for your garland is up to you (that’s why no material amounts have been given in the supply list below). I just made three (two large & one small) to symbolize my small family of three. Also, as you will see, I attached this short garland to a wreath. If you want a longer garland to hang, say from your fireplace mantel, then you will need to cut & stitch more hearts (you could alternate small & large hearts, some lace covered, some not).
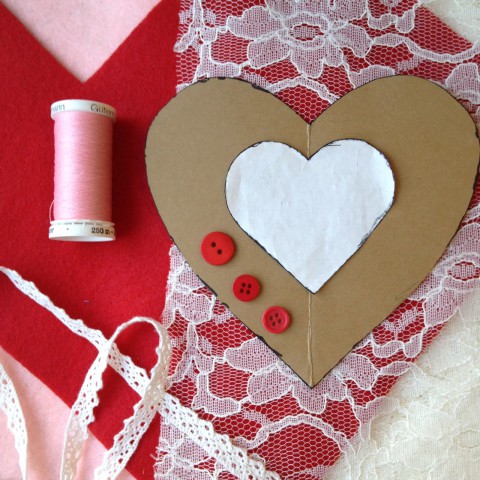 Here are the supplies you will need for this project:
- Bubblegum Sass Heart Template
- Red craft felt
- Pink craft felt
- White or light-coloured lace
- Buttons
- Lace trim or ribbon (to hang hearts from)
- Sharpie or fabric marker
- Thread
- Scissors
- Hot glue gun

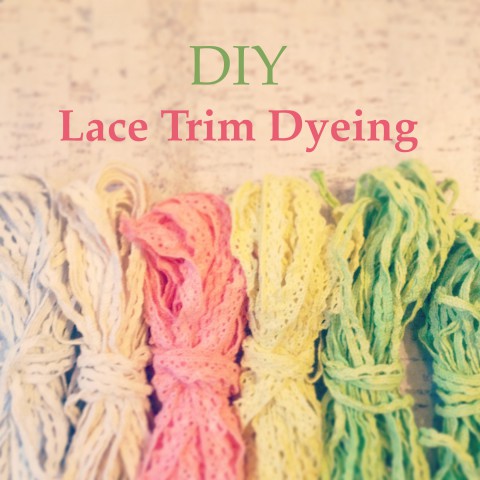
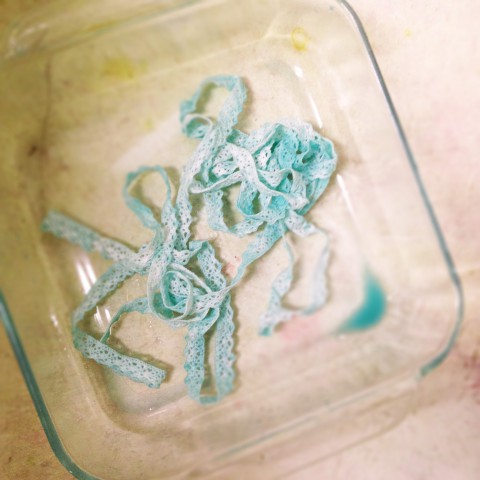
I realized early on in my making of the Love Catchers, that I was going to need a steady supply of lace trim to decorate them. Now, I try to use as much upcycled materials & materials that I have on hand as possible, but it’s hard to resist some new embellishments. It is possible to buy ready-made colourful lace trims (which I have done), but I felt a bit limited by colour choices and widths. So often I would find a package of lace trims online that were the perfect colour (there’s hardly any trim readily available locally), but the package would contain short lengths of various widths, many too wide for the Love Catchers.
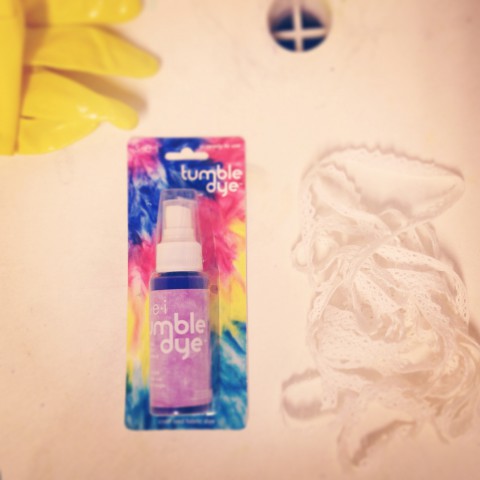
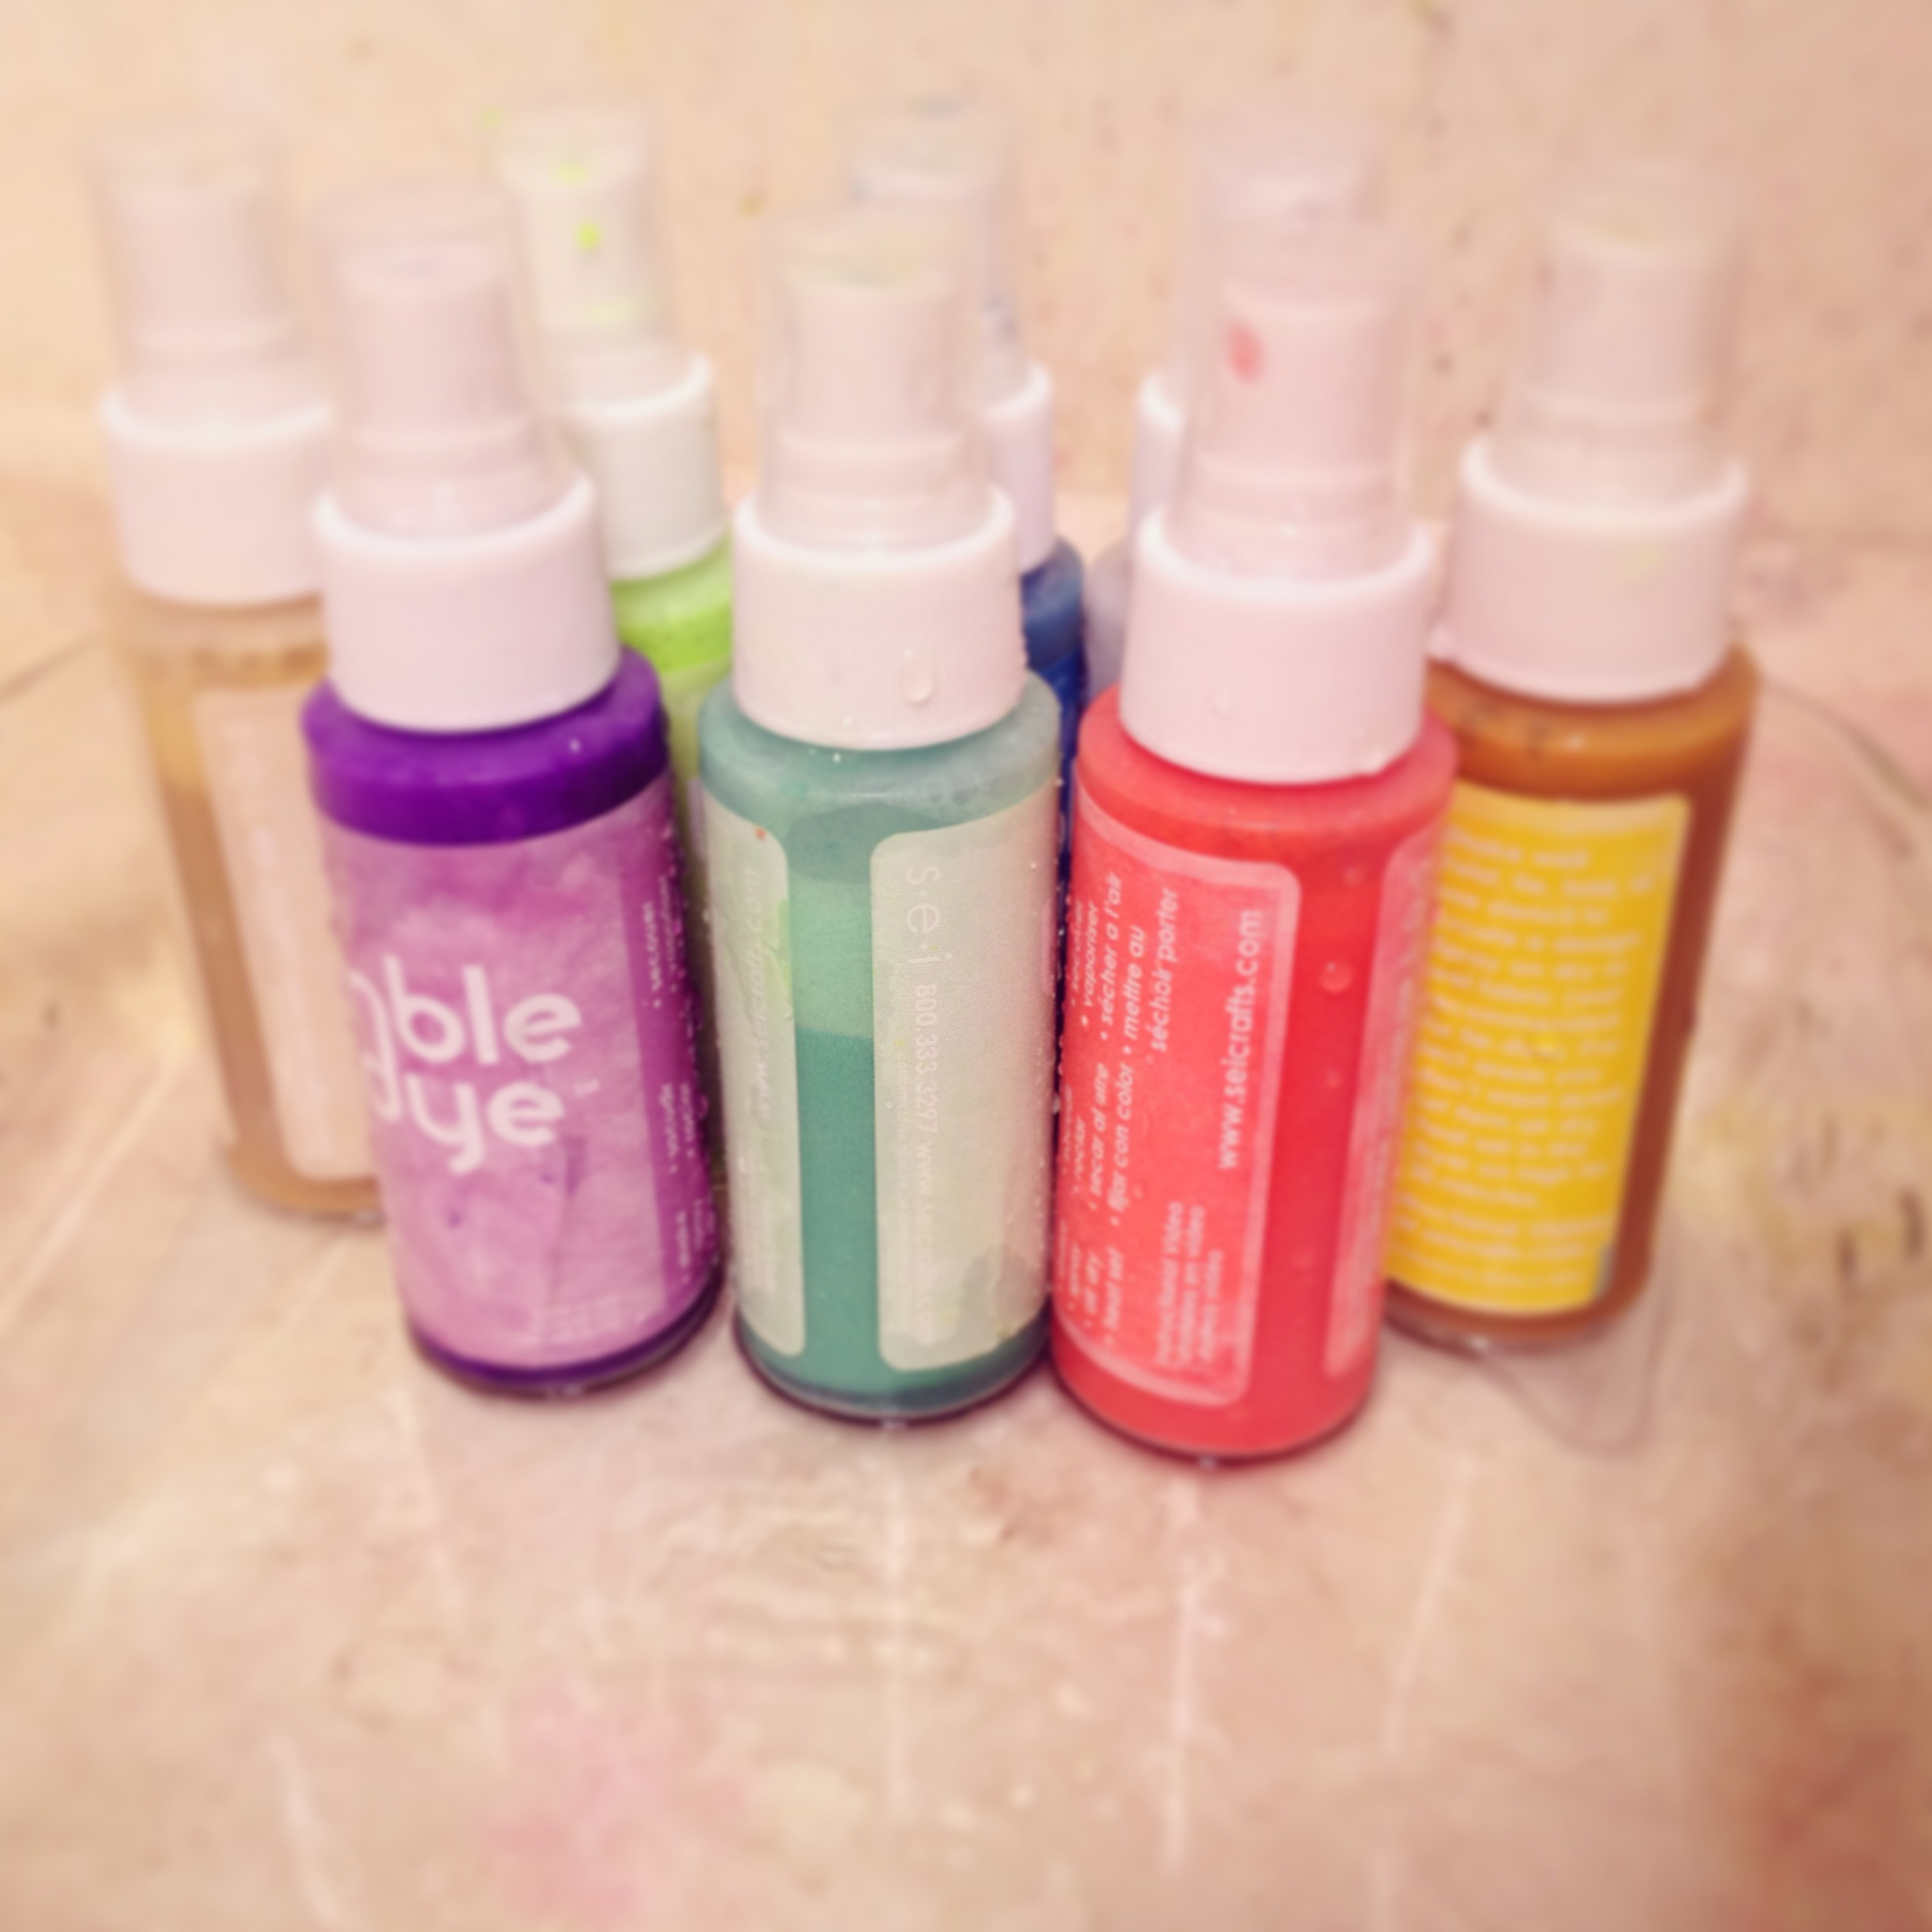
I finally decided that to flush out my selection of trims, I would purchase plain cotton, dyeable lace trim in large quantities and then dye them myself. Mostly I want to focus on making the Love Catchers themselves, and with limited time for all the crafting, I chose to purchase ready-made dyes to simplify the process. The supplies for this adventure were purchased online at the Dharma Trading Co. or were items I already had on hand. Dharma Trading Co. does offer natural plant dye options, if you would prefer to dive into that. I ordered a small selection of Tumble Dye. The fact that you could spray or dip dye with them appealed to me. Also, lovely selection of colours!
Suggested Supplies:
- Dyeable lace trim
- Bottles of Tumble Dye
- Rubber gloves
- Glass pan or large glass measuring cup
- Flat plastic trays or baking sheets
(For air drying the lace. I used the plastic lids from some storage containers) - Dryer
I wet the lace before applying any dye. Then I laid the lace out in the glass pan and sprayed it with the dye. Then I flipped the lace over and sprayed it a bit more. I didn’t pre-mix any dyes, but did combine some of the dyes simply by alternating which one I sprayed, to achieve desired colours.
Once enough dye has been sprayed on, wring the lace trim, allowing the excess water and dye to fall into the glass pan. Then place the lace trim back into the excess dye, rub it in a bit, flip the lace over and rub in the remaining dye. I did this step, to ensure there wasn’t any large white spots on the trim. *see note below*
Once you’ve got the lace trim the colour & hue you want, lay it out on a plastic try or baking sheet and let it air dry completely. Once it’s dry, pop it into the dryer for about 20min (I just used our medium heat setting). So far I have just been using the lace trim for my Love Catchers, which do not go into the wash. According to the instructions, putting the dyed items into the dryer should set the colour, but I haven’t personally tried washing any of them yet.
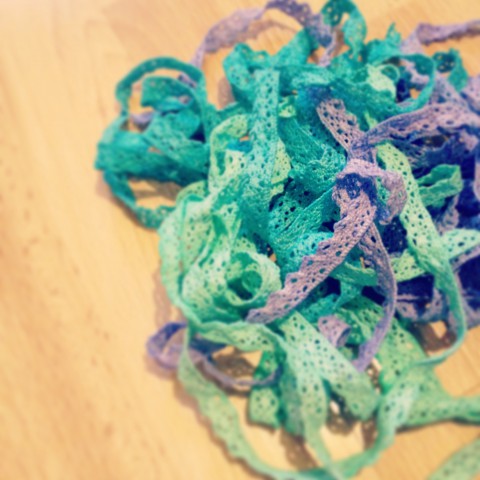
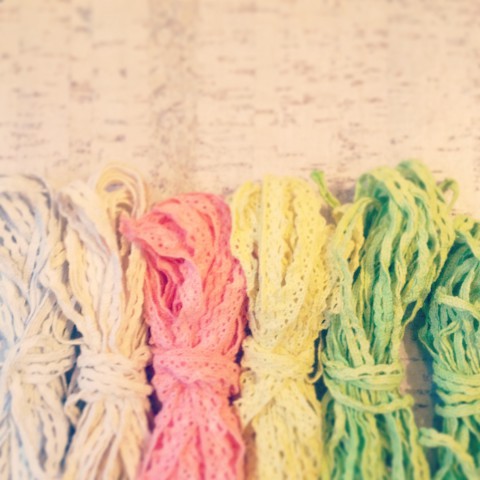
Viola! Pretty, pretty lace trims in a rainbow of colours, ready to be made into even prettier things!
*If you wish to a achieve a much more even dye colour, just pour some of the dye into the glass pan, and do a dip-dye method instead of using the spray applicator. I prefer the spray applicator to achieve the vintage shabby chic look, but it’s up to you.*
Keep experimenting (I know I still am) and have fun with your dyeing projects!
]]>
December is not far off. Goodness! Where did the month of November go?! At our house, it was consumed by colds, potty training, and more colds. I’ve been squeezing in little bits of crafting time where ever possible, but there’s been very few big chunks of making going on. Market Collective is only 10 days away now. I’m busy simplifying things in my head for the show, knowing what’s possible & improbable at this point.
I’m also being very mindful of what is most important at this time of year. This is the season, that one can most easily get caught up in the expectations of the world and lose focus on the true celebration of Christmas. So I make what I can for the craft show. I make what I love; make what I wish to share with my customers to fill their homes and help them express their love to others.
I also made the point to prepare myself for the coming Advent season. I don’t want to let it pass me by. Over the summer months (our craziest time of year), I managed, for the first time in my life, to make Bible reading and reflection through journaling a DAILY habit. A habit that was sadly broken during our Disney trip and subsequent chaos at home, but I’m really looking forward to committing again with the start of Advent right around the corner. I ordered an Advent journal from Naptime Diaries (I loved their Lent one last year) and even splurged a bit on their Advent calendar so that I could fill our house with mini-devotional prints (and God’s message to us). I might also follow along with the reading plan from Love God Greatly (formerly Good Morning Girls, which I did last year). Advent isn’t about spending money, but I saw the difference it made in my own Bible reading habit to have inspirational resources at hand (purchased or free).
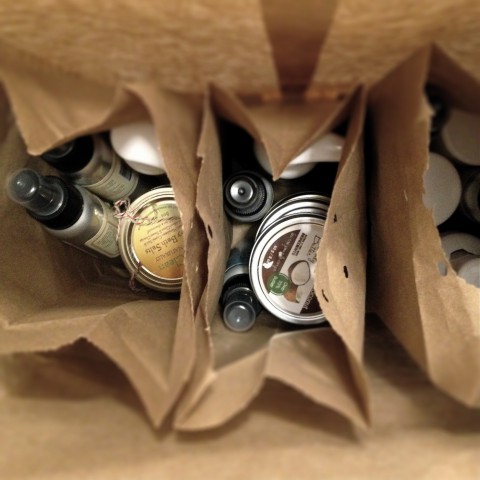
Peering into December, it’s easy to see Christmas as a looming deadline. With chaotic parking lots, busy, busy malls, and the pressure of getting just the “right” gift, it’s no wonder we all get stressed out and miss the point of the season. Each year, hubby & I make another small step in avoiding the crushing chaos of December. It started years ago, when we began making the majority of our gifts. Then we incorporated Gifts of Change (gift certificates to World Vision & such, where recipients could choose the way they would like to impact the lives of others). Christmas craft shows start in September and this year I attended several before the shopping season was in full swing. It allowed me to support local businesses & feel a wee bit more prepared for the giving season. I also discovered the ease of ordering locally and having it delivered directly to my door (shout out to Cedar & Sparrow for the lovely natural beauty products, all made in Canada, that will be gifted to friends this year). Making small changes to simplify the season.
Throughout the entire year, we purchase & collect items for Christmas Shoe Boxes. I have a little cubby in the sewing room where I squirrel away items to donate. We make organizing half a dozen Christmas Shoe Boxes a priority every November and we try to volunteer at the Operation Christmas Child warehouse each year, when possible. I’d love to volunteer there more than just one shift. Perhaps in coming years. I also really want to do more random acts of kindness during Christmas. We managed to do several last year and I’ve collected more ideas on my Christmas Pinterest board. I’m not trying to boast, but trying to encourage you. Our season of Christmas is becoming less about the pressure of giving and more about the experience of giving and ultimately, the deeper enjoyment of it. It is well worth the time to take a look at your own Christmas season and see if there are any changes, big or small, that can be made to embrace the true meaning of this most wonderful time of year.
Fabric headband by Heidi and Finn
Daydreamer Headband by I Am Momma – Hear Me Roar
This pretty button project comes from Ashley of Little Miss Momma. She was inspired by hair pins from Anthropologie and was determined to figure out a simple (and inexpensive) knock-off. I must say, I think she was successful! I like her version even better than the ones from Anthropologie. You can find the full tutorial on her blog.
Ashley used fabric yo-yos from a vintage family quilt (of course, you can make your own yo-yos with the help of Heather Bailey’s great step-by-step instructions). Admittedly, part of the charm of these, is the vintage nature of the yo-yos Ashley used, but you can always score some lovely reproduction fabrics from the quilt shop to tap into that vintage charm. Then all you need are some bobby pins, buttons and a hot glue gun (alternatively, you could hand stitch these all together). Place a bit of hot glue on the end of your bobby pin, press onto the back of your yo-yo. Let cool. Flip the yo-yo over. Place a dab of glue in the center of the yo-yo and squish your button into place. Let cool. Put on a pretty spring blouse, along with your newly made hair pin. Go grab an iced tea & enjoy the day!
]]>