Doilies, buttons, and corduroy, oh my!

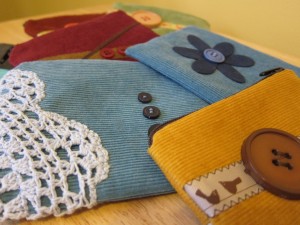
Small Corduroy PurselettesOne of the things I have truly enjoyed about being able to focus a great deal more on my craft business, has been having the time to play and design. When I was working a full-time job and squeezing my crafting time into every possible hour in the evenings and weekends, I found that I did less playing and experimenting. If I had an hour or two in the evening, I preferred to use that time actually making something, rather than brainstorming ways to change the design, try new materials, and push things further. One of my university professors always said that a completed piece of art only comes into being after it has been pushed to exhaustion.

I still haven’t done quite as much experimenting and playing as I would like, but even being able to do some has got my creative juices flowing more freely. My small purselettes had started to become a bit too repetitive for my liking, and it was with great enthusiasm that I dove into exploring some new options. They are such a versatile product. Keeping the same basic shape and size, they are easy to be creative with, simply by changing the type of fabric used and tapping into the seemingly endless embellishment choices. Small changes, but satisfying none the less.

So here’s a sneak peak at some of the new purselettes that will be available at Market Collective sale next weekend. The colours seem so very autumny now that I’ve photographed them, but rest assured, there are some lovely springy ones waiting to be assembled.

Blissfully making…

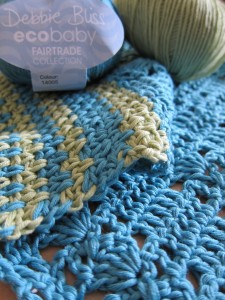
Debbie Bliss EcoBaby Sweater… stuff for babelettes. Not my own, mind you. Let’s be very clear about that. Seems like I am surrounded by wonderful, beautiful expectant mothers these days. It is such a blessing! It’s been a lot of fun walking alongside friends as they go through their first pregnancies and the coming months will continue to be full of change and excitement. Plus, my friends have given me the perfect excuse to make baby things!! Precious, sweet, cute, baby things! And so the blissful making has begun.

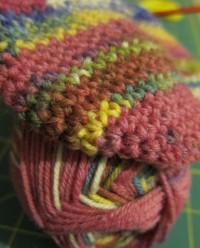
I’m actually planning on sewing a number of the baby items, but I got started on a couple new crochet sweaters just for fun. Couldn’t resist buying this lovely yarn after a trip to Pudding Yarn, our local yarn heaven. It’s the Debbie Bliss EcoBaby fair trade, organic cotton. I’m using this Multi-Coloured Top pattern that I found on Etsy. It’s been fairly easy so far. Vita’s patterns are very clear and have good photos to clarify the special stitches used. Just need to make the sleeves and sew it all together and then I can add it to the small pile of baby items that will surely grow over the coming weeks.

Happy crafting to you all on what some call Valentine’s Day, and others call Monday!

Santa’s workshop revealed

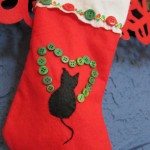
Christmas StockingNow that the gift-opening flurry is mostly complete (we have a couple of stragglers still in Europe that have presents waiting their return), I can share some of the things that got made up this year. The most important of course, was that our kitty Chloe was graced with a Christmas stocking. It’s not like she’s a new addition to our family, but for some reason we generally overlook her at Christmas. My mom, never fails, gives Chloe a Christmas gift. We, on the other hand, are rarely in our own home Christmas morning and thus, don’t get to open gifts with Chloe too often. This year I was determined to include her. I cheated a bit by purchasing a plain ready-made stocking from the craft store because the first chance I had to work on it was on the 24th. Cutting it close, but it did get nicely decorated, if I do say so myself. Just a bit of felt, some buttons, and embroidery thread. Voila!
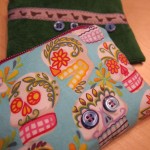
Sugar Skull Coin PurseI had a very special request for these coin purses from my sis-in-law. I made her a coin purse out of that sugar skull fabric a few years ago and she has loved it into the ground. So I was happy to make up a replacement one for her. There’s still a bunch of that fabric kicking around which I fully intend to make into a sassy apron one day… one day. My sis-in-law also recently discovered that her Canon Powershot S90 fits perfectly into my coin purses. So a second one was sewn up for use as a camera cozy. That’s the same camera that I use, by the way (for those curious what my blog photos are taken with).
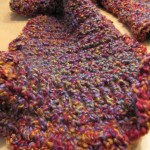
Crochet ScarfThere were two crochet projects undertaken for Christmas gifts this year. One is still in progress. Yes, I realize that Christmas has passed, but like I said, there are a couple of folks in Europe who won’t be back until the New Year, so that’s a whole extra week of crafting. That project is still under wraps, but I can share the second crochet item with you. It was a scarf for my mom. The pattern is just something out of my head. Not too complicated. Some single crochet, some treble crochet, and some scalloped edging that I winged. It’s nice and long. I was worried that I had made it too long by the time I was finishing it up, but I was told by a couple people that a scarf can never be too long. Especially, here in Canada. Anyway, it should keep her nice and warm. It’s made out of some Lionbrand Homespun yarn.
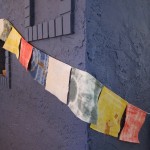
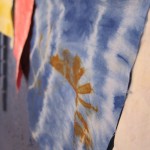
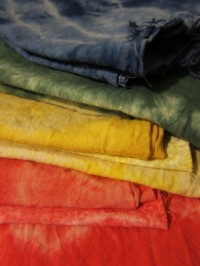
Hand-dyed prayer flagsHand-dyed prayer flagThe last bit of Christmas gift making were sets of hand-dyed prayer flags. I spent one Saturday dying fabrics in the basement (just with that cold water dye stuff). I used various bits of fabric that I had stashed in the sewing room, including some cotton that I had previous rusted. Those pieces ended up being some of my favourite out of the whole project. I have a stack left over too, which I can either make into a strand for us to hang or I could sew up some coin purses.

I feel like there’s a lot to catch you all up on. Big boxes of new yarn, the death of my herb garden, and book reviews. Oh, and I celebrated the big 3-0 yesterday. Must do more blogging.

Hoping that you had a lovely Christmas and are recovering from the sugar-overload!
Santa’s workshop

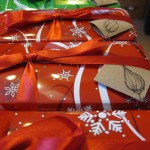
Christmas tinsOur house felt a lot like Santa’s workshop this past weekend. There was so much “making” going on in in the basement, the kitchen, the dining room, and the sewing room. And it was just the two of us. I’m so very thankful that we have the space to do so much in our home. I can’t imagine trying to do it all in our old apartment! There would a lot more swearing, chaos and ruined carpet. With our home though, we can keep the dangerously messy task of dying fabrics contained in a section of undeveloped basement, leaving hubby the entire kitchen for his “making”. Some of my “making” is still in progress, but the result of hubby’s is in those lovely tins. Aren’t those simple paper tags so sweet? That’s all him. Quick sketches on kraft paper, backed by an art degree.

Tissue wrapped giftsWe have regularly made gifts for Christmas, sometimes out of need because money was tight, and sometimes just because we love making things for our family and friends. There has generally still been bought presents in amongst those handmade gifts though. This year we have been thinking and talking a lot about gift giving, in particular, for Christmas. I have become a lot more conscious of, well, everything this past year. Spent time questioning how much of the super consumerist world I want to get entangled with, what’s healthy and what’s not, and what really matters. There have also been lots of conversations about how we would like to raise our children. In reflecting about how we celebrate Christmas, we have a strong desire to simplify the gift giving. Some of our thoughts were nicely expressed in Leo Babauta’s post “The Case Against Buying Christmas Presents“. So we hope to cut back on the amount of gifts that we receive from others and eventually move to gifts of “time”, especially with family. As for hubby and I, we want to move to only making gifts for each other. No bought things. We didn’t really come to this decision until after we had each bought items for each other this year, but we’re excited to do this next Christmas.

As for the Christmas “making” that I undertook this year, I can show you a sneak peek, but the rest will have to wait until after folks receive their presents (as some of them may be reading this). I am enjoying the colourfulness of everything! So typical of me to point out the colour, isn’t it? Anyway, the gift making is a nice mix of crochet and sewing projects with tie-dye thrown in there. Most of the Christmas crafting was put on hold until after the big craft sale, so I’m now working diligently to get everything finished up in time. Lucky for me, my brother and his wife are away for Christmas, so that’s two gifts I can complete after Christmas while I have some time off work. Now I just have to figure out when I’ll sneak some baking into the week.

Red, yellow, green blue dyed fabricsCrochet scarfCrochet sock in progress

I’m a sewing “machine”

Fabric design wallI took a break from the crochet craziness and sat myself down in front of the sewing machine for the first time in months. Along with the scarflettes, I’ve been anxious to make some other items to sell at the upcoming craft sale, including small fabric coin purses. Once I had all the fabric cut out, the first couple of hours of sewing were pretty frustrating. I don’t know if you’ve ever experienced that before with a particular craft, where the longer you spend away from it, the more challenging it is to get back into a good swing. Honestly, though, once I pushed through those first couple of hours, it was really liberating. I almost forgot how much I love sewing! For shame! I’ve spent so much of my crafty time this past year on crochet projects, which are lovely, but there’s just been something missing.

This weekend was just so satisfying! I have five coin purses complete, 6 more in progress, and enough fabric cut out to start another five. AND I didn’t have to buy any supplies to make them up, which means I am either super resourceful or my sewing stash is getting a bit too big. Or it maybe my stash is JUST big enough to sustain all my crafty activities now. Ya, that must be it. Always looking to justify having such a stash of fabric and bits and pieces.

Coin purse with buttonsThese coin purses are a design I made up several years ago for a church craft sale I donated to. I have since made some for gifts and folks seems to enjoy them, so I thought it would be worth it to have some available for the craft sale. They are the perfect size to fit credit/debit cards. I have one in my tote bag to hold my lip gloss, mini hand cream, and bandages (Mrs. Always Prepared). I’ve added some small button embellishments to these newest ones and I’m loving that! Anyone who knows me, knows about my love affair with buttons. Previously, I added fabric yo-yos, which worked out well, but I thought I would try something new this time. Without consciously doing it, I’ve also made the coin purses in a such a rainbow of colours! It nicely mirrors the colours of the scarflettes. Feels like things are starting to come together!

What I did with the extra hour

The time changed here on Sunday. We set the clocks back one hour and like most people I technically spent my extra hour sleeping. I needed the extra bit of sleep after quite a full crafty Saturday. Although the morning was spent with the usual bit of house cleaning and laundry, I had a lovely afternoon at a friend’s Stampin’ Up! Christmas card making party. It was just what the doctor order too! We all work together and last week was full of extra stress, so being able to come together and make some pretty cards was a good release.

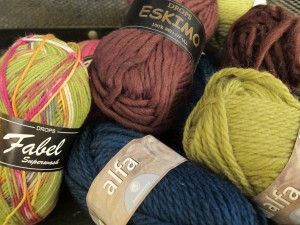
Fabel, Alfa, and Eskimo yarn ballsFollowing that relaxing afternoon, my hubby and I drove out to Banff in the evening. His mother and grandmother live there and his mother actually owns a yarn store in the town of Banff called Jen By The Fjord. She recently moved into a new location, so for any locals interested in checking out her shop, she is in Harmony Lane on the second floor. It’s a bit hidden, but worth a visit! Our mission, besides spending some time catching up, was to put a yarn order in. I’m definitely ready to move on from working solely with yarns purchased from Michaels and while I’m still learning about different yarn types I thought it best to turn to a professional. When your mother-in-law happens to be that professional, it’s even better! So after some back and forth and much touching of yarns, I decided on a few types to order: Punta Yarns Meritwist, Sandnesgarn Alfa, and Garnstudio Eskimo. I was even able to bring some balls home to play with (I *heart* my mother-in-law) and picked up some Garnstudio Fabel yarn to make socks (have to start the Christmas present making soon).

With the yarn order placed and some carrot cake in my tummy, hubby and I drove home along an eerily quiet highway in the dark, arriving home at midnight. So yes, we were thankful for the extra hour on Sunday to get plenty of sleep and still do all the rest of the errands that have been piling up the last couple of weeks.

Trick or treat goodness (part 2)

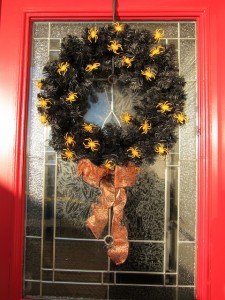
Halloween spider wreath

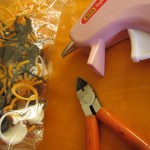
This post could be alternately titled “Fun with plastic spiders & a hot glue gun”. There were a couple more decorations that I made up last Halloween that I’d like to share with you. My absolute favourite decoration was by far our wreath. It was super simple to make and also fairly inexpensive. You will need a black wreath (which I picked up on sale at Michaels), a bag of plastic Halloween rings (most dollar stores have them), a small pair of wire cutters, hot glue gun, and some wide Halloween wired ribbon. Here’s all you need to do to make a creepy, fun wreath:

Plastic rings, wire cutters, hot glue gunCutting plastic spider ring

1. Sort your plastic rings (I only used the spiders and mainly used the orange ones)
2. Using small wire cutters, snip off the band of each ring
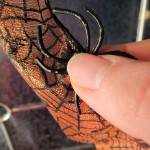
3. Apply a small amount of hot glue on the back of the spider
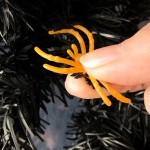
4. Squeeze the spider onto the wreath (be careful not to burn yourself on the glue)
5. Repeat until you have covered your wreath in as many spiders as you like
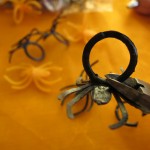
6. Using the wired ribbon make a pretty bow (I’m really not very good at this, so any instructions Gluing plastic spiderPlastic spider ribbonyou can find online about making a bow, will be better than anything I can tell you)
7. Once you’re satisfied with your bow, glue some spiders on it
8. Attach the bow on the bottom of your wreath either by hot gluing it or tying it on with thread (depends on how big or what style of bow you make)

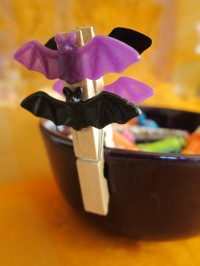
While you have the glue gun warmed up and those plastic rings handy, you can also make up some simple clothespin decorations, which I found inspiration for on Martha’s site:

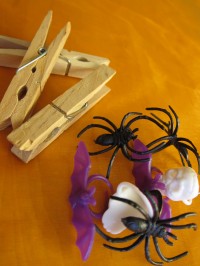
1. Last year I ran out of time (I started making these about an hour before guests began arriving at our Halloween party), but I would suggest either painting or spray painting the clothespins black before you start and let dry
2. Take some plastic rings and snip the band off of each, as done above with the wreath project
3. Apply a dab of hot glue to the back of each ring
4. Squeeze onto the “front” of the clothespin (again be cautious of getting hot glue on your fingers when you do this)

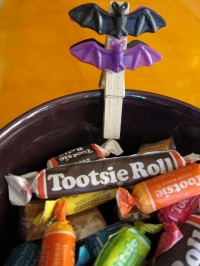
Now you have some creepy decorations to clip onto the edge of bowls or where ever you can think to clip them. I like they way they dress up the treat table at a party and you can’t beat how simple they are to make.

Clothespins and plastic ringsHalloween clothespin decorationHalloween clothespin decoration

Trick or treat goodness (part 1)

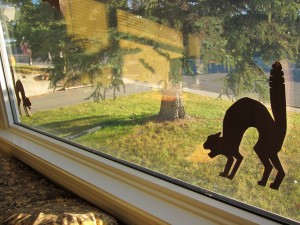
Paper cat cutoutLast October was the first time that we got to celebrate Halloween in our very own home . So of course, I delved into making a variety of decorations, which I was able to re-use this year, with the addition of my spooky crochet spiders.

For decorating inspiration I turned to the one and only Martha, queen of Halloween. I don’t subscribe to her magazine, but the two issues each year that I buy are October and December, and there are generally packed with beautiful and fun ideas, some of which I feel like I can even do myself! Then there is the website, which is packed with even more ideas. So when I needed to start from scratch with Halloween decorations, I turned to good ‘ol Martha.

The first thing I was drawn to was a childhood classic. I knew I wanted to cut out some construction paper silhouettes to tape to our front window, which we always did to decorate at my parent’s house. Martha has lots of handy templates to download for free. I used these flying bat and spitting cat templates, although I increased the size of the bat. Buy some black construction paper, trace the templates, cut out, and voila! Pretty simple, eh?

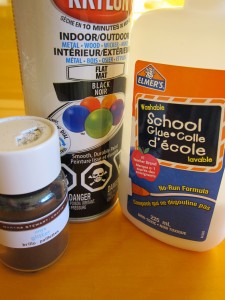
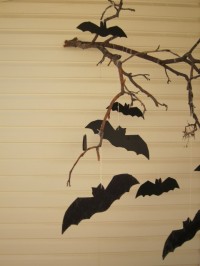
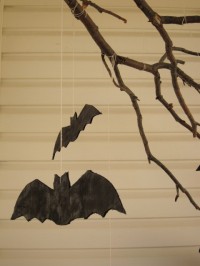
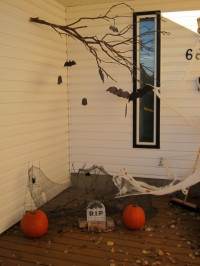
Glitter, spray paint, and white glueThe next thing I tackled was slightly more complicated, but I was thrilled with the results. I found the inspiration for it on The Long Thread. I used the following materials: cardboard, utility knife, black spray paint, white glue, paint brush, black glitter, string, and a big branch. I used the same template from Martha as above, but used both the original and enlarged versions, so there would be two different sizes. Here’s the basics:

1. Cut the bats out of cardboard (I cut out seven total, a few small and a few large)
2. Spray paint the fronts and backs black, let dry
3. Brush one side with basic white glue and sprinkle with black glitter, let dry
4. Use a ball point pen to punch a hole through each bat in the middle of their heads
5. Cut varying lengths of string and thread each bat with one
6. Hang a branch wherever you will be displaying your bats (I put ours outside)
7. Tie each bat onto the branch
8. Stand back and watch them flutter

Cardboard batsCardboard batsOutdoor Halloween decorations