DIY Dino Terrariums

DIY Dino Terrariums ~ Succulent Terrarium Tutorial ~ Kid's Dino Birthday Party

This was the second year in a row that Sam requested a Dino themed birthday party and when you’re kiddo is turning FIVE, you smile & embrace all the fun! Which for me, means diving into all the Dino Pinterest projects I’m constantly pinning.

I grew up in the age of birthday favors, but struggle a bit with them now as a mama. In the past, it has just been candy. This year, I really wanted something the kiddos could keep & enjoy. From that the Dino Terrariums started to take shape. I opted for spending more money on the favors, but made them serve dual duty as a party craft too.

{Read More}

(more…)

Happy Heart Day!

{Otherwise known as Valentine’s Day}


DIY yarn heart kids craft


We made these yarn hearts last week. Yarn dipped in white glue and placed on wax paper in a heart shape… trace a heart shape on the wax paper to make it easy. Let dry over night. Peel off. They’re flat enough you could attach them to cards or pop in an envelope to mail.

Santa’s Workshop: Marble with Nail Polish

Santa's Workshop: Marble with Nail Polish ~ DIY Gift Ideas ~ Bubblegum Sass


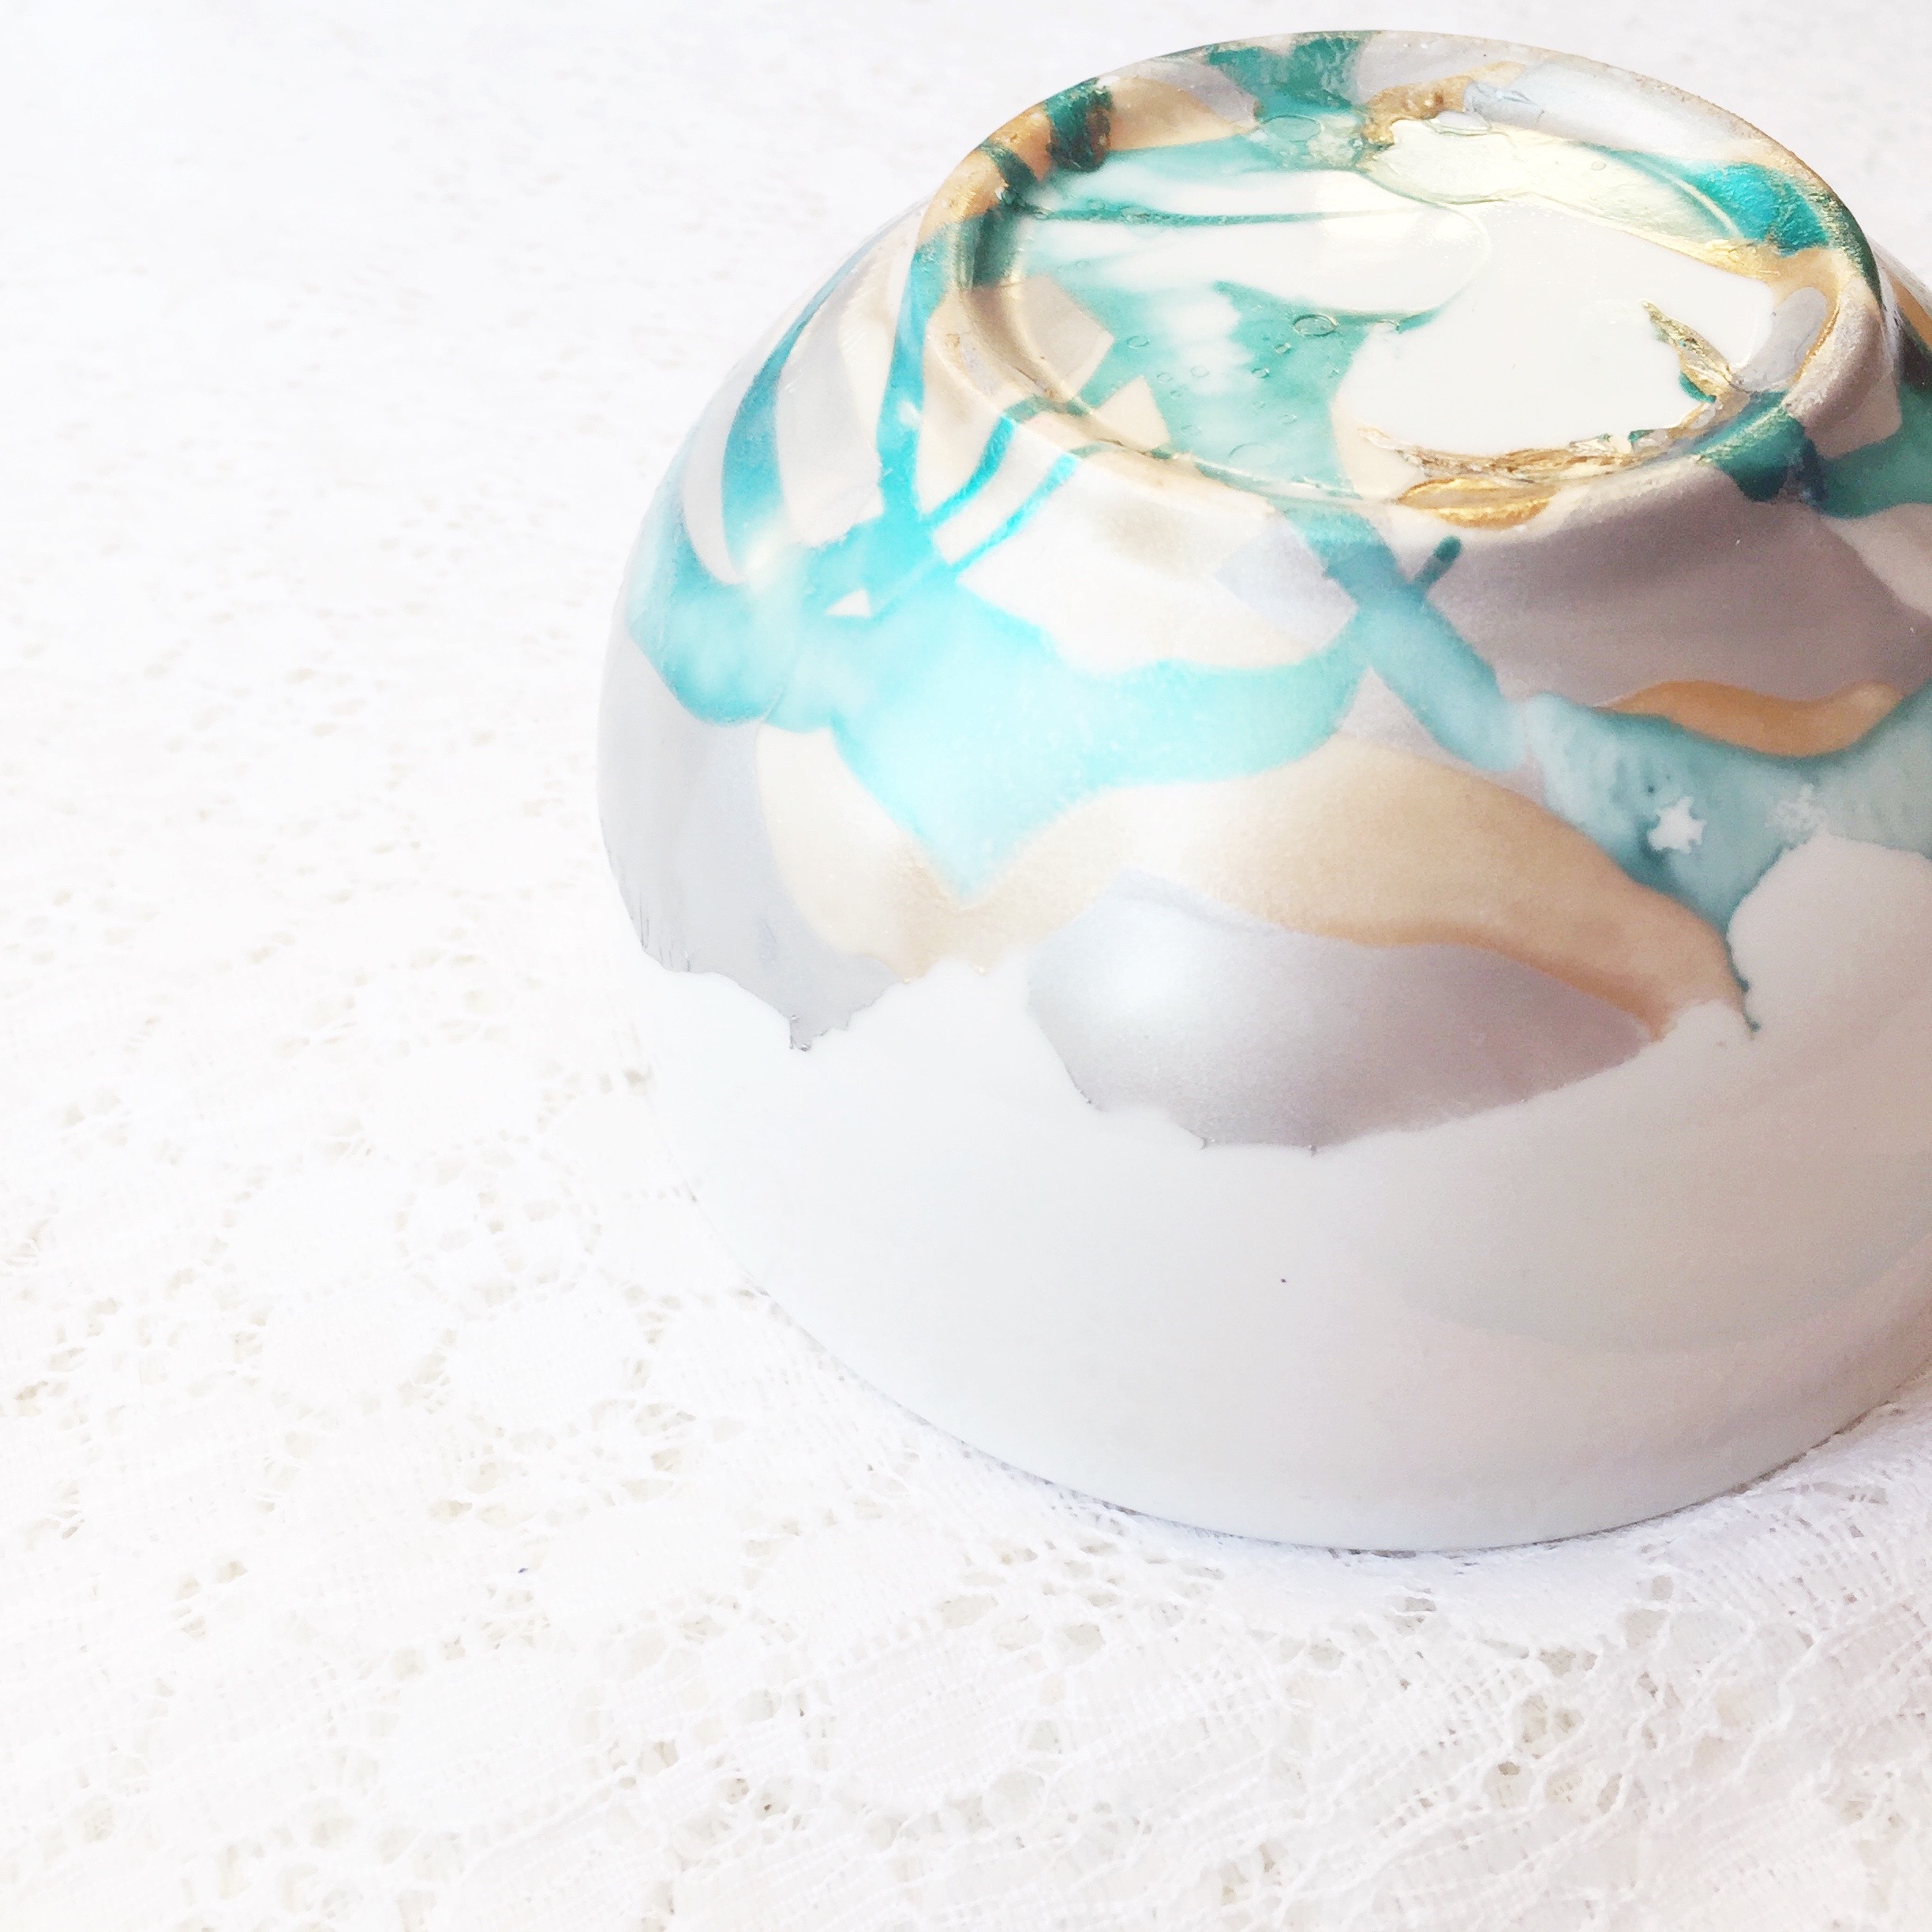
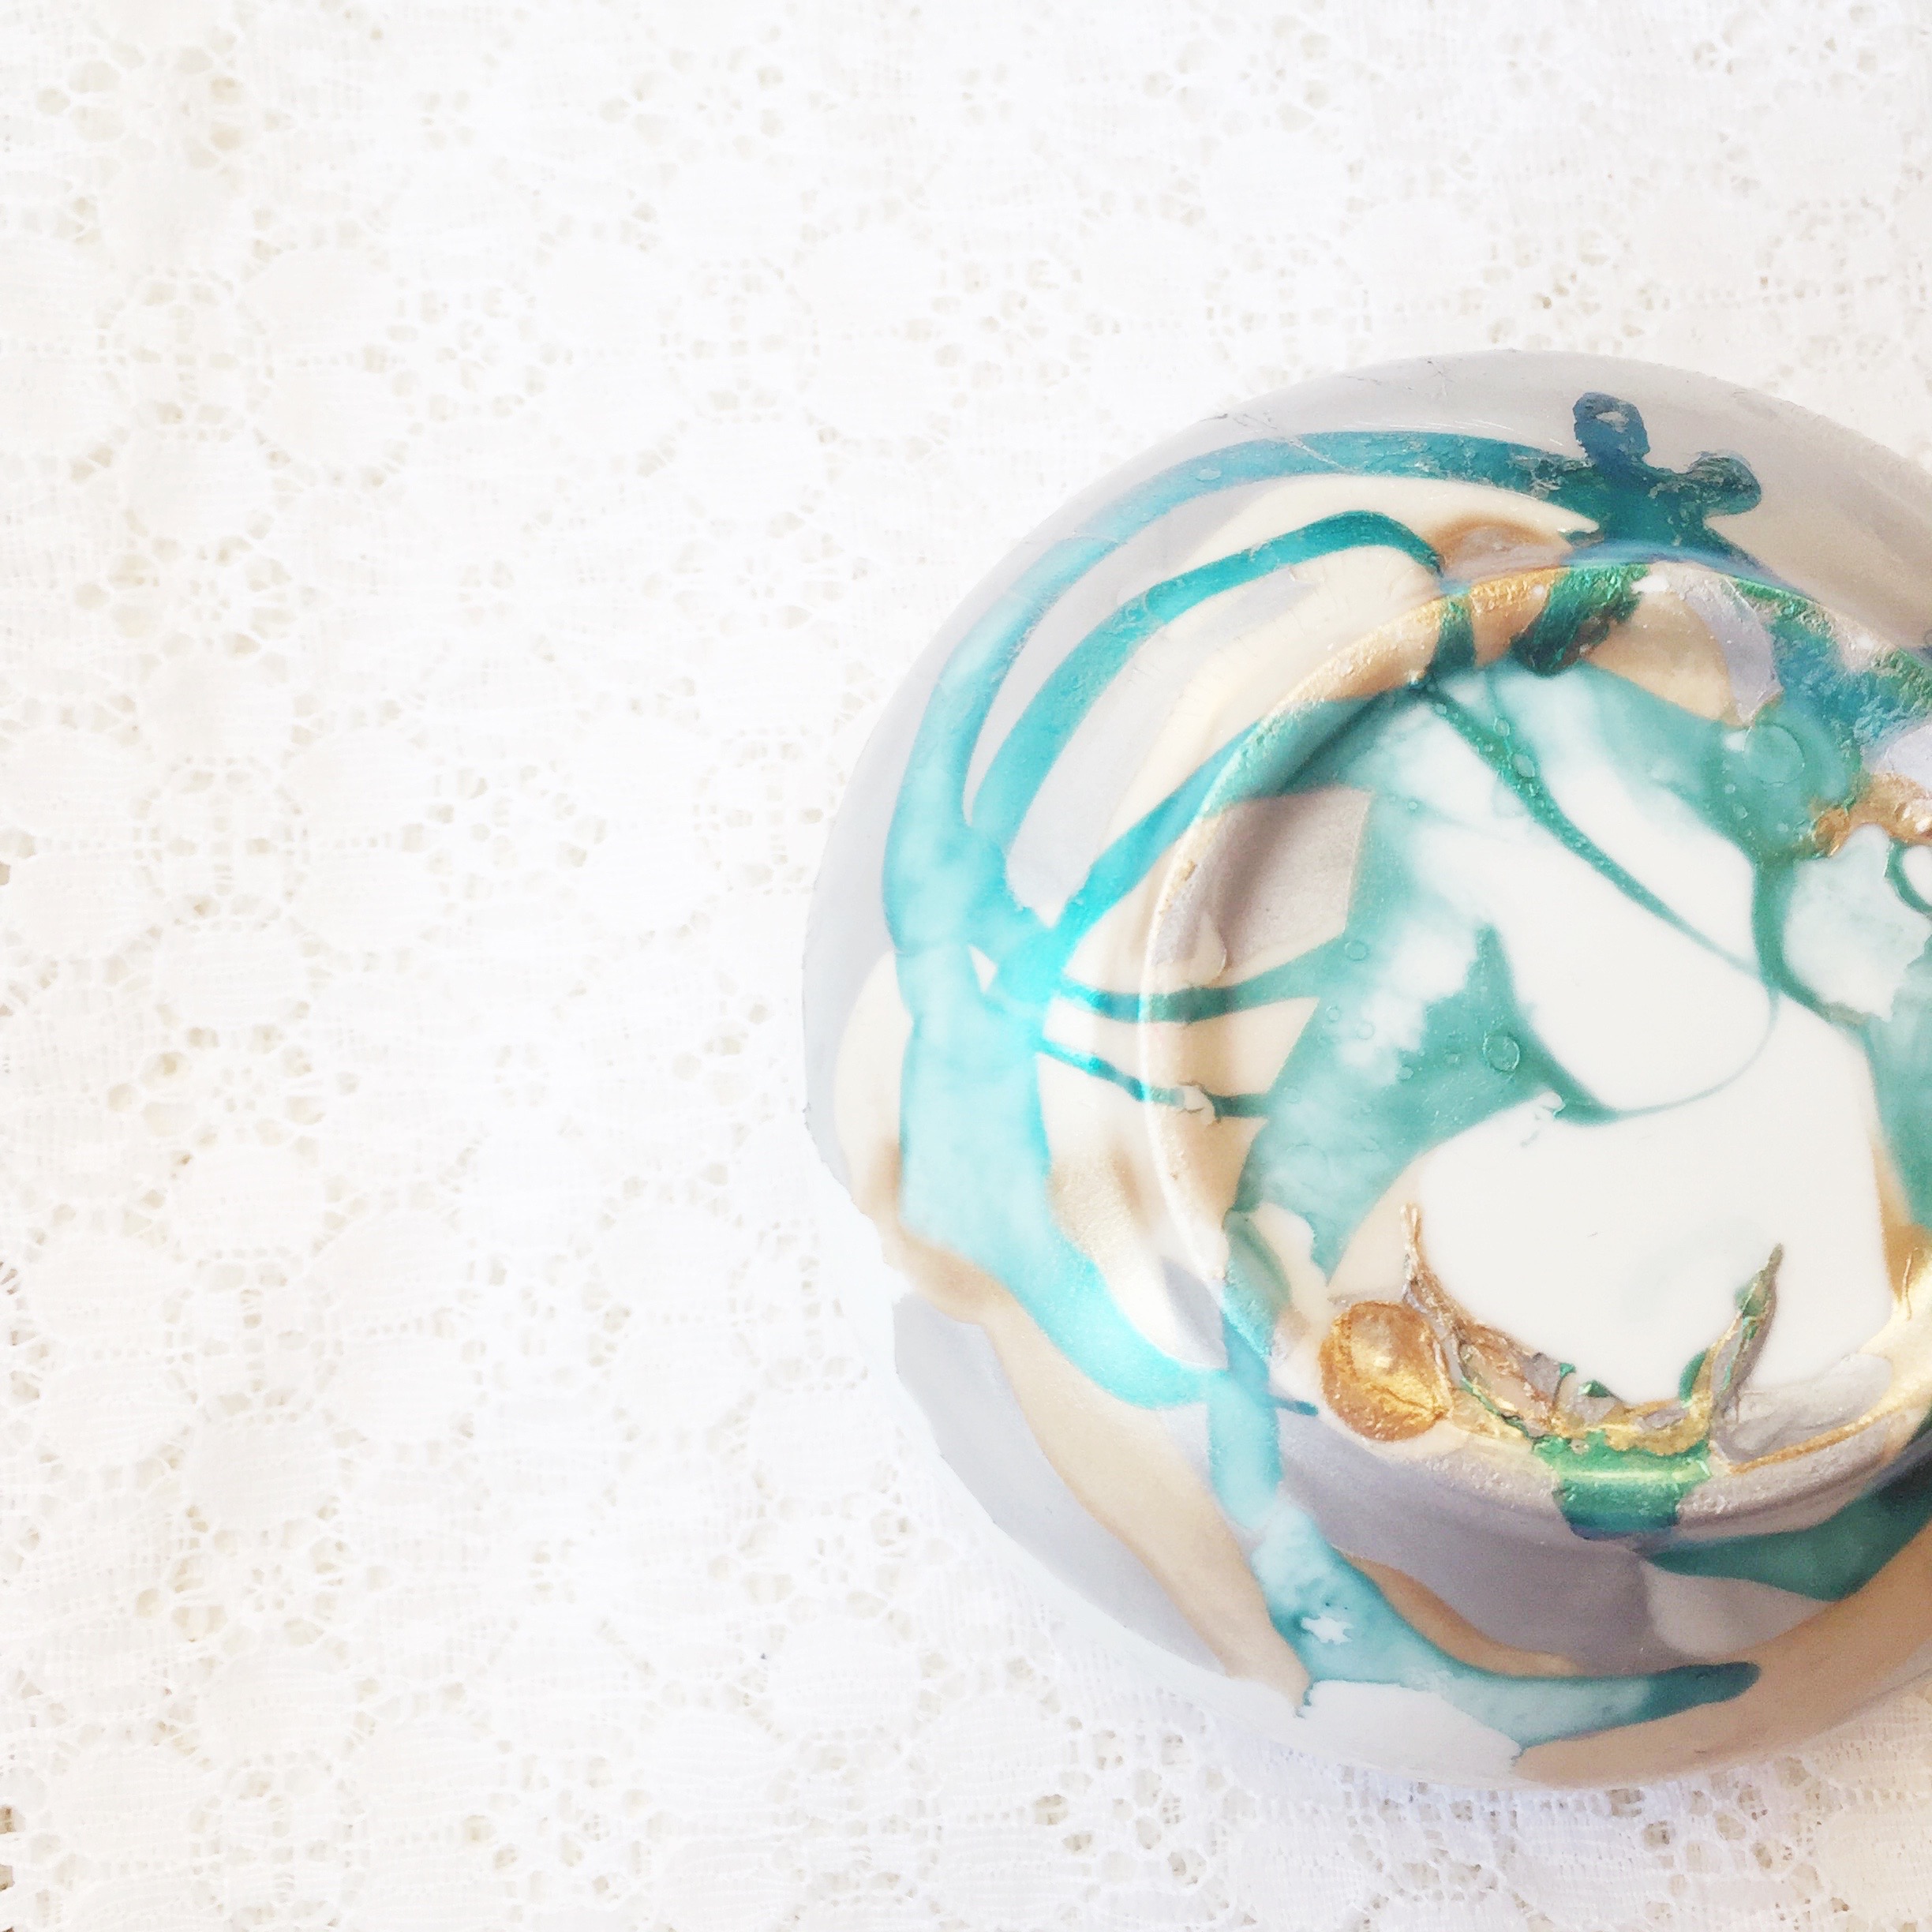
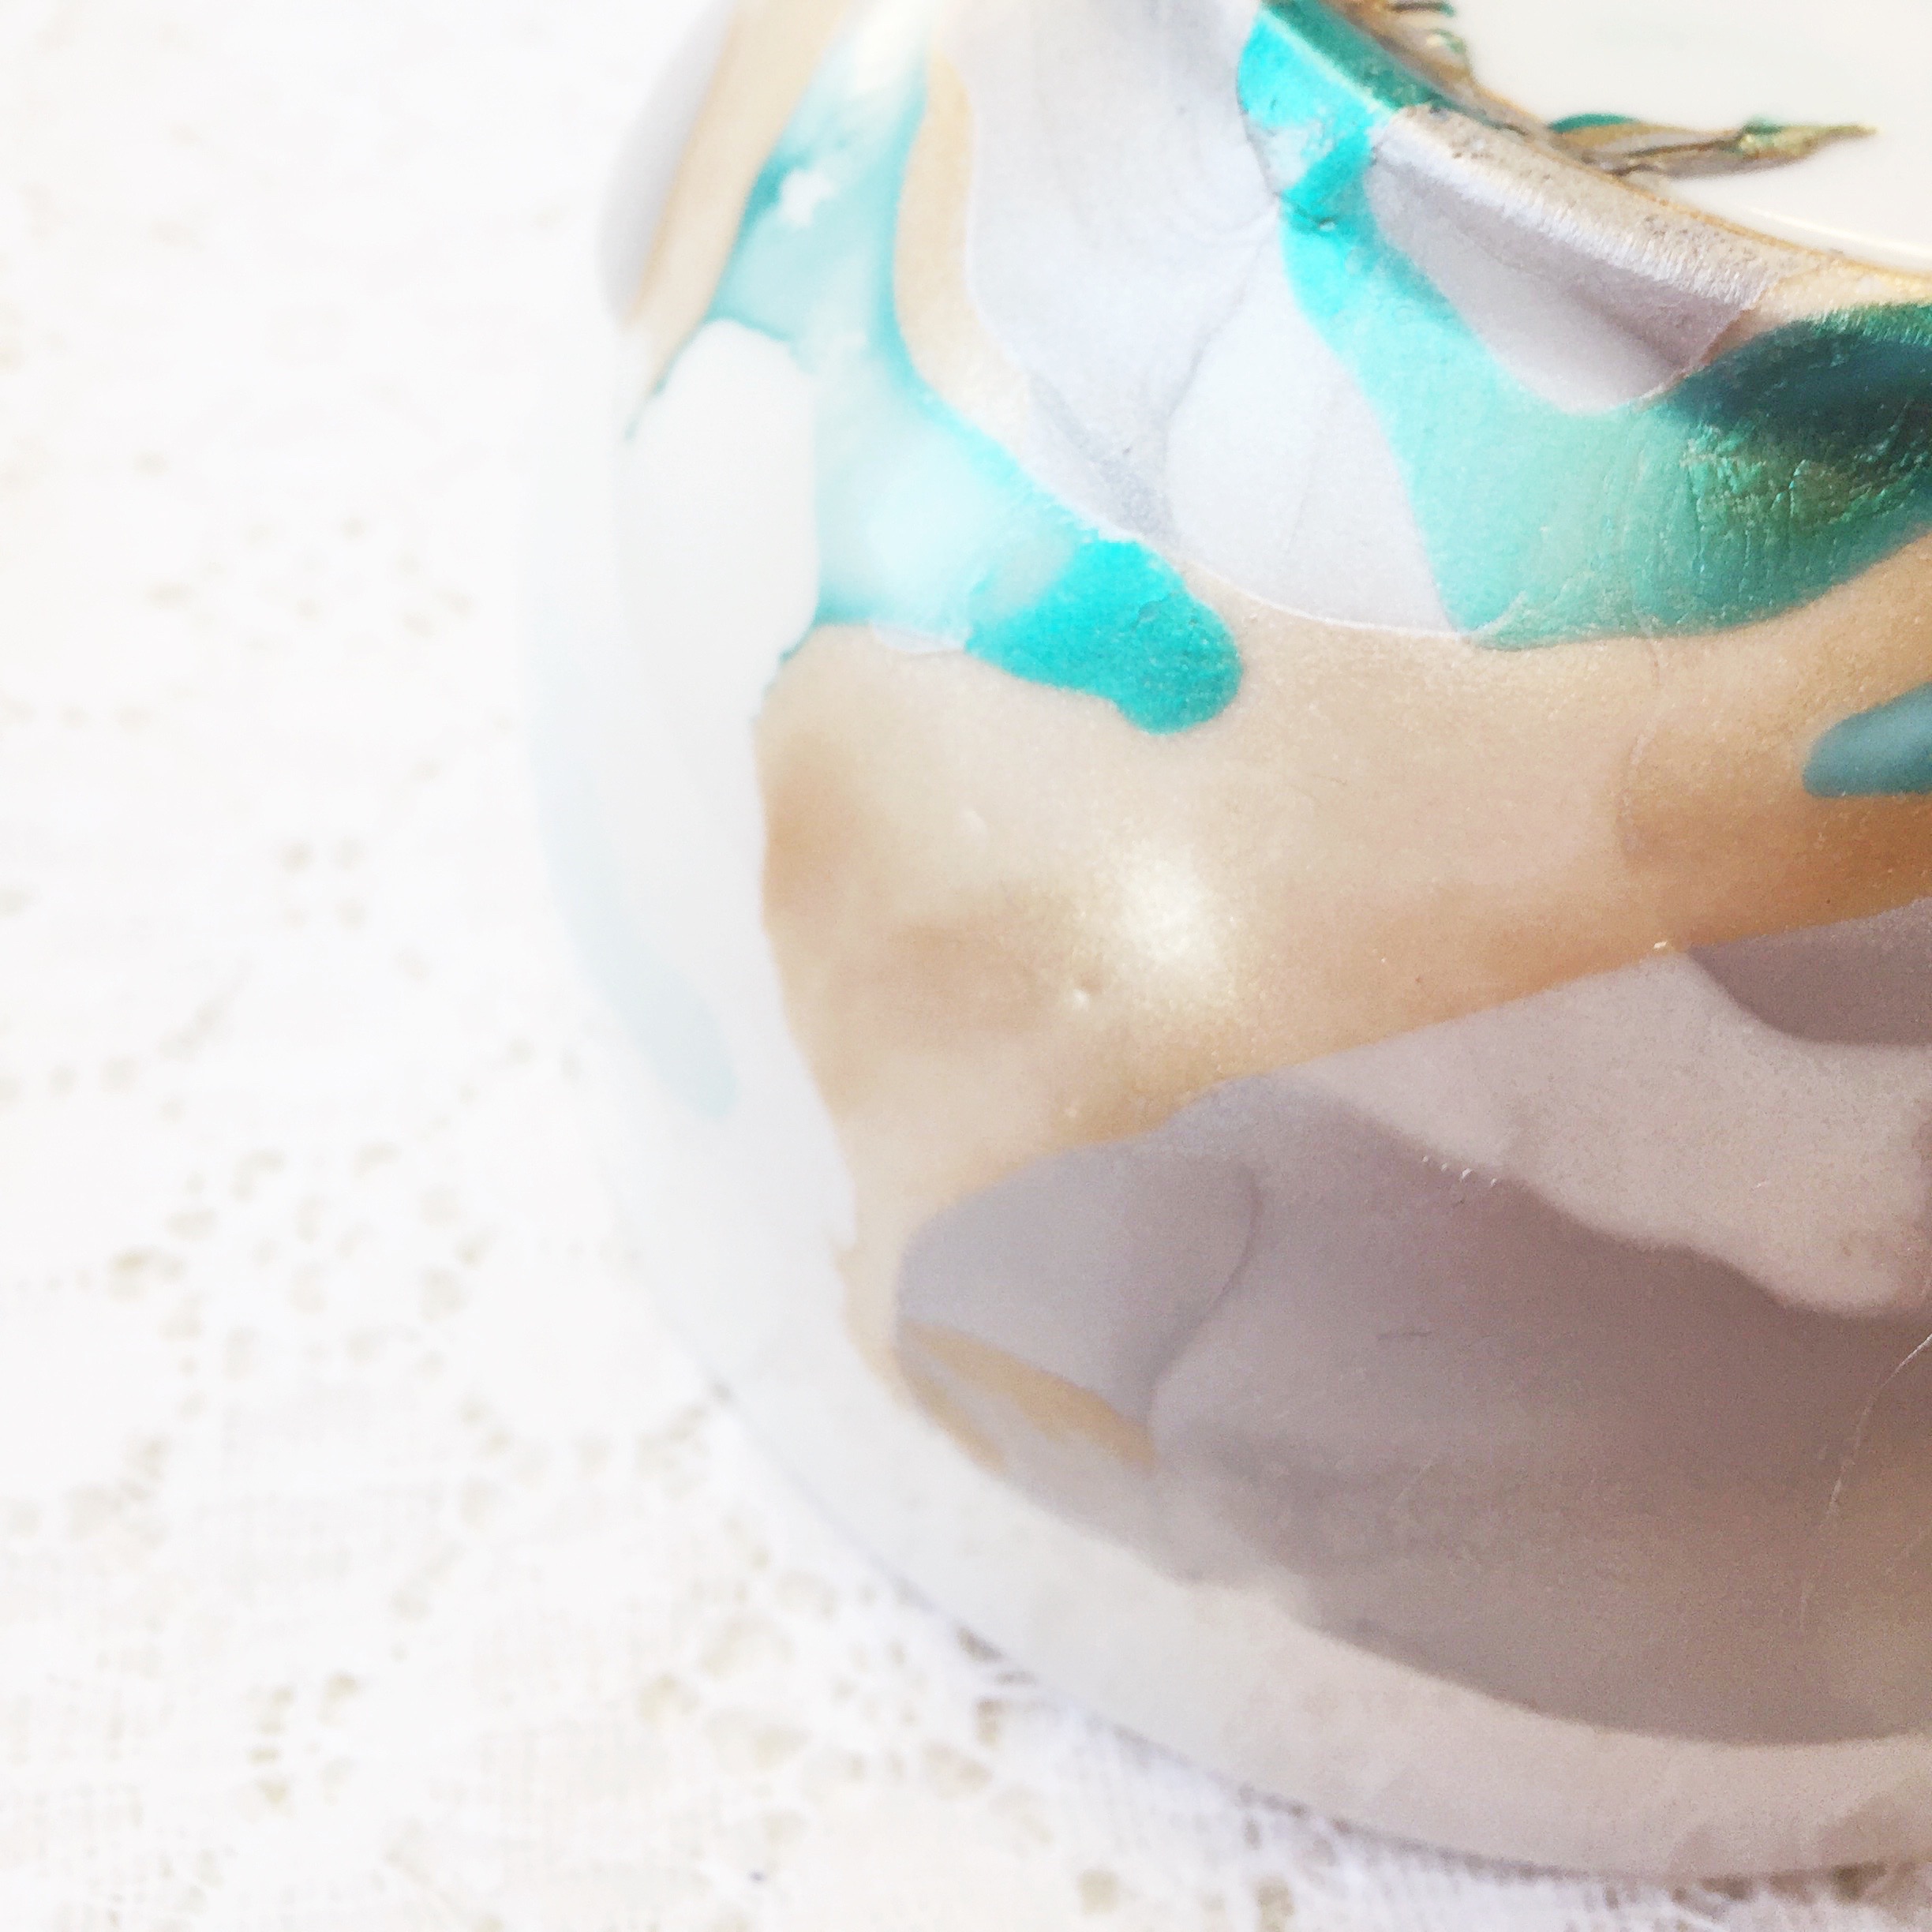
At this year’s annual Pinterest Christmas Party with the ladies, our lovely host, Shauna, had us try out a quick little project: marbling with nail polish. She picked up white bowls & mugs at the dollar store. Then all you need is a disposable foil container, nail polish, hot water, and some creative bravery.


Santa's Workshop: Marble with Nail Polish ~ DIY Gift Ideas ~ Bubblegum Sass


There’s lots of great full tutorials already out there {like here and here}, so I’m not going to do step by step. Just going to offer some tips we discovered as we each took a turn at this project.

Tip #1: Get your work area set up, all the nail polish colours you’re going to use picked out & open each bottle, so everything is ready to go quickly.

Tip #2: Open a friggin’ window {or two}! It was a damn cold winter night, and I’m pretty sure we got a little high on fumes.

Tip #3: In case you thought doing this with young kids was a good idea {ummm, nail polish & kids don’t usually mix}, please reconsider. It’s a simple “adult” craft. Again, hello, fumes.


Santa's Workshop: Marble with Nail Polish ~ DIY Gift Ideas ~ Bubblegum Sass


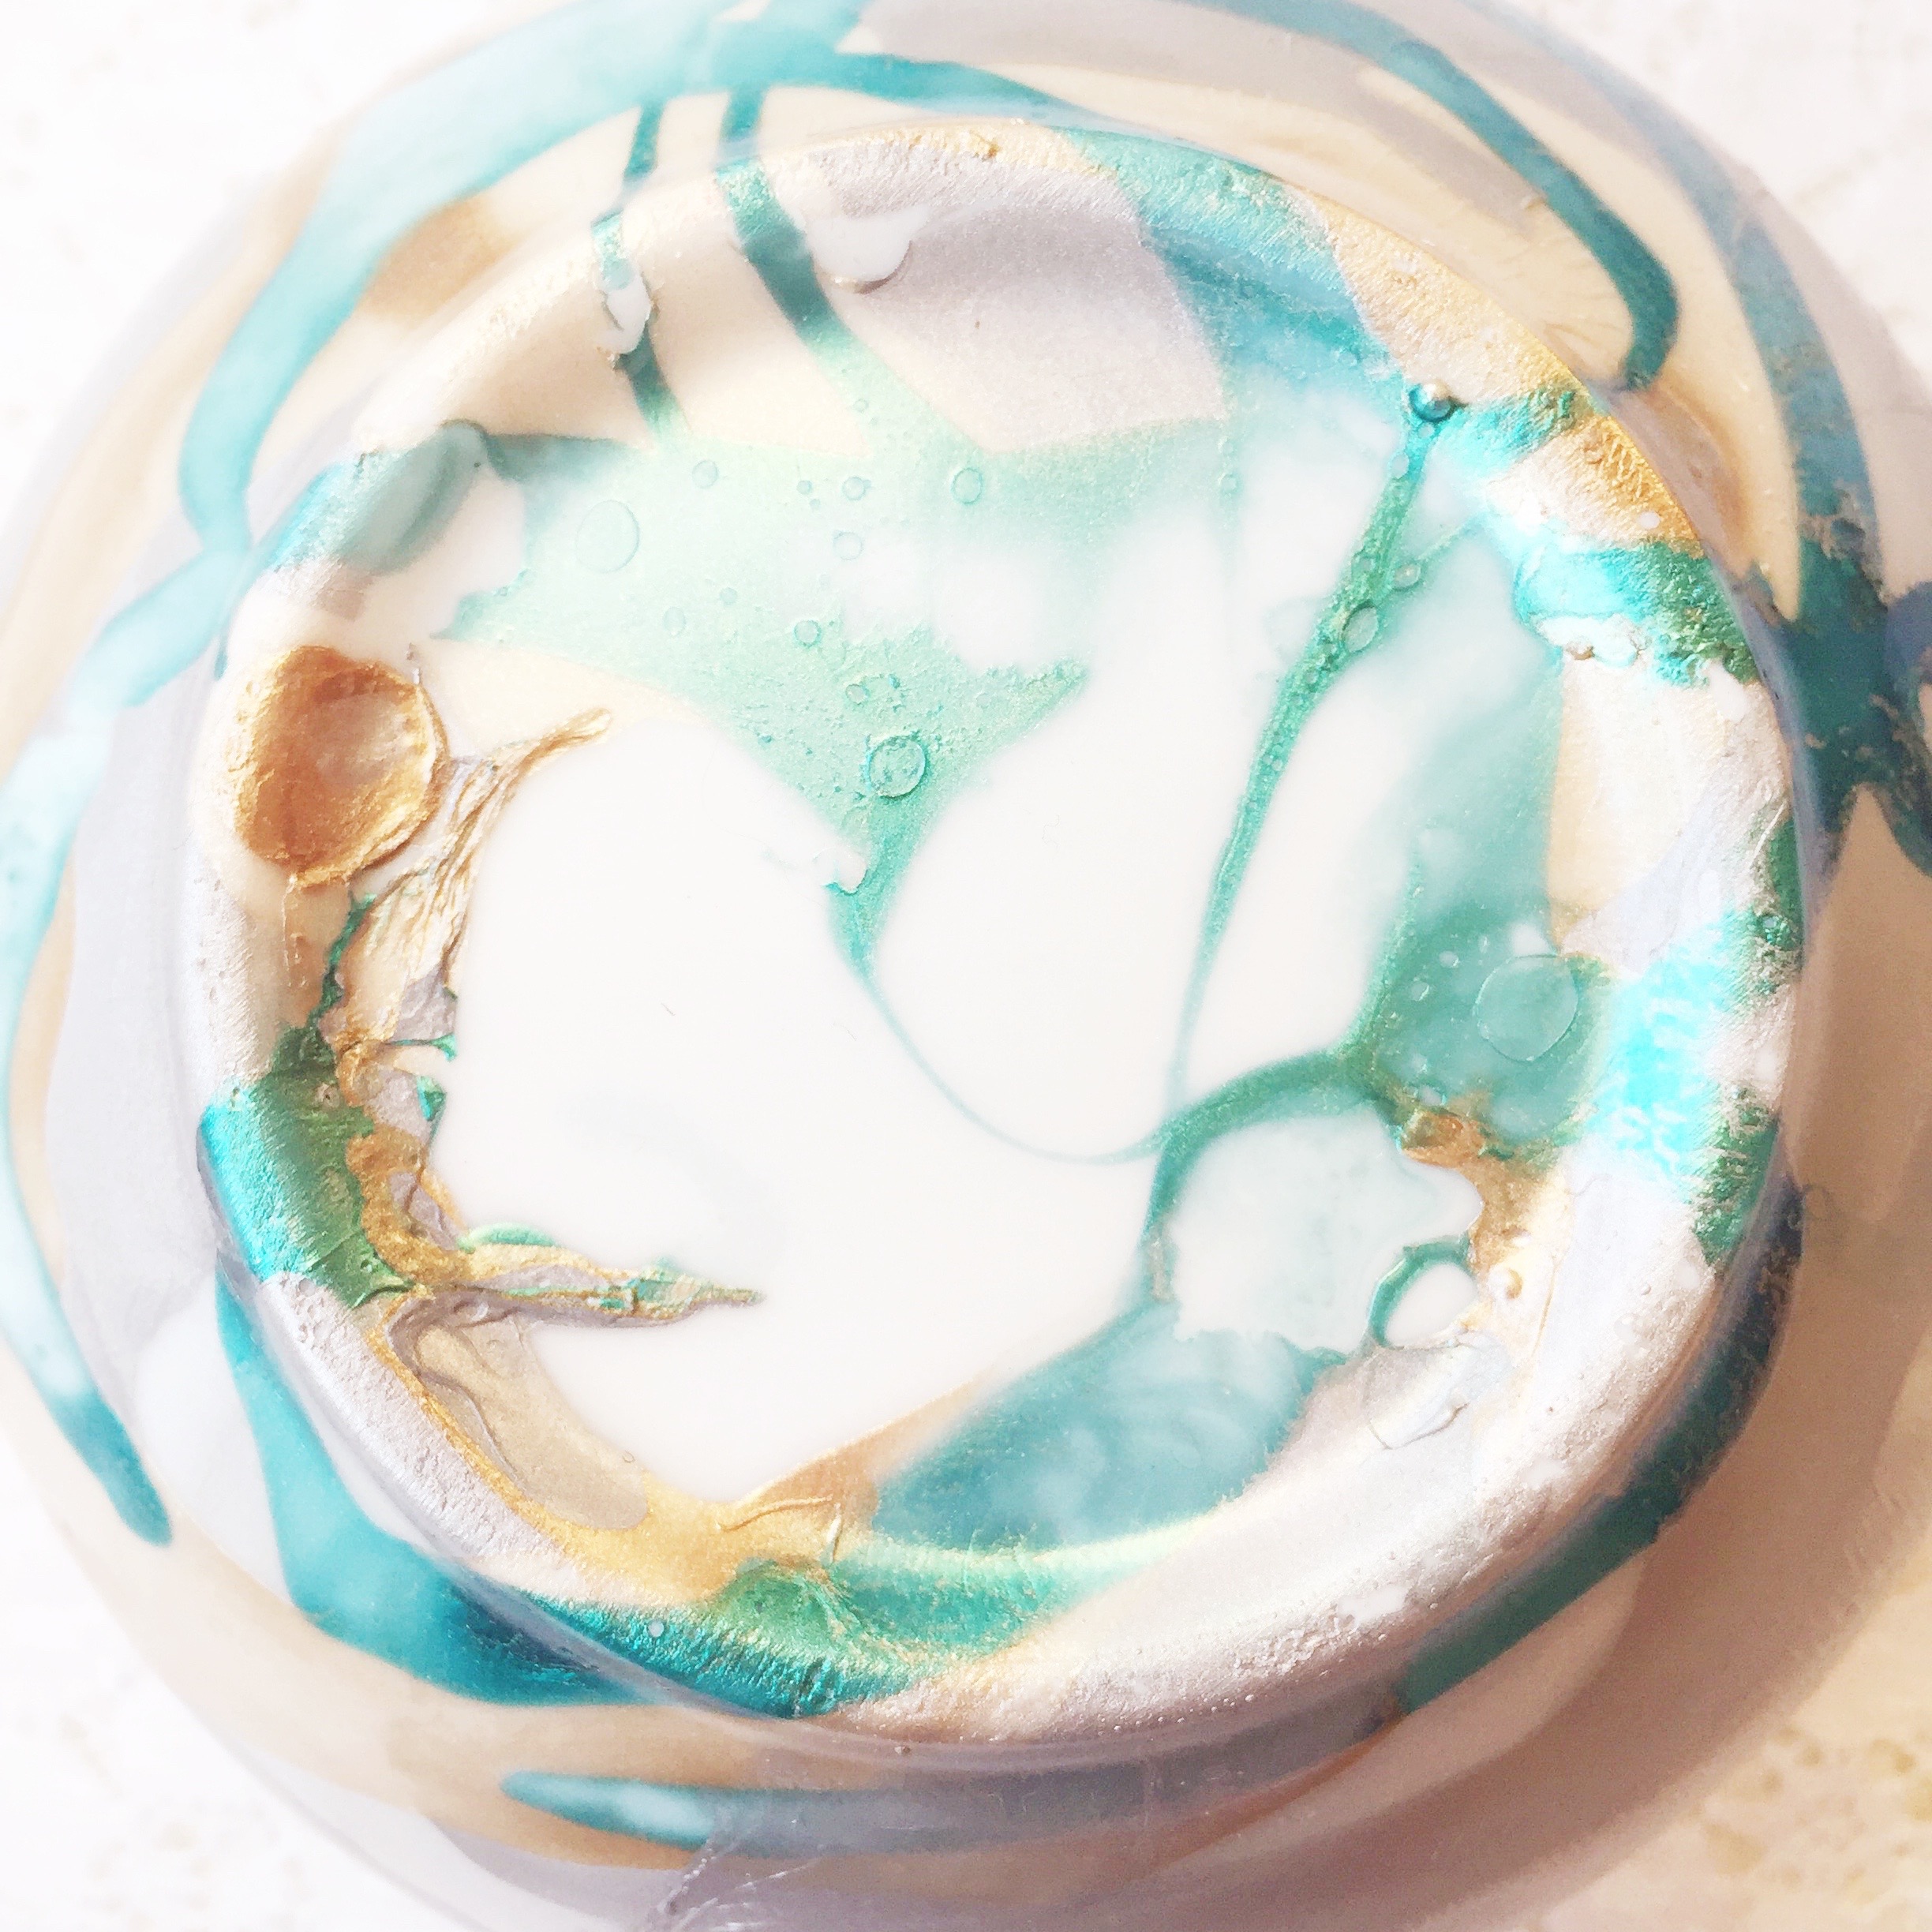
Tip #4: Work quickly. Drizzle the nail polish close to the surface of the water, slowly, but do work quickly. The polish will start to get gummy as it hardens & can lead to lumpy {somewhat ugly} results. But hey, if you don’t like how it turns out, just use nail polish remover & start again.

Tip #5: You don’t necessarily have to take the time to swirl the nail polish in the water with a toothpick before dipping your item in. Simply the way you drizzled the nail polish colours into the water can give beautiful results.

Tip #6: Prepare to be surprised! Or brace yourself! Or heck, just dive in & DO NOT overthink it. This is one of those crafty projects that you can’t predict what the end product will look like. Yes, you’re choosing the colour scheme, but that’s about all you have control over. I found it exciting, others found it a little frightening. Experiment!


Santa's Workshop: Marble with Nail Polish ~ DIY Gift Ideas ~ Bubblegum Sass


You can generally rate the success of a Pinterest project by whether you’d repeat it. And yes, I would definitely gives this one another go. Several of us at the party were interested in attempting to dip our bowls upside down, so that the inside gets marbled {not food safe, but to keep jewelry in}. I think tile coasters would be awesome too {and a great hostess gift idea}. But high on the list to try, is a marbled hanging planter! They’re gorgeous!

Happy crafting!

Save

Save

DIY Fabric Flower Printing

DIY Fabric Flower Printing ~ blog post tutorial by Bubblegum Sass

This is actually an activity that Sam and I did last spring, but I never got around to blogging about it. With gardens full of fresh flowers, summer is the perfect time of year to give this fabric printing technique a try. And you heard me right, this is something you can certainly do with your young child, as soon as they show an interest in using a toy hammer.

(more…)

DIY Embroidery Thread Savers

DIY Embroidery Thread Savers ~ Blog Tutorial by Bubblegum Sass ~ Washi Tape & Button Crafts

I was recently on a mission to tidy up my Love Catcher sewing box. It contains all the bits and pieces I need to prepare the embroidery hoops for the Love Catchers. I began pulling everything out of the box and sorting things into piles, which is when I quickly discovered a mishmash of embroidery thread pieces. They’re good lengths of embroidery thread (perfectly suitable to keep around), so I whipped out some clothespins and got to work on organizing them. When I posted a picture on Instagram of the nicely organized threads, folks were tickled {and surprised} at how a simple thing like a clothespin could make such a great thread saver. And so, I’m sharing it here with you. Pull out your sewing box and errant threads and let’s get to work!

(more…)

In The Studio: Dyeing Lace Trims DIY

DIY Lace Trim Dyeing ~ Tutorial Blog Post ~ By Bubblegum Sass

I realized early on in my making of the Love Catchers, that I was going to need a steady supply of lace trim to decorate them. Now, I try to use as much upcycled materials & materials that I have on hand as possible, but it’s hard to resist some new embellishments. It is possible to buy ready-made colourful lace trims (which I have done), but I felt a bit limited by colour choices and widths. So often I would find a package of lace trims online that were the perfect colour (there’s hardly any trim readily available locally), but the package would contain short lengths of various widths, many too wide for the Love Catchers.

I finally decided that to flush out my selection of trims, I would purchase plain cotton, dyeable lace trim in large quantities and then dye them myself. Mostly I want to focus on making the Love Catchers themselves, and with limited time for all the crafting, I chose to purchase ready-made dyes to simplify the process. The supplies for this adventure were purchased online at the Dharma Trading Co. or were items I already had on hand. Dharma Trading Co. does offer natural plant dye options, if you would prefer to dive into that. I ordered a small selection of Tumble Dye. The fact that you could spray or dip dye with them appealed to me. Also, lovely selection of colours!

Suggested Supplies:

  • Dyeable lace trim
  • Bottles of Tumble Dye
  • Rubber gloves
  • Glass pan or large glass measuring cup
  • Flat plastic trays or baking sheets
    (For air drying the lace. I used the plastic lids from some storage containers)
  • Dryer


Hand Dyed Lace Trim ~ DIY Blog Post ~ By Bubblegum Sass

TumbleDyeColours

I wet the lace before applying any dye. Then I laid the lace out in the glass pan and sprayed it with the dye. Then I flipped the lace over and sprayed it a bit more. I didn’t pre-mix any dyes, but did combine some of the dyes simply by alternating which one I sprayed, to achieve desired colours.

Once enough dye has been sprayed on, wring the lace trim, allowing the excess water and dye to fall into the glass pan. Then place the lace trim back into the excess dye, rub it in a bit, flip the lace over and rub in the remaining dye. I did this step, to ensure there wasn’t any large white spots on the trim. *see note below*

Hand Dyed Lace Trim ~ DIY Blog Post ~ By Bubblegum Sass

Once you’ve got the lace trim the colour & hue you want, lay it out on a plastic try or baking sheet and let it air dry completely. Once it’s dry, pop it into the dryer for about 20min (I just used our medium heat setting). So far I have just been using the lace trim for my Love Catchers, which do not go into the wash. According to the instructions, putting the dyed items into the dryer should set the colour, but I haven’t personally tried washing any of them yet.

Hand Dyed Lace Trim ~ DIY Blog Post ~ By Bubblegum Sass

Viola! Pretty, pretty lace trims in a rainbow of colours, ready to be made into even prettier things!

Hand Dyed Lace Trim ~ DIY Blog Post ~ By Bubblegum Sass

*If you wish to a achieve a much more even dye colour, just pour some of the dye into the glass pan, and do a dip-dye method instead of using the spray applicator. I prefer the spray applicator to achieve the vintage shabby chic look, but it’s up to you.*

Keep experimenting (I know I still am) and have fun with your dyeing projects!

Button-spiration: Lace Button Earrings

Aren’t these lace button earrings wonderful?! I love that they make a nice shabby chic style accessory. And of course, super simple to make too! Find the original tutorial on the Evie S. blog. All you need to make these are: two plain buttons, lace, earrings studs, and a hot glue gun. Cut a circle of lace larger than your button. Then simply wrap the lace around the button, gluing the edges on the backside. Let glue cool. Then glue the earring studs on the backside of the button. And you’re done!

Button-spiration: Bag Lady

I’m waaaaay overdue for a Button-spiration post. Have you missed them? I certainly have! Today, finally, a little button love with a simple project. Who can resist a button bag? Certainly not me. In fact, I’m thinking that a trip to Value Village might be in order to find an old purse that I can spend my evenings embellishing with buttons galore. Find the original post on Burkatron.

Button-spiration: Spring Flowers Pt. 4

Ok. Here is to hoping that we won’t need so much spring button flower inspiration going forward (fingers crossed for later this week). Maybe we can just pop our head outside and enjoy actual spring? Just in case you’re one of those poor souls that is still dealing with snow Sadly, we are some of those poor souls still dealing with snow (I wrote this post ahead of time, and seemed to have jinxed us, again… there’s a steady falling of snowflakes out there this morning). This then, is still a much needed project to keep your hopes up.

This pretty button project comes from Ashley of Little Miss Momma. She was inspired by hair pins from Anthropologie and was determined to figure out a simple (and inexpensive) knock-off. I must say, I think she was successful! I like her version even better than the ones from Anthropologie. You can find the full tutorial on her blog.

Ashley used fabric yo-yos from a vintage family quilt (of course, you can make your own yo-yos with the help of Heather Bailey’s great step-by-step instructions). Admittedly, part of the charm of these, is the vintage nature of the yo-yos Ashley used, but you can always score some lovely reproduction fabrics from the quilt shop to tap into that vintage charm. Then all you need are some bobby pins, buttons and a hot glue gun (alternatively, you could hand stitch these all together). Place a bit of hot glue on the end of your bobby pin, press onto the back of your yo-yo. Let cool. Flip the yo-yo over. Place a dab of glue in the center of the yo-yo and squish your button into place. Let cool. Put on a pretty spring blouse, along with your newly made hair pin. Go grab an iced tea & enjoy the day!