This is such a cute idea! Little button stacking toys with wine corks. All I’m lacking are the self-adhesive velcro dots, otherwise, Sammy & I would be playing with these already. It’s the perfect project for this crazy mama who is determined to instill her love of buttons on everyone, especially her son. Find the full tutorial on the No Time for Flash Cards blog. If you’re looking for other button inspired kids games, check out the one I posted about back in July too.
Category: Buttons
Button-spiration: Bookmarks
This week’s Button-spiration features a super quick and easy project from Busy Beehives… So easy, in fact, it would probably be a good early sewing project for kids. They make nice little gifts for friends and teachers. All you need is a ribbon, a button, hair elastic, and thread & needle. Stitch the hair elastic to one end of the ribbon and a button on the other end. See, easy-peasy!
Button-spiration: Heart Day
Valentine’s is just around the corner. Thought I would share one more “heart themed” button craft with you. This one is from Buttons Galore & More. These little rustic fabric hearts decorated with buttons would make a very nice gift, for the young or old. All you need is some plain or linen fabric, buttons, thread, ribbon, and polyfil. If you’re short on time, you could always use some hot glue to attach all the buttons, instead of sewing them (although they look more adorable stitched). Check out the full tutorial for all the details. And enjoy your Happy Hearts Day!
Fresh in the Shop!
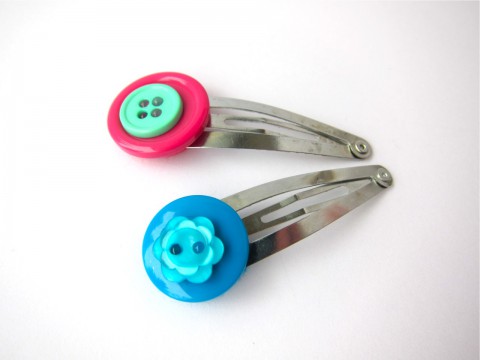
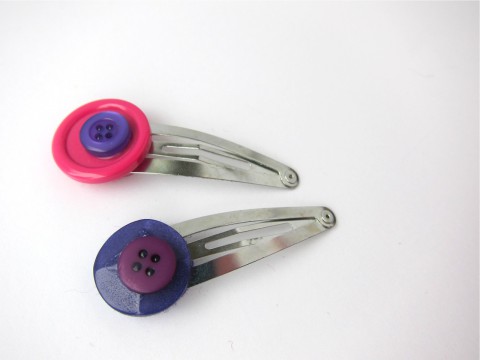
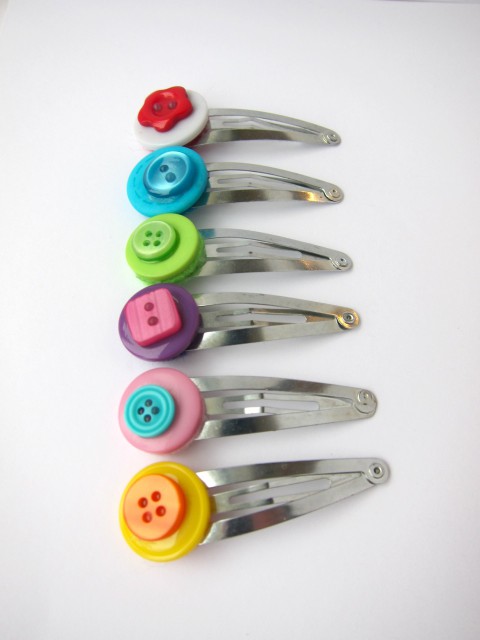
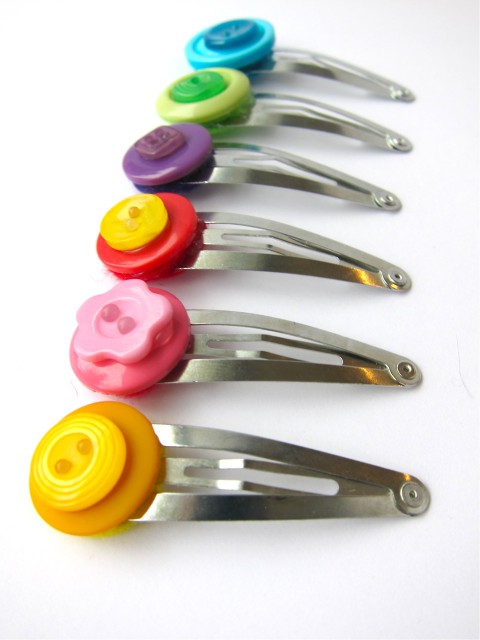
There’s new product now available in the shop! It’s like having a fridge full of fresh, new veggies! Or something like that. I’ve been busy making lots & lots of button hair clips to sell through consignment & thought that my Etsy shop could sure use some of these sweeties. Going forward, I’m likely to focus on selling the clips in sets (of two or six) instead of just individually. Besides, if you like the clips, you should probably have two (or half a dozen), just in case.
Seeing these new items in the shop is getting me in the mood for spring. Realistically we’re still a looong way till spring here in Calgary, but a girl can daydream about that first bit of colour bursting forth from crocus bulbs. Meanwhile, Sam keeps asking to do garden stuff. Poor little guy can’t find a patch of unfrozen dirt anywhere in the backyard. So we listen to the birds and make little seed treats for the backyard critters to pass the winter days.
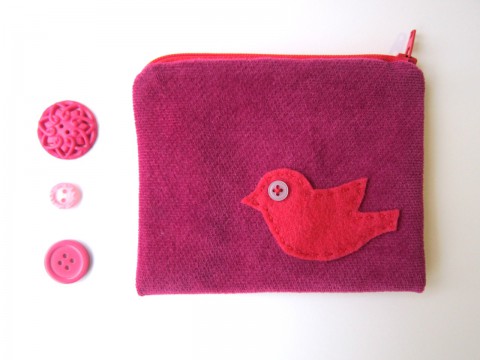
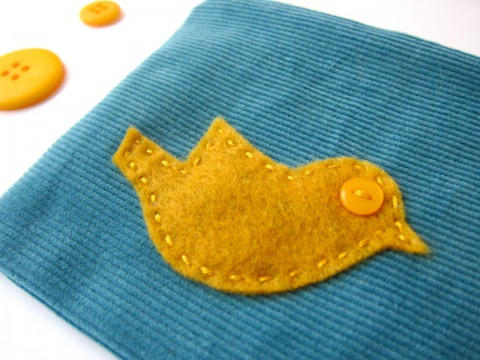
I’ve started to survive the grayness, ice & cold, by hand stitching felt birds to these colourful corduroy coin purses. Keep the hands busy, the mind focused on bright things and spring will eventually arrive. After many, many years of sewing my coin purses (I designed & started them back in 2006), I’ve been getting bored with them. It was time to refresh my creative juices and I longed to do some quiet hand stitching in the evenings after our little man heads to bed. That’s where these *Put a Bird On It* coin purses came from (you have to watch Portlandia!). Sticking a bird on things, instantly makes them better, right? Well, actually, in this case, it worked. I’m back to enjoying the process of making them. A handful are headed to Treehouse Boutique in Ontario and the rest will be nesting in the Etsy shop, until they find a better home.
Button-spiration: Sweetheart
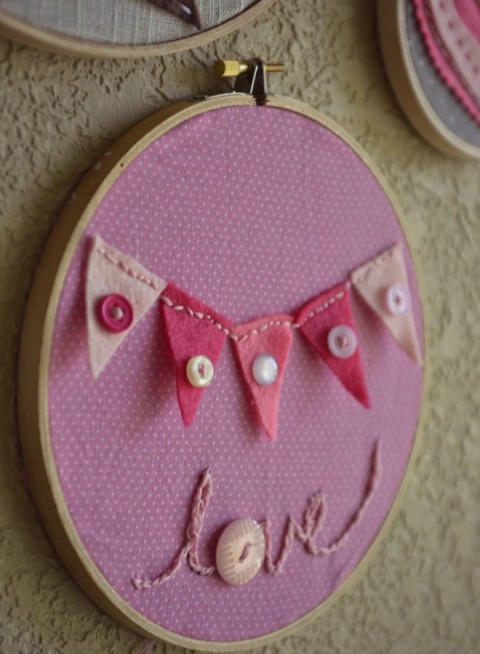
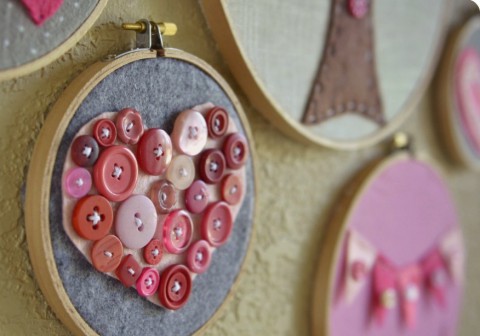
There’s a lot of cute Valentine’s Day projects out there! I couldn’t resist sharing this wonderful tutorial with you from Living Well Spending Less. She has done a great job of walking you through the different designs and providing useful tips on stitches. She and her daughters made several different embroidery hoop designs, most of them with button elements, and ALL of them adorable! Do check them out. The embroidery hoops look great as a collection hanging together, but you could also just make one of them as a simple & sweet Valentine’s Day gift.
Button-spiration: Journal
A new year, often means starting a new journal or diary. I haven’t personally kept one for years (other than the writing I do on here). Sometimes I wish I would make more of an effort to keep a daily or at least weekly journal of our lives. Maybe one day…
For now, I just wanted to share this adorable idea for a button journal cover from The Split Stitch:
The full tutorial actually entails making the entire journal. If you love paper crafts, then go for it. If you just want a cute, quick project to do, then might I suggest you just pick up a new Moleskine journal of your choice (or any soft/paper or thin leather covered-journal). Stitch your buttons on, use rubber stamps & ink to do any wording, a nice set of felt pens can be used to do some more decorating, and voila! A new, personalised journal to fill over the coming months.
DIY candy cane ornaments
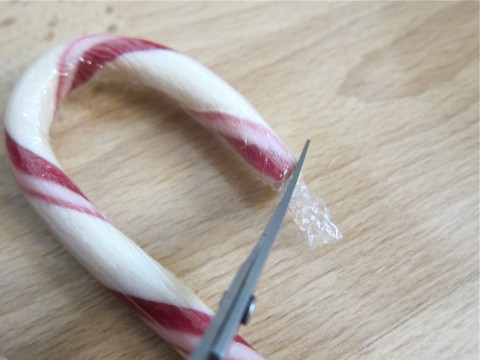
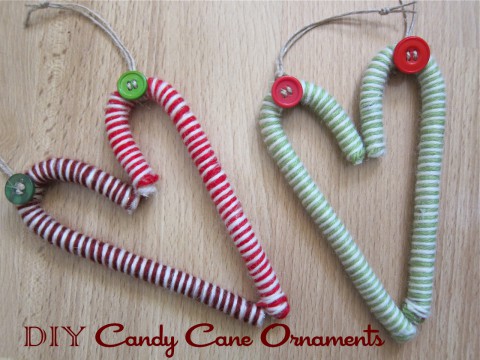 FINALLY!! A tutorial. They’ve been so lacking on this blog, my sincere apologies. I always have the best intentions of trying to put them together to share with you, and then they get stuck at the needing-to-photograph-each-step stage or the needing-to-edit-things stage. But finally, here is one done & ready to share! A simple project to whip up, just in time for Christmas too! These DIY Candy Cane Ornaments were inspired by some yarn wrapped candy canes from Family Chic. I’ve added my own twist to them, of course, by adding an adorable button hanger! So let’s get crafting.
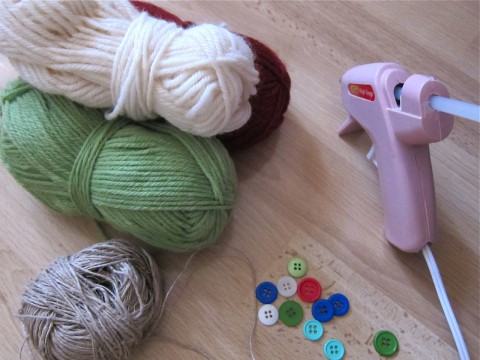
- balls of yarn (I used two different colours per candy cane, a creamy white & either red or green)
- box of edible, full-sized candy canes
- hot glue gun & glue
- scissors
- twine
- buttons (need to use buttons with four holes)
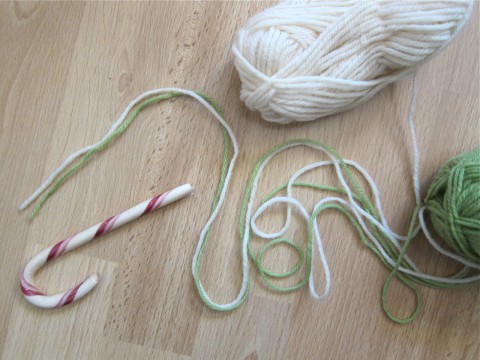
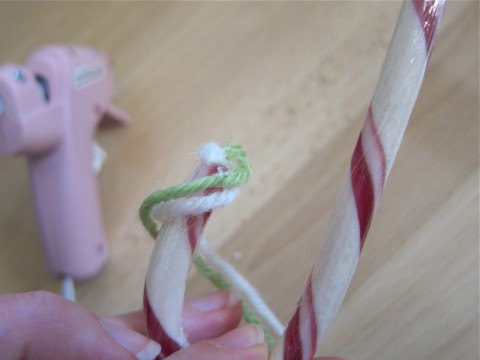
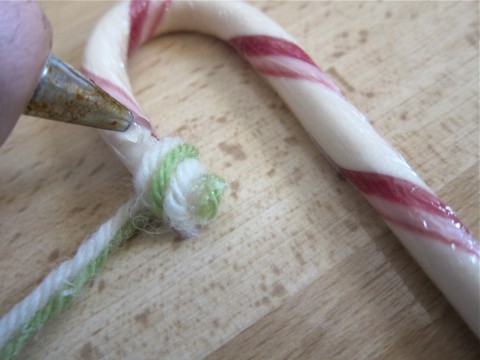
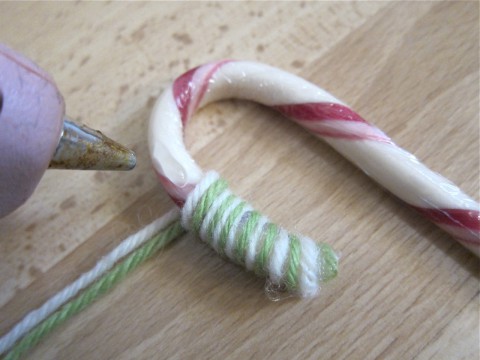
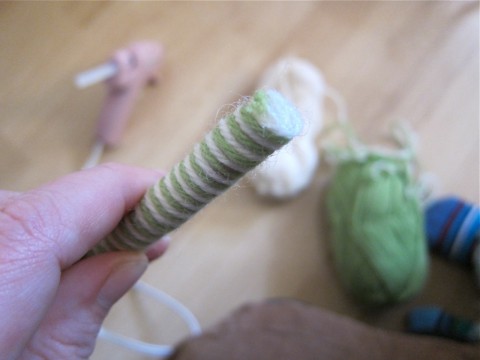
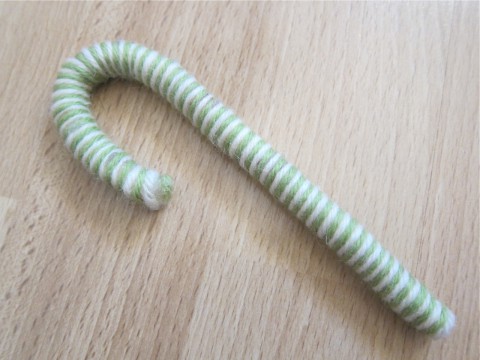
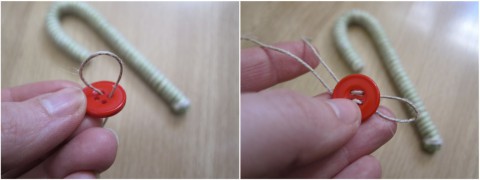
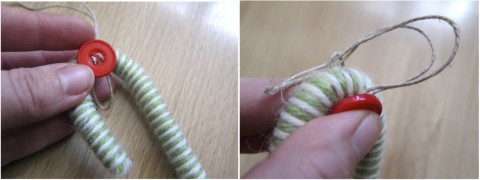
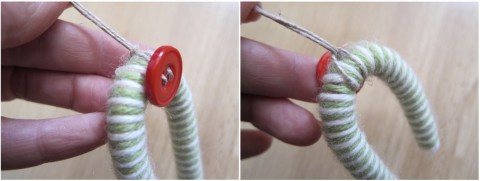
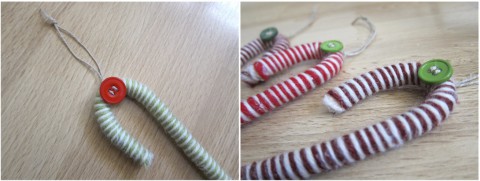
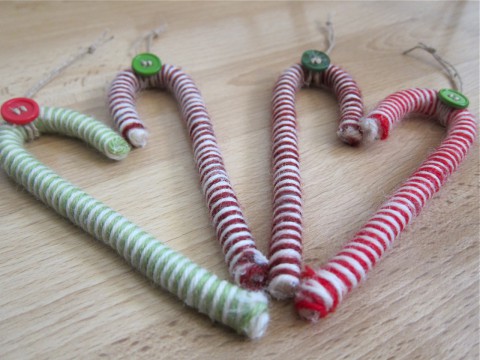
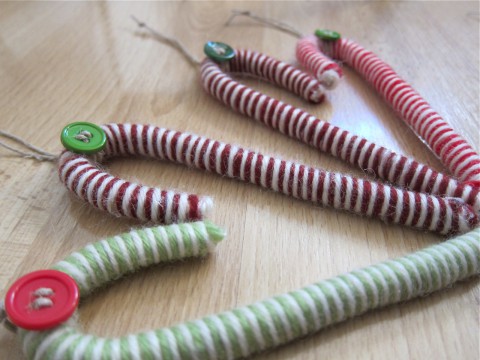
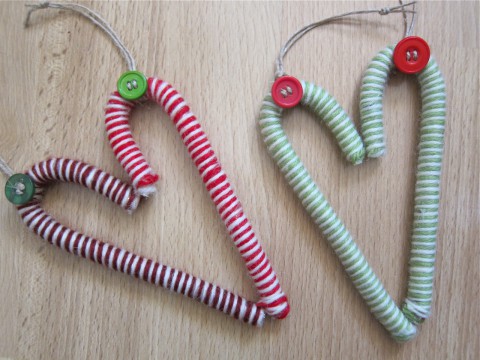
I made a bunch of these to attach to our gift bags for friends & family this year. You could also attach them to the outside of wrapped gifts, instead of using a bow. I’m thinking that next year, I might need to make some into a pretty garland to hang from our fireplace mantel. Lots of possibilities!
Happy last-minute Christmas crafting!
Button-spiration
Let’s look at some more cute Christmas ornament ideas that involve buttons. These ornaments are slightly more work than last week’s ideas, but they’re still not overly complicated. So here are two more possible projects for you to tackle:
The first (and slightly more complex) project comes from Little Things Bring Smiles. She has a well done, full tutorial with lots of photos to walk you through this one. Basic supplies include twigs, pruning shears, felt, & hot glue gun. You can then make it as simple or as complicated as you want by adding bits of pine bough, buttons, twine, berries, and glitter. It looks like a bit of finicky work to glue the small twigs onto the main stems to form the snowflakes, but maybe it’s not too difficult. I’ll give this project a try one year, but it probably won’t get done this year… onto my pile of Christmas Pinterest ideas it goes…
The second project comes from S.C.R.A.P., the cinnamon stick Christmas tree. All you need for this ornament are: cinnamon sticks, wire cutters, scissors, bits of artificial pine, hot glue gun, buttons, and twine. I actually made several of these the other night. They go together fairly quickly, but they do create a bit of mess because I had to trim my bits of artificial pine down, so that they wouldn’t be quite so bushy (if that makes sense). The “pine needles” on my garland were quite long, so I trimmed them all down. In the end, I could only fit three “branches” across my cinnamon stick. I glued on buttons, including some little star shaped buttons that I had on hand, and I did add the little twine bows to some of them because they were so cute. We will likely hang these ornaments on gift bags for our friends & family this year. Which means, I should really get busy and make some more of them!
Hope you are all getting some time to enjoy whatever activities make Christmas special for you, whether that’s baking cookies, writing Christmas cards, decorating your home, making crafts for yourself or gifts for your friends, or helping out in your community! Enjoy this season of hope, love, and generosity!
Button-spiration
Feels like it’s been a while since there was a Button-spiration post. My goodness, my world must be busy, if I’ve managed to neglect my buttons! Well here are TWO craft ideas for Christmas to keep you & your little ones entertained. Simple popsicle stick ornaments:
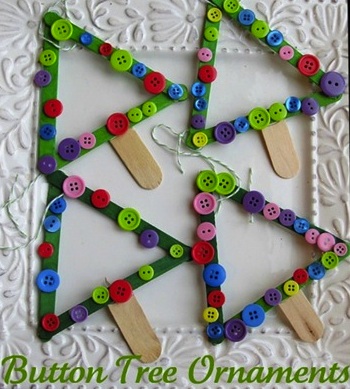
The first project idea comes from Things to Share & Remember. She used a hot glue gun to form the tree shape with popsicle sticks, then let her kids decorate them with buttons using white glue. I like one of her reader’s suggestions, which is to glue a photo in the centre of the tree, so it becomes a little frame. Great gift idea for grandparents!
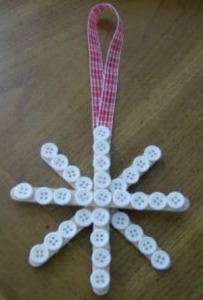
The next project comes from Thrifty Fun. Just glue together 4 popsicle sticks to form a snowflake shape. Then decorate with buttons and attach a ribbon for hanging. Viola! I think these could be pretty hanging from cupboards in kitchens, or even to make a bit of a garland with them to hang from a shelf or fireplace mantel.
Hope you’re finding lots of inspiration these days for simple crafts that make this Christmas season more enjoyable. I’ll likely do a few things here & there, but I’m trying to prioritize Advent as a Christian this year, for once. Which means, more praying & less shopping. It doesn’t necessarily mean “doing” less overall, just focusing that “doing” in a different way (eg. acts of random kindness, volunteering, etc). If you’re interested in an Advent Bible study plan, check out the one the Good Morning Girls is offering. Been enjoying it so far.
Stay warm, safe, & cozy this Wednesday!
Button-spiration
Ok, ok, I know that we’ve just gotten through Halloween and here I am posting about Christmas, but let’s be realistic. If you want to actually have Christmas crafts completed BEFORE the holiday craziness, you probably should have started in July (making mental note to start posting Christmas craft idea posts next summer). Especially if you wanted to make a super cool Advent calendar. A lot of Advent calendars seems fairly complicated and time consuming, specifically the type that requires figuring out 25 gifts or activities for kids. I personally opted not to make that type. Although I enjoyed the traditional chocolate Advent calendar as a kid, Sam is still too young to partake in that & he certainly doesn’t need 25 little cheap gifts or toys. We’re still striving for a “less is more” approach (sometimes we’re successful and other times, we give in). Last year, I made a simple Button Christmas Tree Advent Calendar (brief tutorial available). Each day he got to choose a colourful button magnet to put on the tree.
Here’s another version of this type of Advent calendar from small pea studio, a Felt Advent Calendar Wreath. Not to tricky to make and uses some basic craft supplies. Plus, if you get started on it now, you could definitely have it done before December 1st hits!
The wreath is made of two layers of felt, stitched together & stuffed. Before you actually do the stuffing though, stitch on your 25 buttons. Stuff the wreath & finish stitching it up. Then cut out your leaf shapes (can be any shape you want) and put a small slit in each for the button holes. I think it would be nice to do several non-leaf shapes too. Perhaps some stars, snowflakes, & circles as Christmas ornaments. On that note, you could also do a Christmas Tree version if you’re not into the wreath shape. Do check out the full tutorial for all the details.
Happy crafting! And don’t stress about all those Christmas crafts you want to make… there’s always next year.

