Button-spiration

Let’s look at some more cute Christmas ornament ideas that involve buttons. These ornaments are slightly more work than last week’s ideas, but they’re still not overly complicated. So here are two more possible projects for you to tackle:


The first (and slightly more complex) project comes from Little Things Bring Smiles. She has a well done, full tutorial with lots of photos to walk you through this one. Basic supplies include twigs, pruning shears, felt, & hot glue gun. You can then make it as simple or as complicated as you want by adding bits of pine bough, buttons, twine, berries, and glitter. It looks like a bit of finicky work to glue the small twigs onto the main stems to form the snowflakes, but maybe it’s not too difficult. I’ll give this project a try one year, but it probably won’t get done this year… onto my pile of Christmas Pinterest ideas it goes…


The second project comes from S.C.R.A.P., the cinnamon stick Christmas tree. All you need for this ornament are: cinnamon sticks, wire cutters, scissors, bits of artificial pine, hot glue gun, buttons, and twine. I actually made several of these the other night. They go together fairly quickly, but they do create a bit of mess because I had to trim my bits of artificial pine down, so that they wouldn’t be quite so bushy (if that makes sense). The “pine needles” on my garland were quite long, so I trimmed them all down. In the end, I could only fit three “branches” across my cinnamon stick. I glued on buttons, including some little star shaped buttons that I had on hand, and I did add the little twine bows to some of them because they were so cute. We will likely hang these ornaments on gift bags for our friends & family this year. Which means, I should really get busy and make some more of them!

Hope you are all getting some time to enjoy whatever activities make Christmas special for you, whether that’s baking cookies, writing Christmas cards, decorating your home, making crafts for yourself or gifts for your friends, or helping out in your community! Enjoy this season of hope, love, and generosity!

Button-spiration

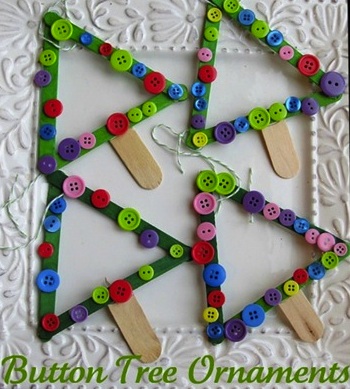
Feels like it’s been a while since there was a Button-spiration post. My goodness, my world must be busy, if I’ve managed to neglect my buttons! Well here are TWO craft ideas for Christmas to keep you & your little ones entertained. Simple popsicle stick ornaments:


The first project idea comes from Things to Share & Remember. She used a hot glue gun to form the tree shape with popsicle sticks, then let her kids decorate them with buttons using white glue. I like one of her reader’s suggestions, which is to glue a photo in the centre of the tree, so it becomes a little frame. Great gift idea for grandparents!

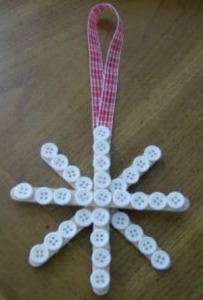
The next project comes from Thrifty Fun. Just glue together 4 popsicle sticks to form a snowflake shape. Then decorate with buttons and attach a ribbon for hanging. Viola! I think these could be pretty hanging from cupboards in kitchens, or even to make a bit of a garland with them to hang from a shelf or fireplace mantel.

Hope you’re finding lots of inspiration these days for simple crafts that make this Christmas season more enjoyable. I’ll likely do a few things here & there, but I’m trying to prioritize Advent as a Christian this year, for once. Which means, more praying & less shopping. It doesn’t necessarily mean “doing” less overall, just focusing that “doing” in a different way (eg. acts of random kindness, volunteering, etc). If you’re interested in an Advent Bible study plan, check out the one the Good Morning Girls is offering. Been enjoying it so far.

Stay warm, safe, & cozy this Wednesday!

Button-spiration

Feels like it’s been a while since I featured a button jewelry idea. Well, here’s one for you. The DIY Vintage Button Necklace from Silvia Chelazzi of Born in ’82. Like most projects that catch my eye, this one is pretty simple to make. Just glue some buttons onto a piece of fabric or felt (felt will probably offer better stability). Then cut around the entire shape. Stitch some chain directly to the back of the felt OR stitch jump rings onto the felt & then attach your chain to the jump rings. If you do the jump ring idea, you could simply feed the chain through, so your necklace will move along the chain (a nice feature if you want the chain length adjustable).

I love this project idea because it gives me a use for all those buttons in my collection that have shanks. Mostly I use shankless buttons for everything, so I’ve got a pile of neat buttons with shanks that could use some purpose in life. Poor little neglected buttons. Of course, there’s no reason you can’t use regular buttons and there’s no reason you can’t stitch them down to the felt instead of using glue. Glue just simplifies this project.

Happy crafting!

Button-spiration

Last week we took a look vintage button cards. This week, I’ve put together a small list of downloadable files (some free, some not) so you can make your own lovely buttons cards. They make sweet gifts. They’re also a nice way to display some of your favourite buttons (just pop them in a frame & viola!).

Happy crafting!


Free download designs from Papercraft Inspirations

Button-spiration

Oh how I wish we were having more hot sun this summer! I know I shouldn’t complain about rain on the prairies, but it has just been such a wet spring & summer so far. I could count on one hand the number of “hot” days we’ve had. That’s just sad. So here’s a little cheery button project to wear once the sun decides to come out and stay. Make as many pairs of these simple flip flops as you like, in a rainbow of colours! Super inexpensive project. All you need are a pair of cheap flip flops, a bit of scrap fabric, a hot glue gun, a bit of thread, and buttons (duh). The full tutorial can be found here.

Button-spiration

If I have one goal in life, it is to instill a love of buttons in our son. Okay, so maybe there are a few other more important things to achieve first, but a mama can dream.

Imagine how tickled I was to come across this super cute game for kids using buttons! The full write-up can be found on the Inner Child Learning site. All you need is a pile of colourful buttons, pipe cleaners, cards with the corresponding button colours written on them, and a single die.

To play, you simply put the cards face down in a pile, roll the die, and the number you roll is the number of cards you take. Then you thread the buttons onto the pipe cleaner in the order you drew them. The result, colourful button flowers, which you can make into a bouquet! Of course, like most games, there are elements of learning involved. This game teaches fine motor skills, colours, words, sequencing & ordering, and counting. Sounds like a great game to play at a kids birthday party! Guests get to go home with a pretty bouquet and you could always provide a uniquely decorated flowerpot for them to keep.

When do you wanna come over and play?

Button-spiration

Okay, so I’m not really needing to plan a wedding (already married) or any special event (my life is kinda boring), but could not help but share this idea. It comes from a rustic DIY inspired wedding on Wedding Chicks. Table numbers for the reception made from vintage hardcover books and buttons! Sooo neat! And fairly simple.

Now, just because I don’t have an event to plan, doesn’t mean this idea wouldn’t be totally cute for the cover of a notebook. Right? If you have a hardcover journal or notebook, you could simply glue the buttons on (maybe into the shape of your initial). Or if you have a soft cover paper notebook, you could hand stitch the buttons on. Might be a little taxing on the fingertips, but still doable.

This project is going into the pile of “once I get a free moment” ideas. I think it would cheer me up to see those buttons on the cover of a much used notebook.

Happy crafting!

Rainy days

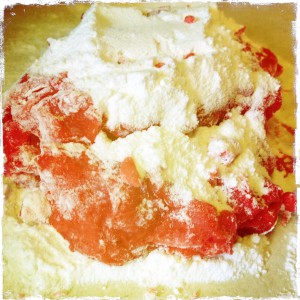
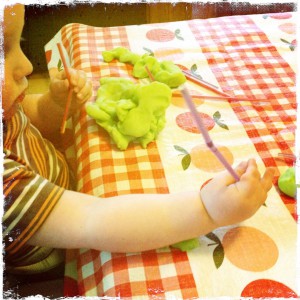
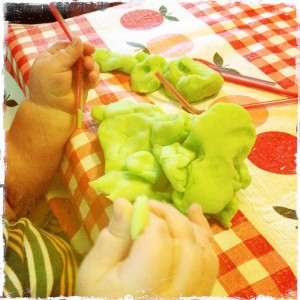
Homemade play dough in progressWe’ve had plenty of rainy days the past couple of weeks. That, combined with not spending a lot of our days at home due to the renos, has meant needing to create some new activities for Sam. This rainy day activity comes straight out of my own childhood. I used to spend hours, creating with play dough!

When I was a kid, we bought some name brand play dough on occasion, but my mom also used to make homemade batches of dough. There are lots of tutorials & recipes out there for making your own play dough. I decided to try the one from Modern Parents Messy Kids. The thing that appealed to me, was the use of jello packets for colour. Not only does the play dough come out quite vibrant, but it also has a fruity smell! Fun stuff!

I’ve tried making up two separate batches and the recipe works out pretty good. I did find that I had to add quite a bit more flour to the dough once it cooled & I started to knead it into shape. It recommends that you keep the dough refrigerated between uses and I sort of ignored that, but on days when the house warms up, the dough gets almost too sticky to use. So now I’ve started keeping it in the fridge.

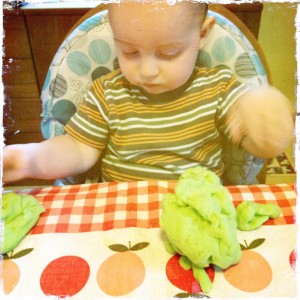
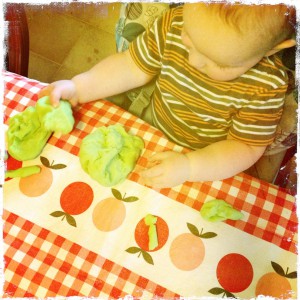
We made up batches of lime and raspberry. Sam got really into it the first day, squishing the dough, making piles, and ripping off pieces. I cut up some straws for him to stick into the dough and gave him a couple of plastic cookie cutters to use. The cookie cutters were mostly ignored, but he did enjoy the straws. We made aliens together and managed to kill off a good 20-30 minutes.

Sam playing with homemade play dough 2
Sam playing with homemade play dough
Sam playing with homemade play dough & straws 2
Sam playing with homemade play dough & straws

Looking forward to some more days of play dough making (lots of colour/flavour options on the horizon) and squishy fun. Think I need to start collecting some more “tools” (pipe cleaners, textured rollers, potato ricer, plastic knife, etc.)

Sam’s fort

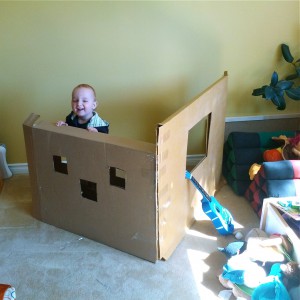
Sam in his cardboard fort

You know one good thing about kitchen renos? You end up with lots (and lots) of boxes. And if your kitchen is from Ikea, the boxes are all big flat boxes, perfect for building cardboard forts! After a few days of putting up with mom & dad being sick and crashed on the couch, little Sammy was pretty bored and needed something new & fun to enjoy. He was the one that gave me the idea, actually, as he pulled boxes out of the kitchen and started leaning them on each other.

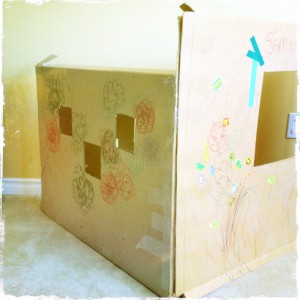
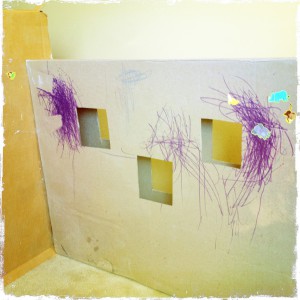
And so, with tape gun & marker & box cutter in hand, I set to work. Just a simple fort with two walls. Makes it easy for a clumsy toddler to get in and out of. I cut some little windows and cubby holes for Sam to stuff blocks through. Sam was right there by my side, helping with each step. We weren’t going for beautiful, just fun.

DIY cardboard fort

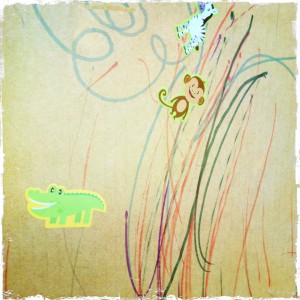
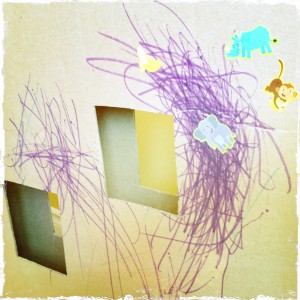
Sam thought it was great as is. Perfect for playing peek-a-boo. Then I handed him a felt marker… and then a booklet of stickers, and rolls of colourful electrical tape. Not sure who had more fun, Sammy or me? Purple was definitely his fav colour of the day.

Sam's drawing on cardboard fort
Sam's drawing on cardboard fort 2
Sam's drawing on cardboard fort 3

Sadly, not all the felt marker stayed on the box… some of it ended up on his clothes and face. Lets just say it was a bit of mom fail not to double check that the markers were washable (they weren’t). The stuff on his face came off after a few washings. No biggie. It was worth watching his imagination run wild for a little bit. I will be picking up washable markers the next time we’re at the store though.

Felt marker on Sam's face

Button-spiration

These paper pinwheels from Ribbons & Glue are so adorable. They would make the perfect spring table top decor. The pinwheels are made from pretty paper, cut and folded, with a button glued in the center. They were then attached to decorated dowels. I’m thinking that if you mount them on plastic straws, you could put them in a vase with a few flowers too. If you need a hand figuring out the cutting and folding required for paper pinwheels, head on over to the sweetest occasion for a full tutorial.