Spring blooms

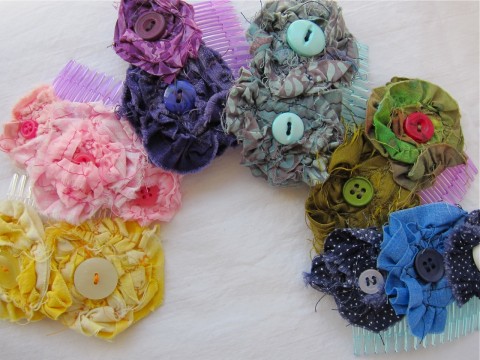
Button Hair Combs by Bubblegum Sass

In my effort to purge, clean, and organize everything (from house to online shop), I FINALLY got around to listing a whole pile of “new” product. In all honesty, I made these beauties well over a year ago (almost two, really). They journeyed to a couple of small shows, but then ended up being tucked away in a cupboard, waiting for their time to shine.

That time, apparently, is now! Out with the old, in with the “new-ish”. I’ve been a bit of a busy bee photographing & listing all of these (35 in total with more to come down the road). It is my pleasure to officially introduce them to the shop and my lovely followers AND include them in the last of this month’s sales!!

From now until Sunday, March 24, you can snag a button hair clip or comb at 50% off! Oh boy! I’m really keen for folks to give them a try! I made my first scrap floral hair comb a few years ago to wear to my brother’s wedding. Loved how easy they were to wear & how they dressed up the simplest hair-dos!

The button hair clips come from that warm, fuzzy place in my heart where I keep my absolute love of buttons. Simple, cute, modern, and colorful. Did I mention the FREE shipping for the button hair clips within Canada? That’s a little bonus. Both the clips and combs are perfect for spring!

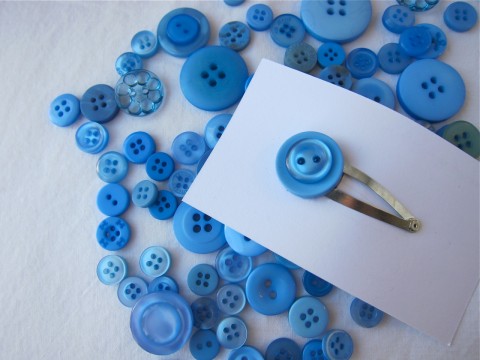
Cobalt Blue Button Hair Clip by Bubblegum Sass

Thanks to everyone who has supported the Spring Cleaning Sale so far!! Excited to share other new products with you in the coming months (which means I should get back to the sewing room and fire-up the creative juices).

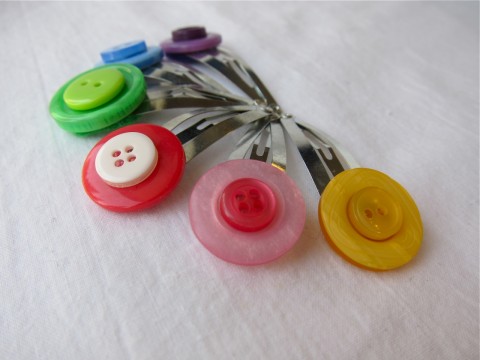
Rainbow Button Hair Clip by Bubblegum Sass

DIY lace earring holder

If you’re on Pinterest, chances are you’ve come across the idea of using an old frame and lace to make a unique earring holder. There are dozens of examples out there, so I’m not claiming to be the genius behind this design. I’ve just been longing to have a better way of storing my earrings, instead of shoving them into a jewelry box, where I forget about some of them & others get tangled. Finally fed up, I headed to the basement to dig up an old frame (former art students always have old picture frames kicking around). Next stop, the sewing room for some lace trim, hot glue gun and vintage buttons (of course I can’t do any craft project without adding a button accent). These particular buttons are gorgeous vintage shell buttons that belonged to my grandmother. They have been patiently waiting for the right project to come along.

To make this super easy earring holder, which can even be done during baby’s nap time (it’s that quick), remove the glass and back from the frame so that all you’re left with is the wood. Next, measure out lengths of lace trim to go from one side of the frame to the other. Use your hot glue gun to adhere the lace trim to the back of the frame. I started with the top most lace strip first, then measured how far down the next strip should be. Keep in mind the type of earrings you have. If you have lots of long ones, you’ll want to leave plenty of space between each lace strip. If you have mostly short earrings, you’ll be able to put each strip closer together and thus fit more strips in the frame. I have a mix of earrings, so I put two strips closer together and the last strip is placed to allow plenty of room for my long earrings to hang freely.

For the finishing touches, I used the hot glue gun to adhere the buttons onto each corner as a nice little embellishment. Sweet and simple.

Hint – If you’d like the frame to stand out from the wall a bit to make it easier to get earrings off and on, just bend out those little metal tabs on the back of the frame that keep the glass in place (hope that makes sense). They add just enough depth.

Happy crafting! And happy organizing too!!

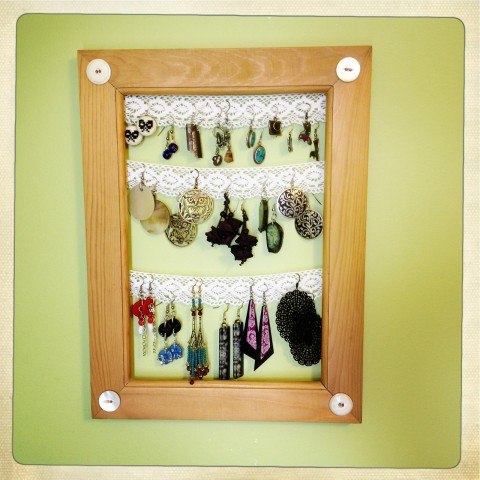
Lace earring holder by Bubblegum Sass

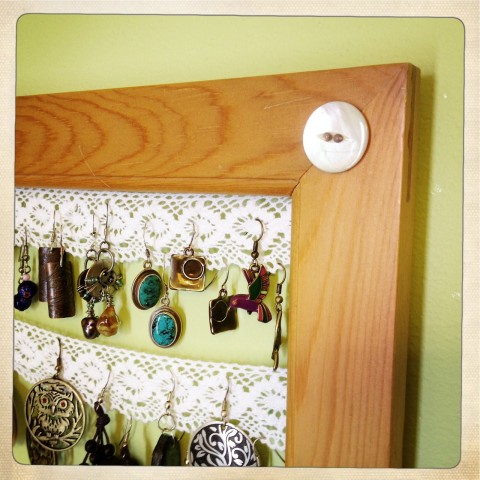
Lace earring holder (detail) by Bubblegum Sass

Button-spiration

Here’s a super unique button craft… Christine Marie Davis began smashing metal buttons with a hammer one day, out of frustration. From that, was born these wonderful charms which she uses to make pendants, rings, bracelets, brooches, and earrings. The smashed buttons are stacked and riveted together (she also treated the buttons to a bleach bath to add texture & colour to the metal surfaces). You can read about her creative process here. She has here creations for sale in her Etsy shop, Christine’s Cabinet. My two fav pieces are both pendants, the Moonscape and the Copper Filligree. Lovely designs, Christine! Ingenious use of metal buttons!

Button-spiration

In the past several months, I’ve finally gotten sucked into the joy & beauty of washi tape. Not sure just how crazy I’ll get with (it can’t replace my love of buttons), but I do foresee having a little collection of them. I ordered a few from Little.Happy.Things on Etsy. It was an exciting day when my package arrived in the mail.

So of course, now I’m keeping my eyes open for some washi tape crafts. I already started doing this (decorating clothespins with tape and wrapping my embroidery floss scraps around them to keep my hand stitching box tidy).

These washi tape flowers caught my attention (notice the button in the centre of the flower). Super easy to make. I’d love to whip up some to put on cards. You can find the full tutorial on the Lines Across blog.

Button-spiration

Here’s a quick & easy project from Happy Serendipity. A cute little felt cloud brooch with rain drops. I like that this could realistically get made during one of Sam’s naps. Seems like the perfect accessory for spring, which I have started thinking about more and more these days, with all the mild weather we’ve been having in Calgary.

You could probably even whip up a Valentine’s Day version just in time for tomorrow. Can’t you picture a cute little heart with a strand of buttons dangling from the bottom?

Button-spiration

We don’t really do much to celebrate Valentine’s Day at our house. It’s just not a holiday that hubby & I acknowledge. That said, however, I do think these little Valentine’s are adorable! Perhaps my girlfriends need them? The design is available for free download from Olivia of A Field Journal. You can print the cards & buttons separately, use circle punches to cut out the buttons, and then attach them to the cards with those adhesive pop dots thingies. Or you can just print the cards and stitch real buttons to them (a great little gift for crafty friends).

Button-spiration

I’ve really got button jewelry on my mind right now. I bought some bits of chain, jump rings & other findings with the hope of making earrings and a necklace. Until I find the spare time to do some crafting, here’s a lovely adjustable button necklace for inspiration. This particular necklace doesn’t require any jewelry making skills. The buttons on just threaded onto a cord. The full tutorial can be found on here (an Estonian blog, but with English translation available). I love the neutral palette they used too!

PS – This marks my 300th post on my blog!! Whoot! That’s quite a little milestone to reach!

Source: craftwerk.ee via Sarah on Pinterest

Button-spiration

Today’s post is a little different. It’s not something to make (gasp, not a craft!) I’ve been inspired lately by baby boy’s love of books, in particular books that involve cats. So imagine my complete delight, when I came across this book at the library… Pete the Cat and His Four Groovy Buttons by Eric Litwin. How could a kids book get any better than this?! Cats and buttons! Sam and I are both enjoying this whimsical counting story, which involves singing about buttons, “…my buttons, my buttons, my four groovy buttons…”

Most quotable part of this book, “buttons come and buttons go”. I should probably have that on a poster or coffee mug. Hope you enjoy your Wednesday! I’m sure ours will involve reading this book once (or twice).

Source: amazon.ca via Sarah on Pinterest

Button-spiration

I’ve been losing sleep lately thinking about buttons. Yes, seriously. Usually it happens when I wake up to feed Sam in the wee hours of the morning & then I lay awake, creative juices running on overdrive. I blame my brother, Aaron. He shared this awesome tutorial with me on making leather buttons. A few days later he whipped up some leather buttons for himself. Now I can’t wait to give it a try, one day real soon!

Here’s a pic of one the buttons my brother made. You can find his tips & tricks for making the leather buttons on his blog. So cool! Absolutely love them!