DIY Valentine’s Day Lace Heart Garland

DIY Lace Heart Garland ~ Tutorial Blog Post ~ By Bubblegum Sass

Although we don’t typically do a lot to celebrate Valentine’s Day at our house, we do decorate a wee bit. It’s nice to have a few pretty things around the house in the dead of winter. I especially enjoy a pretty wreath on the door (I get so sad when I take down my Christmas wreath). A wreath on the door always makes me smile when I arrive home. This year, I decided to spruce up our twig wreath with a shabby chic inspired garland. Annnd… I even remembered to document the process thoroughly so I could share it as a tutorial with all my lovely readers! That’s my bit of Happy Valentine’s to YOU!

Now, the number of hearts to make for your garland is up to you (that’s why no material amounts have been given in the supply list below). I just made three (two large & one small) to symbolize my small family of three. Also, as you will see, I attached this short garland to a wreath. If you want a longer garland to hang, say from your fireplace mantel, then you will need to cut & stitch more hearts (you could alternate small & large hearts, some lace covered, some not).

DIY Lace Heart Garland ~ Tutorial Blog Post ~ By Bubblegum SassHere are the supplies you will need for this project:

  • Bubblegum Sass Heart Template
  • Red craft felt
  • Pink craft felt
  • White or light-coloured lace
  • Buttons
  • Lace trim or ribbon (to hang hearts from)
  • Sharpie or fabric marker
  • Thread
  • Scissors
  • Hot glue gun
DIY Lace Heart Garland ~ Tutorial Blog Post ~ By Bubblegum Sass
Print off and cut out the heart template (or use your own preferred heart template). Using a sharpie, trace around the template onto the felt.
DIY Lace Heart Garland ~ Tutorial Blog Post ~ By Bubblegum Sass
Trace out your heart template onto the lace, as well. *For perfectionists, see note below (in sewing section) for a tip on cutting out the lace.*
DIY Lace Heart Garland ~ Tutorial Blog Post ~ By Bubblegum Sass
Cutting just inside the marked line, cut out each heart shape.
DIY Lace Heart Garland ~ Tutorial Blog Post ~ By Bubblegum Sass
Repeat above steps for all sizes of hearts in both felt & lace. For my short garland, I cut out: two large felt hearts, two large lace hearts, and one small felt heart.
DIY Lace Heart Garland ~ Tutorial Blog Post ~ By Bubblegum Sass
Lay one lace heart over a matching felt heart, lining up the edges. Pin into place, as the lace tends to stretch & move a bit. Using a sewing machine zigzag stitch, sew all the way around the heart. Repeat with remaining hearts that you wish to layer with lace & felt. *If you really want your lace hearts perfectly lined up with the felt hearts (I know there are perfectionists among us), then I suggest cutting your lace hearts out slightly larger than the felt hearts, zig zag stitching them on and then trimming the edge of the lace so it is even with the felt.*
DIY Lace Heart Garland ~ Tutorial Blog Post ~ By Bubblegum Sass
Choose your buttons and stitch onto each heart, either on the left or right upper corner of the heart.
DIY Lace Heart Garland ~ Tutorial Blog Post ~ By Bubblegum Sass
Measure and cut the length of lace trim/ribbon that you will hang the hearts from (mine was about one meter or 39″, but of course cut whatever length is going to work for your own project. A longer garland will require a longer lace trim/ribbon.) Fold this in half and mark the half-way point (with a pin). Position your center heart here and pin into place, along the back of the heart.
DIY Lace Heart Garland ~ Tutorial Blog Post ~ By Bubblegum Sass
Position remaining hearts along the lace trim/ribbon, pinning into place on the backside. Tip: Place your lace trim/ribbon on the upper part of the heart, or else the hearts tend to flip over once hung. Once pinned into place, use a hot glue gun to attach the lace trim, removing pins as you work. If you would prefer, you can stitch the lace trim/ribbon into place.
DIY Lace Heart Garland ~ Tutorial Blog Post ~ By Bubblegum Sass
Voila! A pretty lace heart garland to hang. Besides using it to decorate for Valentine’s Day, I think it would be a sweet addition to a baby room. And of course, you could make it in any combination of colours.

DIY Lace Heart Garland ~ Tutorial Blog Post ~ By Bubblegum Sass

DIY Lace Heart Garland ~ Tutorial Blog Post ~ By Bubblegum Sass

DIY Lace Heart Garland ~ Tutorial Blog Post ~ By Bubblegum Sass
My completed project, with the lace heart garland attached to our twig wreath & hung on the front door. The wreath, by the way, is one that my hubby made for fun one year out of lilac bush branches.

In the Studio: Love Catchers

In preparation for the Market Collective Christmas show on December 5-7th, I’ve been sneaking in a bit of crafting time here & there. Mostly in the evenings while watching a show on Netflix (most recently Veronica Mars, and now onto the latest season of Vampire Diaries). Hoping for a bit more time in my actual sewing room in the coming weeks. The Love Catchers are starting to pile up, and I’m feeling very satisfied with how well they are all coming together. So how about some pics and quotes to inspire your week?

Love Catcher Lace Heart Prep by Bubblegum Sass

Love Catcher Hoop Prep by Bubblegum Sass

“Never give up on a dream just because of the time it will take to accomplish it. The time will pass anyway.” 

– Earl Nightingale

Love Catcher Heart Stitching by Bubblegum Sass

Colourful Love Catchers by Bubblegum Sass

Love Catcher Hanging Prep by Bubblegum Sass“When my heart is overwhelmed, lead me to the rock that is higher than I.”

– Proverbs 26:1

Shabby Chic Love Catchers by Bubblegum Sass

Blue Love Catcher by Bubblegum Sass“There are far better things ahead than any we leave behind.”

– C.S. Lewis

Button-spiration: Bag Lady

I’m waaaaay overdue for a Button-spiration post. Have you missed them? I certainly have! Today, finally, a little button love with a simple project. Who can resist a button bag? Certainly not me. In fact, I’m thinking that a trip to Value Village might be in order to find an old purse that I can spend my evenings embellishing with buttons galore. Find the original post on Burkatron.

Button-spiration: In Your Hair

Here’s a fun collection of DIY headband tutorials. All cute, all colourful, and all sorts of button embellishments. I recently discovered that my short hair finally looks good with a headband (it’s the little things that make my day). Now it’s time to get accessorizing!


Fabric headband by Heidi and Finn


Daydreamer Headband by I Am Momma – Hear Me Roar


Pleated headband by Craftiness Is Not Optional


Yarn wrapped headband by Hellobee

Pretty in Progress

I’ve been spending the last several weeks preparing for the upcoming Boutique Wedding Market here in Calgary. I’ve designed a couple new products for the show, while the rest are slight design variations on my current products. I brought the colours of everything inline with the very popular shabby chic/rustic style wedding decor (dusty purples & pinks, peach, ivory & beige). It’s all a lot more soft than the punchy colours you see in my Etsy shop.

I had already played around quite a bit with the shabby chic style cuff bracelets last year. So I used the inspiration from those and sprinkled it into my button hair clips and the new bridal accessories. The result is a whole lot of pretty in vintage doilies, lace, silks, tulle, yo-yos, and buttons. There’s a lot of hand stitching going into all of this, evenings spent sewing yo-yos & lace flowers while we watch our latest addiction on Netflix. Right now, I’m moving on to putting together the hair clips, and finishing touches on the bridal accessories. In a few days, I’ll be diving into button magnets (all in wedding appropriate colours… don’t you think they would make cute wedding favors?). I’ve also got several display details still to finish up. I’m really tickled with the display I’ve got roughly worked out. It will be quite a change for Bubblegum Sass (I won’t be hiding behind a table for once), but I’m loving the idea!

So here’s a peek into the progress:

Peach bridal accessory (can be worn as a hair piece or accent belt for a dress)
A whole lot of silk, tulle, & buttons
Bridal accessory with cute blue & bird details
Diving into purple... fabric flower accents for bridal accessories & hair combs
Diving into purple… fabric flower accents for bridal accessories & hair combs
Lots of beautiful shabby chic inspired fabric button flowers for hair clip sets.
Lots of beautiful shabby chic inspired fabric button flowers for hair clip sets

Our Week (so far)

Evenings spent hand stitching piles of these lovely lace flowers (destined to be accents in some new products)
His and hers coconut crack bar treats. One batch with agave syrup (for her) and one batch with peanut butter (for him). Both with loads of coconut flakes & coconut oil. All sorts of yummy!
His and hers coconut crack bar treats. One batch with agave syrup (for her) and one batch for peanut butter (for him). Both with loads of coconut flakes & coconut oil. All sorts of yummy!
Homemade biscuits (made with coconut oil instead of shortening) and some tasty bacon jam (not homemade).
Be still my heart. Our little man making his first button art project.
Sam's completed button artwork, perfect on the mantel. One proud mama.
Sam’s completed button artwork, perfect on the mantel. One proud mama.

Button-spiration: Bookmarks

This week’s Button-spiration features a super quick and easy project from Busy Beehives… So easy, in fact, it would probably be a good early sewing project for kids. They make nice little gifts for friends and teachers. All you need is a ribbon, a button, hair elastic, and thread & needle. Stitch the hair elastic to one end of the ribbon and a button on the other end. See, easy-peasy!

Button-spiration: Heart Day

Valentine’s is just around the corner. Thought I would share one more “heart themed” button craft with you. This one is from Buttons Galore & More. These little rustic fabric hearts decorated with buttons would make a very nice gift, for the young or old. All you need is some plain or linen fabric, buttons, thread, ribbon, and polyfil. If you’re short on time, you could always use some hot glue to attach all the buttons, instead of sewing them (although they look more adorable stitched). Check out the full tutorial for all the details. And enjoy your Happy Hearts Day!

Fresh in the Shop!

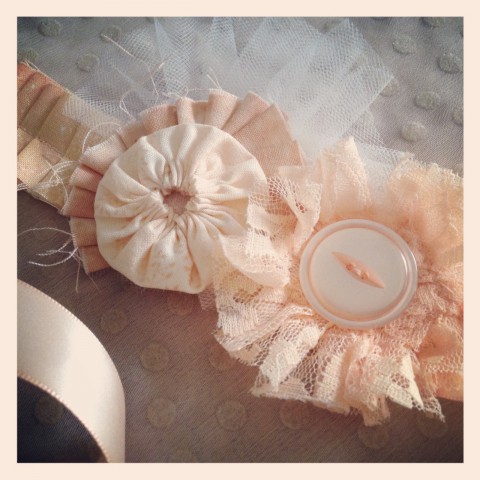
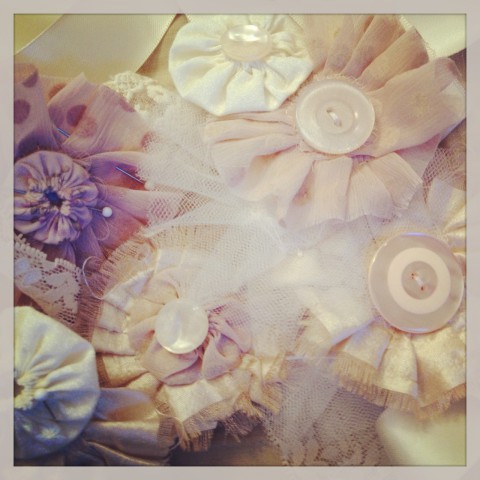
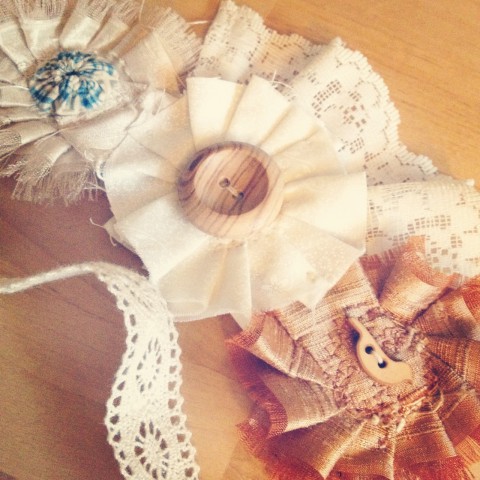
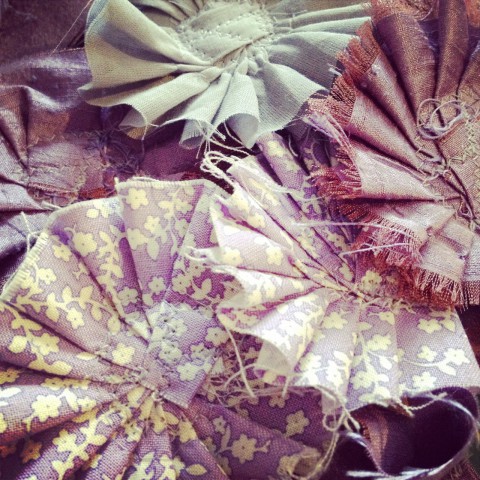
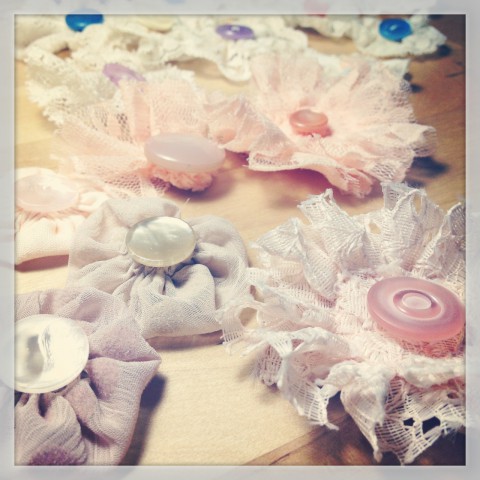
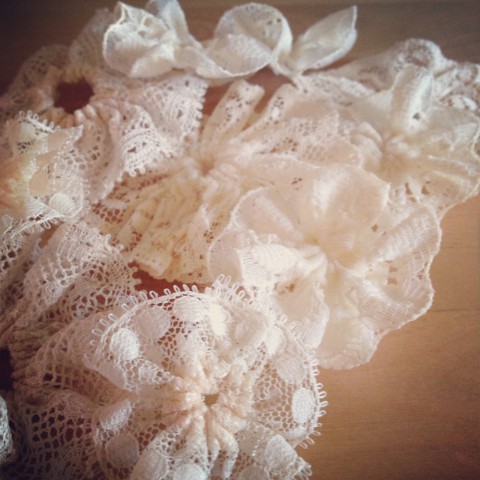
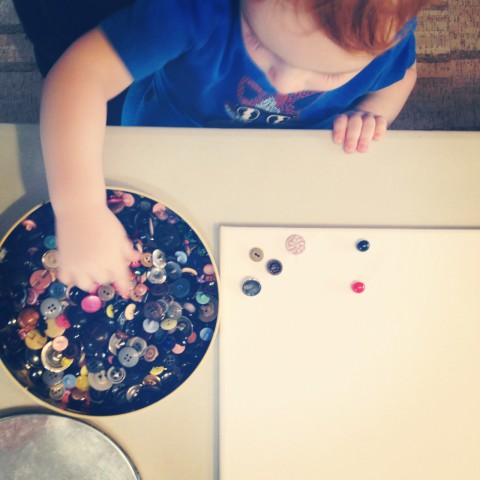
There’s new product now available in the shop! It’s like having a fridge full of fresh, new veggies! Or something like that. I’ve been busy making lots & lots of button hair clips to sell through consignment & thought that my Etsy shop could sure use some of these sweeties. Going forward, I’m likely to focus on selling the clips in sets (of two or six) instead of just individually. Besides, if you like the clips, you should probably have two (or half a dozen), just in case.

Button Hair Clips Set of Two, Aqua Pink

Button Hair Clips Set of Two, Purple Pink

Button Hair Clip Set of Six

Button Hair Clip Set of Six

Seeing these new items in the shop is getting me in the mood for spring. Realistically we’re still a looong way till spring here in Calgary, but a girl can daydream about that first bit of colour bursting forth from crocus bulbs. Meanwhile, Sam keeps asking to do garden stuff. Poor little guy can’t find a patch of unfrozen dirt anywhere in the backyard. So we listen to the birds and make little seed treats for the backyard critters to pass the winter days.

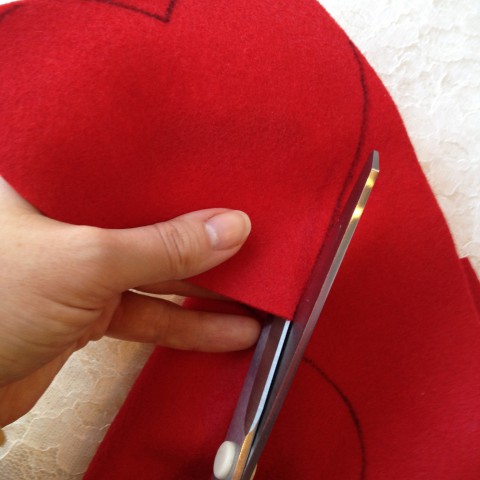
I’ve started to survive the grayness, ice & cold, by hand stitching felt birds to these colourful corduroy coin purses. Keep the hands busy, the mind focused on bright things and spring will eventually arrive. After many, many years of sewing my coin purses (I designed & started them back in 2006), I’ve been getting bored with them. It was time to refresh my creative juices and I longed to do some quiet hand stitching in the evenings after our little man heads to bed. That’s where these *Put a Bird On It* coin purses came from (you have to watch Portlandia!). Sticking a bird on things, instantly makes them better, right? Well, actually, in this case, it worked. I’m back to enjoying the process of making them. A handful are headed to Treehouse Boutique in Ontario and the rest will be nesting in the Etsy shop, until they find a better home.

Corduroy Bird Coin Purse, Magenta

Corduroy Bird Coin Purse, Blue Yellow