She’s making a list, checking it twice…

Crochet scarflette with tag… tryin’ to figure out just what’s been missed. Oh, the joys of list making. I am feeling deep in the thick of it right now. There are only four more days left until my first craft show and I only actually have two evenings left in which to complete, organize, and pack everything up.

All the scarflettes that were “in progress” are now complete. The scarflettes were super simple to tag and I am really satisfied with how they look. I just used scrap bits of yarn left over from making the scarflettes to attach the business card tags. The contrasting scraps play-up the overall colourfulness of the scarflettes, plus it uses up bits that might otherwise be tossed in the garbage or left outside for the birds.
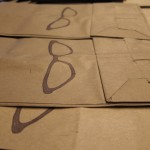
Stamped paper bagsThe shopping bags are all sitting pretty, waiting to be used. The handmade stamp was fun to carve and I think it suits the brown kraft bags. I considered carving my entire logo and name, but opted to just tackle the glasses, which makes for some pretty funky bags. They feel like they have a good mix of mystery and hipster-ness. I’m sure there are folks who feel that the bags should clearly indicate the shop or company they are from and act as some free advertising. Which I get. Personally, though, I am more likely to re-use and keep re-using a bag that doesn’t act like a blatant advertisement. Afterall, the re-usability of the bags is definitely a concern for me. One day I might still switch to a sticker instead of the stamp, but in the meantime, I have an inexpensive stamp to decorate everything with (it only costs me a small blister or two).
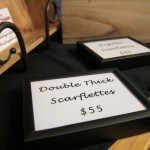
Framed craft sale signsLast night I spent some time typing, printing, cutting and framing (they look so nice in frames) signage for the craft table. Besides having the scarflettes individually tagged and priced, I also wanted to ensure I have some price signs to set out in the display. There is nothing more frustrating as a customer than not being able to tell at a quick glance how much an item costs. Yes, I am one of those people who won’t purchase something if I have to ask how much it is. I know I’m not alone on this either. Sure, there is the random thing that just gets missed being tagged, but if the next two or three identical items I pick up still don’t have a price on them, then I am likely to move along. This goes for signage too. If I can’t clearly figure out which price sign goes with what item, it’s a turn-off. Customers are out to shop, not problem-solve your pricing. So I hope that my signs and pricing will be nice and clear.
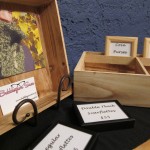
Craft sale signsBesides some price signs, I also printed out a few photos of the scarflettes being worn by none other than myself. I really need the help of one of my beautiful friends to model these at some point. Thank goodness for the cropping and blemish removal tools! Anyway, trying not to be too self-conscious, I will hang these photos on the wall by the mirror, so folks can see at a glance what the folded, cozy, fuzzies on the table look like on someone. Plus, I will be wearing one. That wooden box on the right will display the coin purses, which I haven’t individually priced, but I figured placing them in a container all together with a clear price sign should work. Tonight, the list checking continues, as I prep the big table cloth, figure out a container to keep the money, and finish sewing the last four coin purses. Wish me luck with the last bits and pieces!

To you, from me: packaging made pretty

In preparation for my first upcoming craft show and in planning my future Etsy shop, I have been spending time considering packaging and branding. Part of the branding work has been done for me with the logo design that my hubby came up with. The logo has given me more than just an image to use on packaging, labels, and banners. It has determined a colour scheme and aesthetic to use going forward with my business.

Wanting to stay on track with keeping things simple, I had to force myself to make “Must Have” and “Would Like To Have” lists for approaching packaging and branding. I’ve poked around online to find inspiration and guidance and included a list of helpful links below. For now, I have resolved a couple of “Must Have” items, while keeping in mind how I can gradually reach the “Like To Have” items.

First off, I figured the simplest solution to tagging my items for the craft sale, would be to use the business cards (which I already have), as hang tags. I purchased a package of adhesive labels to stick on the back of the business cards so that I could include content and care information. There are super easy and free online templates to use in conjunction with the adhesive labels, so that layout and printing is a no-brainer. Then I figured I could just hole punch the business card and use a scrap piece of yarn to tie onto each scarflette. Viola! Hang tags!

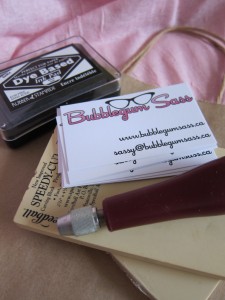
Materials for branding shopping bagsThe second item could be argued as a “Like To Have”, but in all the back and forth conversations I had with myself, I did indeed “Need” to have bags for the craft sale. There is plenty to be said for people using their own re-usable shopping bags, which I try to do as often as I can remember. However, applying my retail expertise to the situation, I want to ensure a pleasant shopping experience which includes being able to offer a customer a bag. If they have their own, then great! If not, then I want to be able to provide one to them. Since I can’t feasibly purchase or make cloth bags for customers to re-use at this time (it’s on the “Like To Have” list), I made a compromise. I ordered sturdy kraft paper bags with twisted handles. I considered getting black bags to go with my branding colour theme, but found them to be more money than I could justify. As it turns out, the brown kraft paper has provided a solution to branding my bags because now I can simply stamp them with my logo (which would not have shown up on the black). I hope to order stickers very soon, which I can then use on the bags and elsewhere, but that won’t happen in time for the craft show. So now, I guess I have a stamp I need to make. Fun!

The third item that I have been trying to resolve, is packaging items sold through my Etsy shop. I’ve been under slightly less pressure with this one, since I haven’t even officially opened my shop. Also, this is probably one area that will grow and evolve as my crafty business grows. All I know for certain, is that I don’t want to just cram items into mailers or boxes and send them on their way. I used to work at a shop that also did international mail orders, and one thing that always sticks in my mind is the desire to have orders be like gifts. So the simplest solution that I have devised for now is to fold black tissue paper around items and use a sticker with the company logo to secure it. Hence, needing to order the stickers sooner rather than later. Looking at all the incredibly creative ideas for packaging, leaves me wanting to offer so much more to customers. I take a deep breath and remind myself that I can’t do it all in one swoop. When I am able, I will get there. Wishing you good luck with all your own branding challenges!

Here are some lovely thoughts on and ideas for packaging:

Counting up…

… and counting down. After spending so many evenings and weekends crafting away, I decided it was probably a good idea to take a quick inventory of completed items. Not only that, but I needed to take a conscious moment to celebrate my progress. Maybe that sounds odd, but it’s definitely one thing that I have taken away from all the “career learning” that I’ve participated in over the past year; the importance of building regular opportunities to celebrate your accomplishments. How can you feel really satisfied with what you’ve done, if you don’t allow yourself a moment to look back and take stock? It seems like the simplest way to build up some positivity and keep yourself from getting bogged down by the “should have” thoughts. Look at what you’ve actually done, how far you’ve come!

With that in mind I take stock, not to brag, but to celebrate and be accountable to myself and those who support me in all I do:

    Stack of scarves

  • Started blog and post regularly on it
  • Obtained an official NUANS corporate name report (required for incorporating in Canada)
  • Registered for my first craft show
  • Created an Etsy account
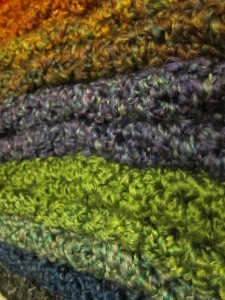
  • Completed 27 scarflettes, 10 more in progress
  • Completed 10 coin purses, 12 more in progress
  • Started taking photos of everything I do and make
  • Ordered and received shopping bags and tissue paper (more on this to come)
  • Ordered a pile of yarn wholesale
  • Purchased all the supplies to make labels for my scarflettes
  • Found a Canadian company to get stickers printed
  • Researched online, read books, talked to other crafters, checked out community craft sales, and spent a great deal of time visualizing (not just daydreaming)
  • Lastly, but not leastly, I prayed and continue to pray that the direction I am going is the one He would have me go

Thank you for reading this blog! You support my endeavours by doing so! Afterall, I don’t craft purely for my own enjoyment, but with the hope that others will enjoy it too.

Perhaps you have a moment to take stock of what you’ve personally accomplished (in what ever you do) or how far you’ve come in a project. You’re welcome to post about it in the comments or share a link to your own blog. It’s always a treat to hear about the progress and success of others!

What I did with the extra hour

The time changed here on Sunday. We set the clocks back one hour and like most people I technically spent my extra hour sleeping. I needed the extra bit of sleep after quite a full crafty Saturday. Although the morning was spent with the usual bit of house cleaning and laundry, I had a lovely afternoon at a friend’s Stampin’ Up! Christmas card making party. It was just what the doctor order too! We all work together and last week was full of extra stress, so being able to come together and make some pretty cards was a good release.

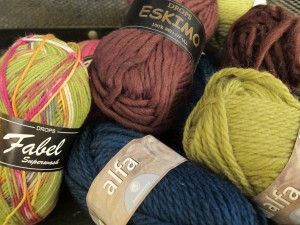
Fabel, Alfa, and Eskimo yarn ballsFollowing that relaxing afternoon, my hubby and I drove out to Banff in the evening. His mother and grandmother live there and his mother actually owns a yarn store in the town of Banff called Jen By The Fjord. She recently moved into a new location, so for any locals interested in checking out her shop, she is in Harmony Lane on the second floor. It’s a bit hidden, but worth a visit! Our mission, besides spending some time catching up, was to put a yarn order in. I’m definitely ready to move on from working solely with yarns purchased from Michaels and while I’m still learning about different yarn types I thought it best to turn to a professional. When your mother-in-law happens to be that professional, it’s even better! So after some back and forth and much touching of yarns, I decided on a few types to order: Punta Yarns Meritwist, Sandnesgarn Alfa, and Garnstudio Eskimo. I was even able to bring some balls home to play with (I *heart* my mother-in-law) and picked up some Garnstudio Fabel yarn to make socks (have to start the Christmas present making soon).

With the yarn order placed and some carrot cake in my tummy, hubby and I drove home along an eerily quiet highway in the dark, arriving home at midnight. So yes, we were thankful for the extra hour on Sunday to get plenty of sleep and still do all the rest of the errands that have been piling up the last couple of weeks.

How will my booth grow?

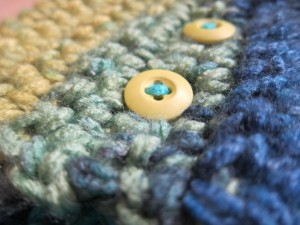
Buttons on scarfletteThe first step to prepping for a craft fair (assuming that you have already submitted an application) seems to be pretty obvious; make stuff! I do this on a regular basis anyway, but I picked a couple of items to focus on, stocked up on materials, and ramped up my crafting.

The second step, for me, has been to read, research, brainstorm, and daydream. I’m realizing that there are a bunch of factors to consider when designing a craft booth/table. Of course, you have to decide the most attractive way to display your handmade items so that people are not only drawn to your space, but can also readily see what your items are and how to use them. In my case, I’ve decided to focus on crochet scarflettes, which I am making in a rainbow of colours. Folded up, it’s hard to tell what they are and when they aren’t being worn they seem like an odd shape. First solution to this display challenge, I will make sure to wear one of my scarflettes at the show (duh). Second solution, I will include a couple of pretty framed photos of the scarflettes being worn by others. Third solution… not sure yet. I’m debating about bringing my dress-form along to put a scarflette on display. I know for sure that one element I want to play up is the colourful rainbow, so I will continue to brainstorm the best way to do this.

Okay, so besides keeping in mind the actual items that will need displaying, I’m also trying determine a general “feel” for my crafty business. Not just for craft shows, but for my online shop too. Have I mentioned that I am FINALLY getting an Etsy shop set-up too? Well, now you know. It’s all very much “in progress”, but I will make sure to share more about it here when it is closer to completion. So, right, back to brainstorming crafty business “themes”. I am starting to keep a notebook in my purse that I can whip out whenever I have an idea or see an intriguing store display. I am also trolling the internet for inspiration. Here are a bunch of links that I’ve found helpful in learning about what to keep in mind for craft shows, including craft booth/table ideas:

Preparing for your arts and crafts shows
Prepping for your next art & craft fair
13 Craft Show Display Do’s
Fair game: how to maximize your craft fair profit
Craft fair tips and lessons learned
How to set up a craft booth that customers can’t resist
Craft show suggestions/table setup
Show me your booths
Arts & crafts fairs & shows

Hope that helps any of you who might also be getting ready for a craft show! For now, my own check-list is growing each day. Not too much getting marked “done”, but plenty of brainstorming happening.

Looking at all the lovely booth pictures on Flickr, I find that I need to remind myself of one very important thing, keep it simple. Let me write that again, just for good measure. Keep it simple. As much as I daydream about a beautiful craft table, the last thing I want to do is become too overwhelmed, trying to develop everything (off and online) for my crafty business while working a non-crafty full-time job. Yes, a craft table needs to be appealing and represent your handmade product as best it can, but I think it is also something that I can grow over time. So for my first craft show I want to keep it simple, especially since I will be sharing the space with a friend. The reading, learning, and inspiration continues though, and I am eager to apply all of that in the near future.

One giant leap

Well, I did it. I submitted an application to my first craft show and have been accepted. Fees have been paid. Confirmation has been sent. It looks like this is it! The beginning of a big ‘ol adventure! My friend and I are actually going to share a table since neither of us have done this before. There’s so much to do in preparation. I’ve been reading tons online about selling at craft shows and setting up your booth/table. Every spare hour in the evening is spent making items. Lists are being compiled of what I need to prepare, buy, design, etc. I hope to share my experience through the whole process here, so I guess you’re in for a crafty ride! Thanks in advance for reading and learning alongside with me! Oh, and by the way, the show I am participating in is the Market Collective, December 11-12, in Calgary.