Happy Food pt. 3

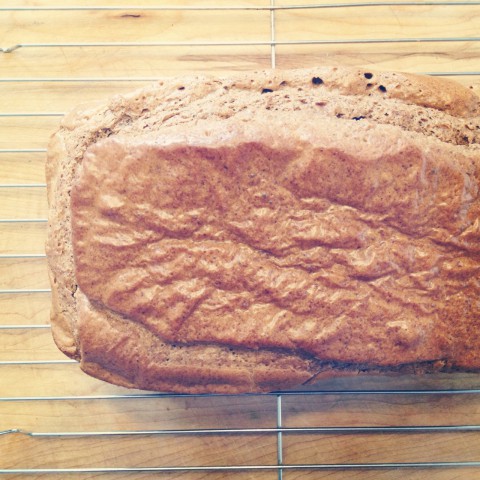
Finally a third installment in our “Happy Food” series! You can find the previous two posts here and here. This time around I want to share one of hubby’s fave recipes for low-carb “bread”, Almond Butter Bread. I say “bread” loosely because generally we joke around calling it almond-not-a-bread. It’s close to the texture of actual bread, without having any flour in it. You can slice it, toast it, use it for sandwiches, dip it in egg yolks, and spread your favourite jam on it. Close enough to bread for someone who eats a low-carb diet and seriously misses bread. I’ve grown to quite like it, even though I still eat real bread on occasion. Not sold yet? Let me cut you a slice and slather it with some tasty homemade apple butter.

Almond Butter Bread

Almond Butter Bread

500 ml smooth organic almond butter (we buy ours at Community Natural, but it’s also available at general grocery stores)

6 large eggs (or 5 extra large eggs)

1 tbsp baking powder

1 tsp salt

3/4 cup warm water


Making Almond Butter Bread

  1. Preheat oven to 350 degrees Fahrenheit
  2. Butter small loaf pan, 8″ x 4″ (be quite generous with your butter so the bread will pop out easily)
  3. Place almond butter in bowl & mix well until almond butter is smooth
  4. Add baking powder & salt and mix well again
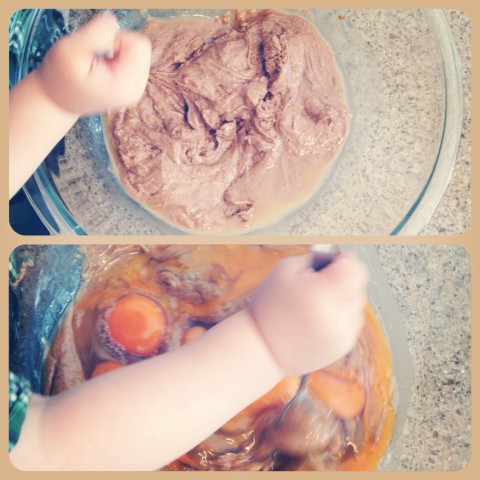
  5. Add eggs and hand whip with a fork until, you guess it, mixed well
  6. Add warm water and mix until nice & smooth
  7. Pour batter into loaf pan (it will be quite full, but don’t worry)
  8. Bake for 50 minutes
  9. Remove from loaf pan and cool on rack
  10. Slice and enjoy!

We’ve tried adding tasty bits like raisins and nuts to the batter before baking. It’s yummy, but they do tend to settle to the bottom of the bread. Maybe you could drop some raisins in part way through the baking process? Haven’t experimented with that too much. If you’re looking to toast it, keep in mind that it burns a little more quickly than normal bread, so turn down the heat on your toaster a bit. Also, the bread is a touch bland, but that’s why it works so well with whatever you decide to spread on it!

This week, I think I’m going to venture into actual bread making. We picked up some lovely Red Fife flour from Country Thyme Farm. Confession: I’ve never actually made bread before. Working with yeast makes me nervous. It’s why we don’t have homemade cinnamon buns in the house, no matter how much I love the smell of fresh baked bread. Hoping to change that in the coming weeks. Wish me luck! Even if I pull off “real” bread, I’ll still be making this tasty Almond Butter Bread for hubby & myself to nibble on.

Happy Food pt. 2

It’s been a little long in coming, but finally put together the second installation of my Happy Food series. You can find Part 1 here. Keeping with my intention of changing some of our food habits, I finally decided to get on board with my hubby and cut out all vegetable & canola oils (including shortening). I wasn’t using them all that much really, mostly in my baking. We already frequently use olive oil, butter, or bacon grease to cook with. We decided to start using coconut oil for some things. The switch wasn’t as difficult as I had built it up to be. In my mind, it was going to be a real pain in the butt and mean sacrificing some of my fave recipes (many passed down from my family) and having to find new ones to use.

This has not been the case. I found some helpful, easy tips online about substituting coconut oil for vegetable/canola oil & shortening. I also embraced the fact that things might not turn out “right” the first time. Armed with that attitude and determined to commit to the switch, I dove in. I started substituting coconut oil in my baking in the fall, and so far, there hasn’t really been a fail recipe. So today, I want to share some of the tasty things Sammy & I have been eating (hubby is low-carb, so he skips most of these treats… being low-carb is quite a big eating habit change, one that I’m not mentally or emotionally capable of committing to, yet).

First off, you might ask, why coconut oil? It’s not locally grown or made and travels large distances to get onto my pantry shelf. This is one of those instances where healthy outweighs buying local, that is, until we have our own dairy cow & can make enough butter to keep our household happy without breaking the bank. For hubby, who believes in low-carb eating, the fat in coconut oil is not something to be scared of, but embraced. You can find plenty of info and ugly videos on just how disgusting vegetable & canola oil is. With the limited time we have on this earth, I’d much rather put yummy organic coconut oil in my body than that stuff! Don’t get me wrong, we LOVE butter at our house and have been trying to purchase butter from pasture-raised, grass-fed dairy. Simply put, it’s expensive, especially in the quantities we already use. The good quality milk to make the butter is pricey too. Again, I dream of days when we have buckets of milk from our own dairy cow to make yummy, healthy butter.

So let’s check out some of the tasty treats.

We’ve made yummy pancakes, waffles, even Sammy’s birthday cake. Some of these were done with a box mix for dry ingredients (hey, I didn’t say we were perfect). Homemade biscuits are great with that touch of coconut taste. And we’ve made lots & lots of muffins! Coconut oil in muffins has been a delightful discovery. Try it! Another wonderful recipe find has been Coconut Crack Bars. They’re a super snack at our house now, that even Sam loves! I even figured out a low-carb version for hubby (skip the agave syrup & salt, increase the coconut oil, melt some of the coconut oil beforehand and add some lime juice). And who can forget THE best gingerbread cookies I’ve ever made!?! Yep, for Christmas this year, I stuck to my commitment to avoid shortening and made my mom’s gingerbread cookie recipe with coconut oil. Best batch I’ve ever made! Seriously. That officially ended my fear of substituting coconut oil into my fave recipes.

By the way, frying some veggies (like kale & chard) and meats (like beef) in coconut can add a nice change in flavor. I sometimes put just a dab of it on cooked veggies before we serve them (so yummy on carrots). There’s a lot you can do with coconut oil!

Here’s our fave muffin recipe for you to try:

Banana Chocolate Chip Coconut Muffins
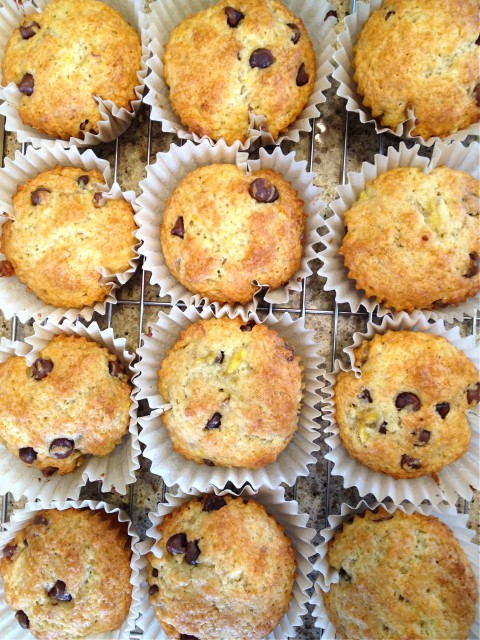
Banana chocolate chip muffins by Bubblegum Sass

Ingredients
• 1 3/4 cups all-purpose flour
• 3/4 cup sugar
• 1 teaspoon baking powder
• 1 teaspoon baking soda
• 1/2 teaspoon salt
• 1 egg
• 1/2 cup coconut oil (or a touch more for even more moistness)
• 1/2 cup plain or vanilla greek yogurt
• 1 teaspoon vanilla extract
• 1 cup mashed ripe bananas
• 3/4 cup semisweet chocolate chips (or more if you want)
• 1/2 cup finely shredded coconut (optional)

Directions
1. In a medium size bowl, combine egg, yogurt, and vanilla. Microwave for 20 seconds & let sit.
2. In a large bowl, combine the flour, sugar, baking powder, baking soda and salt.
3. Measure out your coconut oil & melt it.
4. Add the melted coconut oil to the bowl of other wet ingredients. Mix well with a whisk.
5. Stir into dry ingredients just until moistened.
6. Fold in bananas and chocolate chips and optional shredded coconut.
7. Fill parchment paper-lined muffin cups two-thirds full.
8. Bake at 350 degrees F for 22-25 minutes or until a toothpick comes out clean.
9. Cool for 5 minutes before removing from pan to wire racks.

Tips For Baking With Coconut Oil

  • To substitute coconut oil for vegetable oil, simply use the amount of oil called for in the recipe & then melt it. It’s a straight 1-1 substitution amount.
  • To substitute coconut oil for shortening, reduce the amount of oil used by about 25% (for example, if the recipe calls for 1 cup of shortening, use 3/4 cups of coconut oil).
  • To melt my coconut oil for baking recipes, I usually pop it into the microwave for 15 sec. The “experts” on coconut oil recommend a double boiler. If you use a microwave, just be very careful not to over heat. Coconut oil melts easily.
  • Coconut oil has a lower smoke-point than vegetable oil, so keep that in mind if you’re frying it.
  • The  most helpful thing to keep in mind, if you’re adding melted coconut to other wet ingredients in a recipe (like eggs & milk), make sure those ingredients are not straight-out-of-the-fridge cold. Start your baking by mixing together the cold wet ingredients, microwave them for 20 sec & let them sit while you organize everything else. This will ensure that when you add the melted coconut oil to the wet ingredients, the oil won’t start to cool & re-solidify right away. The first recipe I tried, I didn’t heed this advice & the dough never was a great consistency for mixing thoroughly.

Hope you enjoy experimenting with coconut oil! I’ll try to post some of the other recipes we use, like our homemade biscuits and gingerbread cookies, later this month.

Happy food pt. 1

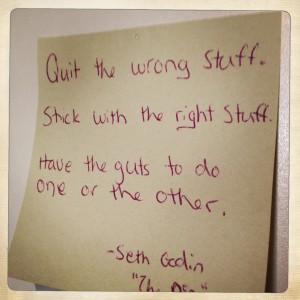
Quit the wrong stuff

We started overhauling the types of food we buy a few years ago, when hubby went low-carb. Since then, we have continued to make small changes, searching out local suppliers, opting for organic varieties here & there, less sugar on occasion, more fat all the time, meat, meat & more meat, and trying to align our kitchen with the seasons.

I’ve felt compelled to make more changes lately. We recently switched over to buying 80% of our weekly groceries at Community Natural Foods. That’s a pretty big change for a gal who has shopped at Safeway since her birth. We still pick up a some things at Safeway that we haven’t figured out alternatives for. Maybe at some point we will or learn to go without. Slow steady changes.

It really does come down to quality over quantity. Our personal farming motto is “good food, happy people”. It just feels like the right time to live out that philosophy more fully. It’s not a change that can happen overnight. We’ve known that from the beginning. And I certainly don’t recommend that you try to change all your eating & buying habits overnight. You need to believe in the changes that you make. Each and every one of them. It can take time & careful consideration. You need to weigh your own personal priorities & passions.

When it comes to food, the two big considerations for us is the distance it has traveled and just how healthy it truly is. In other words, our first priority is locally sourced food. Our second priority is organic. Local organic is the ultimate goal, besides growing & raising it ourselves. Of course, we’re not perfect. We make plenty of compromises along the way, but bit by bit, we’re trying to change.

The quote above from Seth Godin is so appropriate for this lifestyle overhaul. We will try to quit the “wrong” stuff, and stick with the “right” stuff. I thought I would make this a new post series on the blog, documenting how we choose to do one or the other on our quest for happy food. We’re all hungry for it in our own ways.

30 x 30

Tomorrow is May. You might not necessarily know it, looking out my sewing room window. It snowed yesterday and through the night. There’s about an inch on the ground this morning.

I’ve decided to join David Suzuki’s 30×30 Nature Challenge. For 30 days, starting May 1st, I have committed to spending at least 30 minutes out in nature each day. Now that’s not a huge commitment, really, considering that in nice weather, I like to get outside anyway. Especially with Sam in the mix these days. He absolutely loves being outside! But on days where there’s snow sitting on the ground (AT THE END OF APRIL!!!), going outside for a nature adventure, will be challenging.

We’ll see how it goes. We will soon be without a kitchen and in the middle of chaotic renos, so going outside to the backyard, the park, or cabin will probably be a very welcome escape.

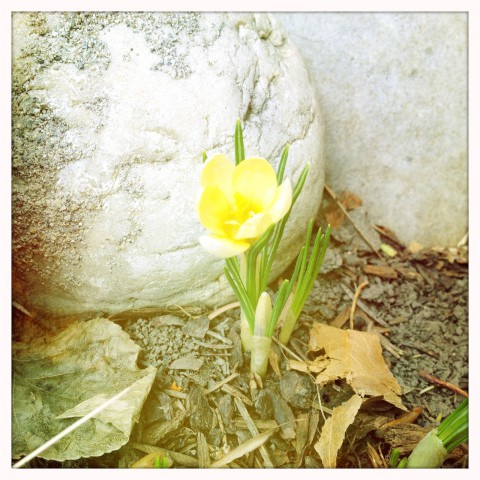
Yellow spring crocus(I know I recently used this photo on the blog, but I couldn’t resist posting it again. A little sign of my hope for spring.)

To mom, with love

I heart momIt was with a heavy heart that we discovered in September that my mom’s cancer was still present, even after months of chemo last year. And it is still spreading. She has an uncommon form of endometrial cancer called uterine serous carcinoma. It is already far along at Stage III.

On Oct. 29th she started another round of chemotherapy, with a different drug. It’s hard to know how this whole situation will go. Will she become quite sick from the treatment? Will the chemo slow the spread? Will it eradicate the cancer? How long will this go on for? So many questions, and no real clear answers.

Another question that comes to mind is, what else can we be doing to help? Specifically, what can “I” do? I pondered this quite a bit and there are lots of ways I can support my mom during this time, but one new thing popped into my head this time around. It came quite clearly and confidently to me, as I sat rocking my baby boy one night. It was one of those rare moments when you have a sudden thought and know in an instance, deep down that is exactly what you should & will do.

I’m going to shave my head. I will go from long flowy locks to buzz cut in an effort to raise funds for the Alberta Cancer Foundation & the Tom Baker Cancer Centre. Honestly, it’s such a simple act. Give up something for a time. Not forever, because it will grow back. I’m blessed to be able to make the choice when so many others don’t get to decide whether or not they will lose their hair, including my mom. It’s an inconvenience for me (since we’re headed into winter), but the symbolic support it offers seems greater than all that.

So come the end of November, I will shave my head (along side my most wonderful sister-in-law Tina). To mom, with love.

If you would like to donate to this fundraiser, click here. Every little bit helps us all. You could also help by keeping my mom, Jan, in your prayers in the coming weeks. Thank you for your support!

Nancy and I (part 3)

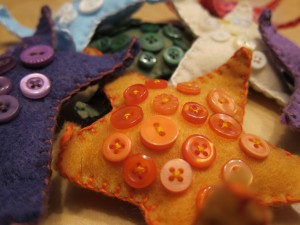
Felt starfishI had all sorts of grand plans of crafting that I wanted to do while I recovered, but I started out with reading. I had stocked up on some new paperbacks (working my way through some Charlaine Harris books) and also pulled the entire Harry Potter series out to re-read. Sipping ginger ale and cranberry juice while reclining with a book became my new routine. Eventually I gained a bit more mental and physical energy and eased myself back into crafting. I started out simple with just some hand sewing. I’d been working on these starfish decorations in between other random projects for a while. It was very relaxing just sorting button and thread colors.

I then moved onto a fairly simple crochet project (“simple” because I didn’t have the patience and energy to worry about counting stitches or working row patterns). My friend at work is expecting her first baby towards the end of October and I was really keen to make her a baby blanket. I already had a bunch of granny squares made-up and it turned out to be the perfect number for a baby-sized blanket. Prior to my surgery, I had the forethought to organize the layout of the squares and number each one, so that when it came to assembling them, it wouldn’t take much mental power. I sat watching an assortment of borrowed dvds (the likes of “The Lakehouse”, “Calendar Girls”, “In Good Company”, “Waking Ned Devine”, etc) and attached granny square to granny square and row to row until I had completed a sweet little autumn baby blanket. More details on this particular project to follow.

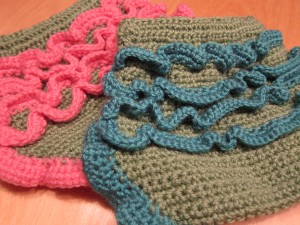
Crochet nappy pantsWhen I finally started to feel like I had the energy to try out a new crochet pattern, I turned to Tina Barrett’s Natural Crochet for Babies & Toddlers. It was love at first sight with this book! For a super avid crafter, I don’t buy a ton of craft books, not because I don’t want to. Seriously, I would go crazy ordering craft books till every shelf in our house was filled and then some, if I could. Being on a tight budget though, I’m often inclined to spend my crafty funds on supplies rather than inspiration. However, Tina Barrett’s crochet book was just too lovely to pass up. I borrowed it from the library originally just to flip through and when I realized I wanted to make every single pattern in the book, I ordered it. The first project I attempted from that book was the nappy pants. So very adorable! Although I wasn’t able to make them out of fancy natural soya or cotton called for in the pattern, since I had to make do with my stash, I think they turned out pretty cute.

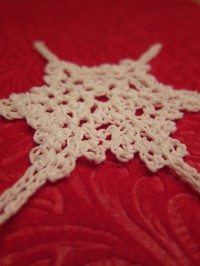
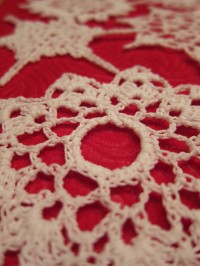
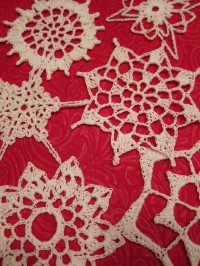
After finishing my first pair of nappy pants I started thinking about Christmas. I haven’t a clue why, but I just started thinking about what to make people for Christmas and that led to thinking about how last year I never got a chance to try making crochet snowflake ornaments for our tree. I mentioned this to my mom and on one of her post-surgery visits she brought all of her old snowflake patterns gathered from magazines from the 80s, white crochet thread and the smallest crochet hook I’d ever seen. Between all of her patterns and ones I tracked down online, I kept busy working up snowflakes. I actually got pretty frustrated trying to make them and I had a hard time reading the patterns, but before I decided that maybe snowflake making was too advanced for me, I tried a pattern posted on Attic 24. Although the Lucy’s pattern uses a DK weight yarn, and I used crochet thread, I loved the shape of the snowflake AND I was finally able to understand how these darn things worked up. So I simply added some more rounds and with my usual improvisation ended up with a nice little snowflake.

It was like a light bulb went on (or I guess in this case a glowing snowflake) and I eventually made these guys too.

Crochet snowflakeCrochet snowflakesCrochet snowflakes

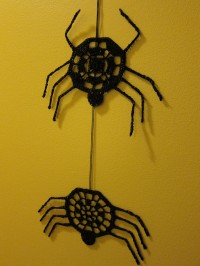
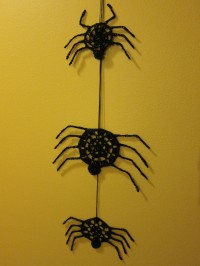
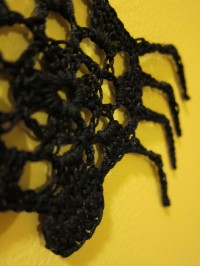
From Christmas, my thoughts turned to Halloween. I know, that was sort of in the wrong order, but who can control one’s crafty thoughts? After my adventures in snowflake making, I started thinking about decorations for Halloween. What could I crochet for Halloween? I liked the idea of making something similar to the snowflakes, that I could starch and hang, but with a Halloween theme. I poked around briefly online, but didn’t find what I had in mind. So I figured I could make it up, after all I had just completed six snowflakes, how hard could it be? After some experimenting, it turned out to be a bit difficult, but not impossible and I managed to created these creepy little friends.

Crochet spidersCrochet spidersCrochet spider

Phew! Well, I managed to complete quite a bit during my weeks of recovery. Definitely didn’t waste the time off and all the lovely crafting kept my sanity!

Nancy and I (part 2)

Three months passed quickly with not much changed and we found ourselves back in the doctor’s office discussing the state of my fibroid. We arranged to have tests done on my husband to ensure that he wasn’t “shooting blanks” as so many like to folks say. I had a bunch of blood work done and another ultrasound. The ultra sound indicated that the fibroid had now grown to the size of a cantaloupe, which was about a two-inch increase. This started to worry me more. Waiting around for me to get pregnant was giving Nancy, the fibroid, time to grow and further complicate things. My symptoms had been getting worse. Heavy bleeding two weeks of the month is not fun. Missing work because of heavy bleeding and painfully crippling cramps is not fun. Having to pee every half hour to hour is just plain annoying. And being able to feel and see a strange lump on your lower abdomen, that you know is not a fetus, is very disconcerting.

This is when Plan B was formed. We would go ahead with surgery to remove the fibroid and hope and pray that all the worse-case scenarios of hysterectomy and infertility would be avoided. My surgical date was set for August, a mere four month wait. It had already been a year since it was first discovered, and at first the thought of waiting four months to have the surgery didn’t bother me much. We had a lot of family events to fit in during that time (my brother was getting married in Poland and we would be travelling there for it), but as the months went by and I was in increasing discomfort, I got anxious to get the whole thing over with. Two months before the surgery, I was actually starting to look pregnant. In fact, I was mistaken as such a couple of times on our trip to Europe. It was pretty devastating and frustrating to think that all I was growing in there was a big ugly tumor. The fact that I looked so much bigger, had me quite worried about how much it was actually growing. Oh, how I started to really hate Nancy.

By August 4th 2010, my surgical date, I was nervous and simply exhausted. Heavy bleeding, constant soreness, worrying, bloating, all of it, was taking its toll. Not to mention the extreme emotional rollercoaster that had been our lives since June. We had managed to fit in the marriage of my middle brother, the death of my father-in-law, the marriage of my husband’s niece, and the near death of my oldest brother. I was ready to check into the hospital and focus on myself for a time. I can’t say I wasn’t nervous, because I truly was. I’d never had to stay in the hospital as a patient and as they rolled me through the doors to surgery and away from my husband, I started to tear-up.

The procedure was very invasive. The size of the fibroid required an abdominal myomectomy, which is open surgery with a large incision and a long recovery period. I found out later that the surgery itself went quite a bit longer than anticipated because they were having difficulty removing the entire fibroid through the horizontal incision that was made. A vertical incision would have given the doctors more room, but would have been even more difficult to heal. In then end, the fibroid turned out to measure about 12x12x10 inches, close to double the size since the last ultrasound. It weighed just shy of 5 pounds! I had almost forgotten what my mostly flat tummy looked like!

I will save you the details of my “fun” at the hospital. I stayed there for four days and was then able to go home. My hubby worked from home the first week, so that he could be on hand if I needed any help with food and such. I had already arranged with work to be off for the seven weeks that my doctor and surgeon had determined I would need to recover. It was slow going. Sleeping was incredibly difficult. It was weeks before I could even lay down flat without the support of every pillow in the house. I slept a lot. The first two weeks were literally just getting up to take pills, eat, shuffle a little loop around the house and then back to bed. Repeat several times a day. My constant companion was our cat Chloe. She loved the hours spent dozing in bed, but became frustrated when she found out that she couldn’t sleep on my tummy or crawl on me. I had to resort to keeping a pillow on my lower abdomen to keep her from causing a painful shock as I slept. Oh, but I wouldn’t have dared denied her companionship during the many weeks at home. There really isn’t too much photo-wise to share in regards to my journey with Nancy, the fibroid, so here is a photo of Miss Chloe instead.

Chloe in the sun

Nancy and I (part 1)

In April 2009, my doctor discovered that I had fibroid growing on my uterus. At the time, the ultrasound indicated that it was about the size of a grapefruit (oh, yes, doctors do seem to love equating growth sizes with types of fruit). I was definitely a bit shocked and nervous when I first found out. What the heck was a fibroid? Why was it growing on my uterus? And how would this impact my ability to have children? My head filled with questions, which my family physician didn’t seem too keen to answer her self. Instead she referred me to a specialist. In Alberta, that process sadly means that you wait about a month before finding out if you’ve gotten an appointment somewhere, and then wait another 6-12 months for the actual appointment. I was so severely disappointed by all of this. My family physician assured me that the fibroid, which is a type of tumor, is very, very, rarely cancerous and that was supposed to comfort me during my 6-12 month wait to see someone who could tell me what was going on and what my options were.

Of course, the worry about cancer still clung in the back of my brain, but what I was most concerned about was how this would affect my chances of having children. Would the fibroid continue to grow during the long wait to see a specialist? And if so, would that put my fertility at greater risk? My husband and I had finally reached the stage where we were excited to start trying for children. We’d spent the six months before my diagnosis moving back to Calgary to be closer to our families, getting good jobs, buying our first house, all in preparation for starting a family. Beyond all these things, we were both finally truly looking forward to having children and having them soon. It had never occurred to me that we might run into obstacles with that. Of all the things we’d struggled through, surely getting pregnant would be the least difficult. This strange fibroid discovery de-railed all my preconceived notions of easy or straightforward childbearing.

During the anxious wait to talk to a specialist, I hit-up Wikipedia for information and took out books from the public library about fibroids. I learned about all the various types, the symptoms, and treatments. I tried to educate myself as much as possible and kept a list of questions to ask the specialist when I finally had my appointment. Without getting into too much complex stuff, basically, a uterine fibroid is a type of tumor that grows from the tissue of the uterus. They are not sure why they start growing in the first place, but they do rely on the presence of estrogen and progesterone and often grow rapidly during high estrogen states (like pregnancy). They can be quite small or quite big. You might have just one at a time, or you may have several. They can be completely asymptomatic, causing no problems, or they can cause a whole assortment of problems (pain, heavy bleeding, extreme bloating, miscarriages, etc.). Through the course of all of this learning and trying to adjust, I decided that my fibroid needed a name and so for what ever reason (I can’t even recall) I began referring to it as Nancy. Nancy and I didn’t get along all that well, but I was stuck with her and she with me for the time-being.

Eventually, my appointment date arrived (sooner rather than later with persistent calling). Accompanied by my loving hubby, we sat and discussed the issues, the options, and the worse- and best-case scenarios. The main concern the specialist had was that the fibroid was a fairly large for someone my age (28 at the time) and also I hadn’t had children yet, which we did want to do. So we formed Plan A, which was to start trying for children. With luck, I’d get pregnant and we’d just have to monitor the fibroid throughout the pregnancy. However, if I didn’t become pregnant within a few months, we would start doing some testing to ensure that everything else health-wise was good with both my husband and myself.