Button-spiration

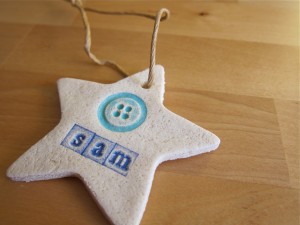
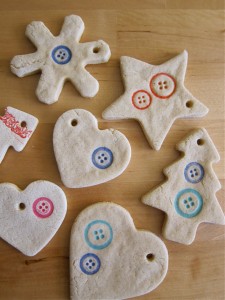
Bubblegum Sass button salt dough ornamentsI’ve really been trying hard to do more of the crafts I wanted to complete for Christmas this year. Yesterday afternoon, I managed to complete these salt dough ornaments (with boy in the Baby Hawk because he refused to nap). They aren’t as perfect as I want them to be, but they’ll have to do as a first attempt at salt dough. Of course, I got the idea from Pinterest (where else?!) and I actually used two tutorials for my inspiration. The first was from the Make It Give It blog and the second was from the Intimate Weddings blog (they used the salt dough to make wedding favors).

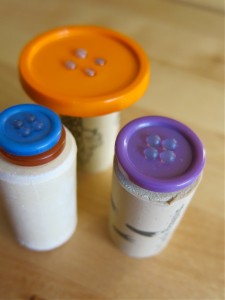
I loved the idea of using rubber stamps & ink to decorate the ornaments! Simple and yet it can make a traditional craft slightly more sophisticated. Of course, I immediately envisioned buttons stamped on these ornaments and since I don’t actually own a rubber button stamp (shame on me), I first had to set about making some stamps. Luckily, that was an easy fix! I glued some buttons onto old wine corks, which I’ve kept around for exactly that purpose. Easy-peasy, right?

Bubblegum Sass DIY button stamps

Next, I mixed up the dough, using the following recipe (Please Note – in the future I will cut this recipe in half and make two separate batches of dough) :

2 cups flour
1 cup salt
1 cup water

I rolled the dough out to about 1/4″ thick (perhaps even slightly thinner, which I might regret). Then I inked & stamped the designs and used cookie cutters to cut the shapes. I used a straw to make the hole for hanging the ornaments. Then gently placed each one onto a cookie sheet and baked in the oven at 200 degrees for about 5.5 hours. Most tutorials recommend between 4-6 hours. I just pulled them out before I went to bed.

They are pretty darn cute! But I do have a few things I will attempt differently next time. Here’s my tips on this project:

  • DO have all your stamps & inks & cookie cutters out and ready to go. The dough starts to dry quickly, so you want to do a lot of prep before you even mix the dough.
  • DO make sure you have plenty of time to dry them in the oven. These aren’t going to be done baking in a couple of hours.
  • DON’T mix the dough recipe that I have listed on the blog. Cut it in half and make two separate batches of dough. The dough starts to dry quickly (especially in our Alberta climate).
  • DON’T try re-rolling the dough to use the left over bits. I think this is one reason why some of my ornaments have cracks. They are so much more pretty when they are nice & smooth.
  • DON’T get too frustrated if some aren’t quite perfect. You can always make up more. Even though they take a while to bake, keep in mind that the dough itself is very inexpensive & easy to make.

Bubblegum Sass salt dough ornament

I would definitely like to make more of these as tags for gifts throughout the year. Love the way they look with names stamped on them! Sam’s first Christmas ornament. I hope he likes buttons as much as his mama…

Button-spiration

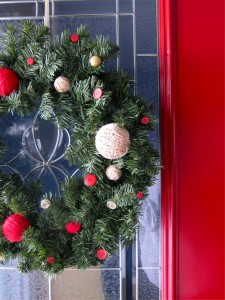
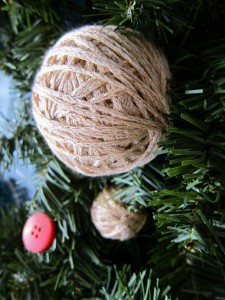
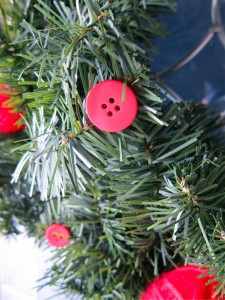
Bubblegum Sass Christmas Button Wreath…on a Monday. A little extra button-spiration this week. With Christmas around the corner I couldn’t resist sharing my button wreath. I bought the plain faux evergreen wreath from Michaels, wrapped red & gold yarn around various sizes of foam balls (purchased from the dollar store), and then glued the balls, along with red and gold buttons onto the wreath. Voila! Perfect Christmas button wreath! Quite satisfying! And there’s no mistaking that you’ve arrived at the house of a crafter when you see the wreath on our front door.

Yarn wrapped foam ballButton on Christmas button wreath

Couple of tips:

  • Do tack the yarn onto the foam balls with hot glue here & there as you wrap the yarn, but no need to over-do the gluing.
  • Do tie some of the larger balls onto the wreath before fixing them further into place with hot glue.
  • Don’t “over do it” with the buttons. As much as I love buttons, I think the key is to keep it simple.

Button-spiration

Oh, there’s so many lovely button Christmas craft ideas out there, I’m bound to run out of time to post about them this month, not to mention, time to make them! Here is one that I had really hoped to do at our last Pinterest party, but instead I opted to make a wreath for our front door. We’ve got a lot of ornaments as it is, but I thought they would make cute decorations for people’s presents. Maybe next year… The full tutorial for the cinnamon stick Christmas tree (with button ornaments) can be found on S.C.R.A.P.

Button-spiration

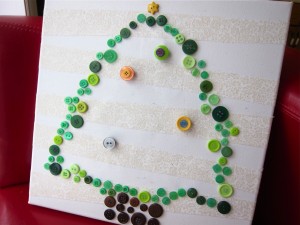
Button Advent CalendarAs promised, here is the button Advent calendar that I made. Sam has been having fun selecting a button magnet to place on the tree each day. It is slowly getting more colourful as the days pass. And once again, I failed to do a step-by-step photo documentation of how I made this beauty, but it’s really pretty simple. Here’s a list of the supplies you’ll need:

  • store-bought white canvas (any size or shape)
  • strips of white or beige (fairly neutral) fabric
  • Mod Podge matte finish
  • craft paint brush
  • hot glue gun & plenty of glue
  • buttons (lots of green, some brown, and various colours for the ornaments)
  • strong magnets
  • thin strips, sheets, or pieces of metal (I just used the round metal bits that the magnets come mounted on when you purchase them)

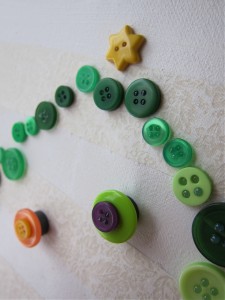
Button Advent Calendar detailFirst step, I used Mod Podge to attach the strips of fabric to the canvas (you could just skip this step & leave the canvas blank, but I thought it needed some subtle “sprucing up”). Let dry.

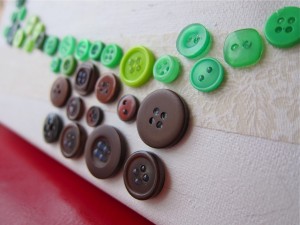
Button Advent Calendar detail 2Next, I arranged my green buttons on the canvas, loosely forming the shape of a tree. Then used brown buttons for the trunk of the tree. Once I was satisfied with the design, I got to work with the hot glue gun, fixing each button into place.

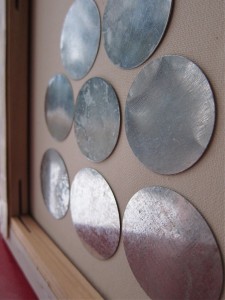
Button Advent Calendar back detailThen I flipped the canvas over and, once again using the hot glue gun, attached the thin metal pieces.

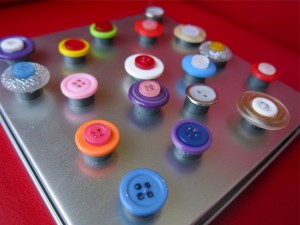
button magnetsLastly, I made the button “ornaments” by stacking colourful buttons onto each other and then gluing them onto a magnet.

Easy-peasy.

Button-spiration

Oh my, is it that time of year already!? Yes, yes it is. I really do love Christmas, so it should be no surprise that what I’ve had on my mind lately has been Christmas craft projects. Not the making of Christmas gifts, which is usually what I’m getting knee deep in right about now. Instead, I’ve been pondering decorative projects for our own house.

Every year, I think about making an advent calendar, and it never happens. One year, I’ll get myself organized in the spring/summer (cause it will take awhile to put together) and make an awesome advent Calendar for Sam (a girl can dream). For now, I’m looking at this simple button tree advent calendar by Diane Gilleland of the CraftyPod. Buttons are mounted on simple thumbtacks and the Christmas tree is just a foam cone. Each day of December, you add a cute button ornament to the tree.

PS – I had this post all written up a couple weeks ago… In that time, I had an awesome crafty mama day and actually managed to make a button advent calendar! Hope to share it with you here next week!

Button-spiration

How much fun are these 9-hole buttons?! I love the possibilities that open up with being able to write words with these buttons! 9-holes means you can pretty much embroider any letter. Now these particular buttons were handmade, with the full tutorial available here by Derek & Lauren of The Curiosity Shoppe. Not sure I necessarily want to dive into the world of making my own buttons (that could be a job unto itself). You can however score 9-hole buttons on Etsy and other random online venues, which is probably a bit more my speed these days.