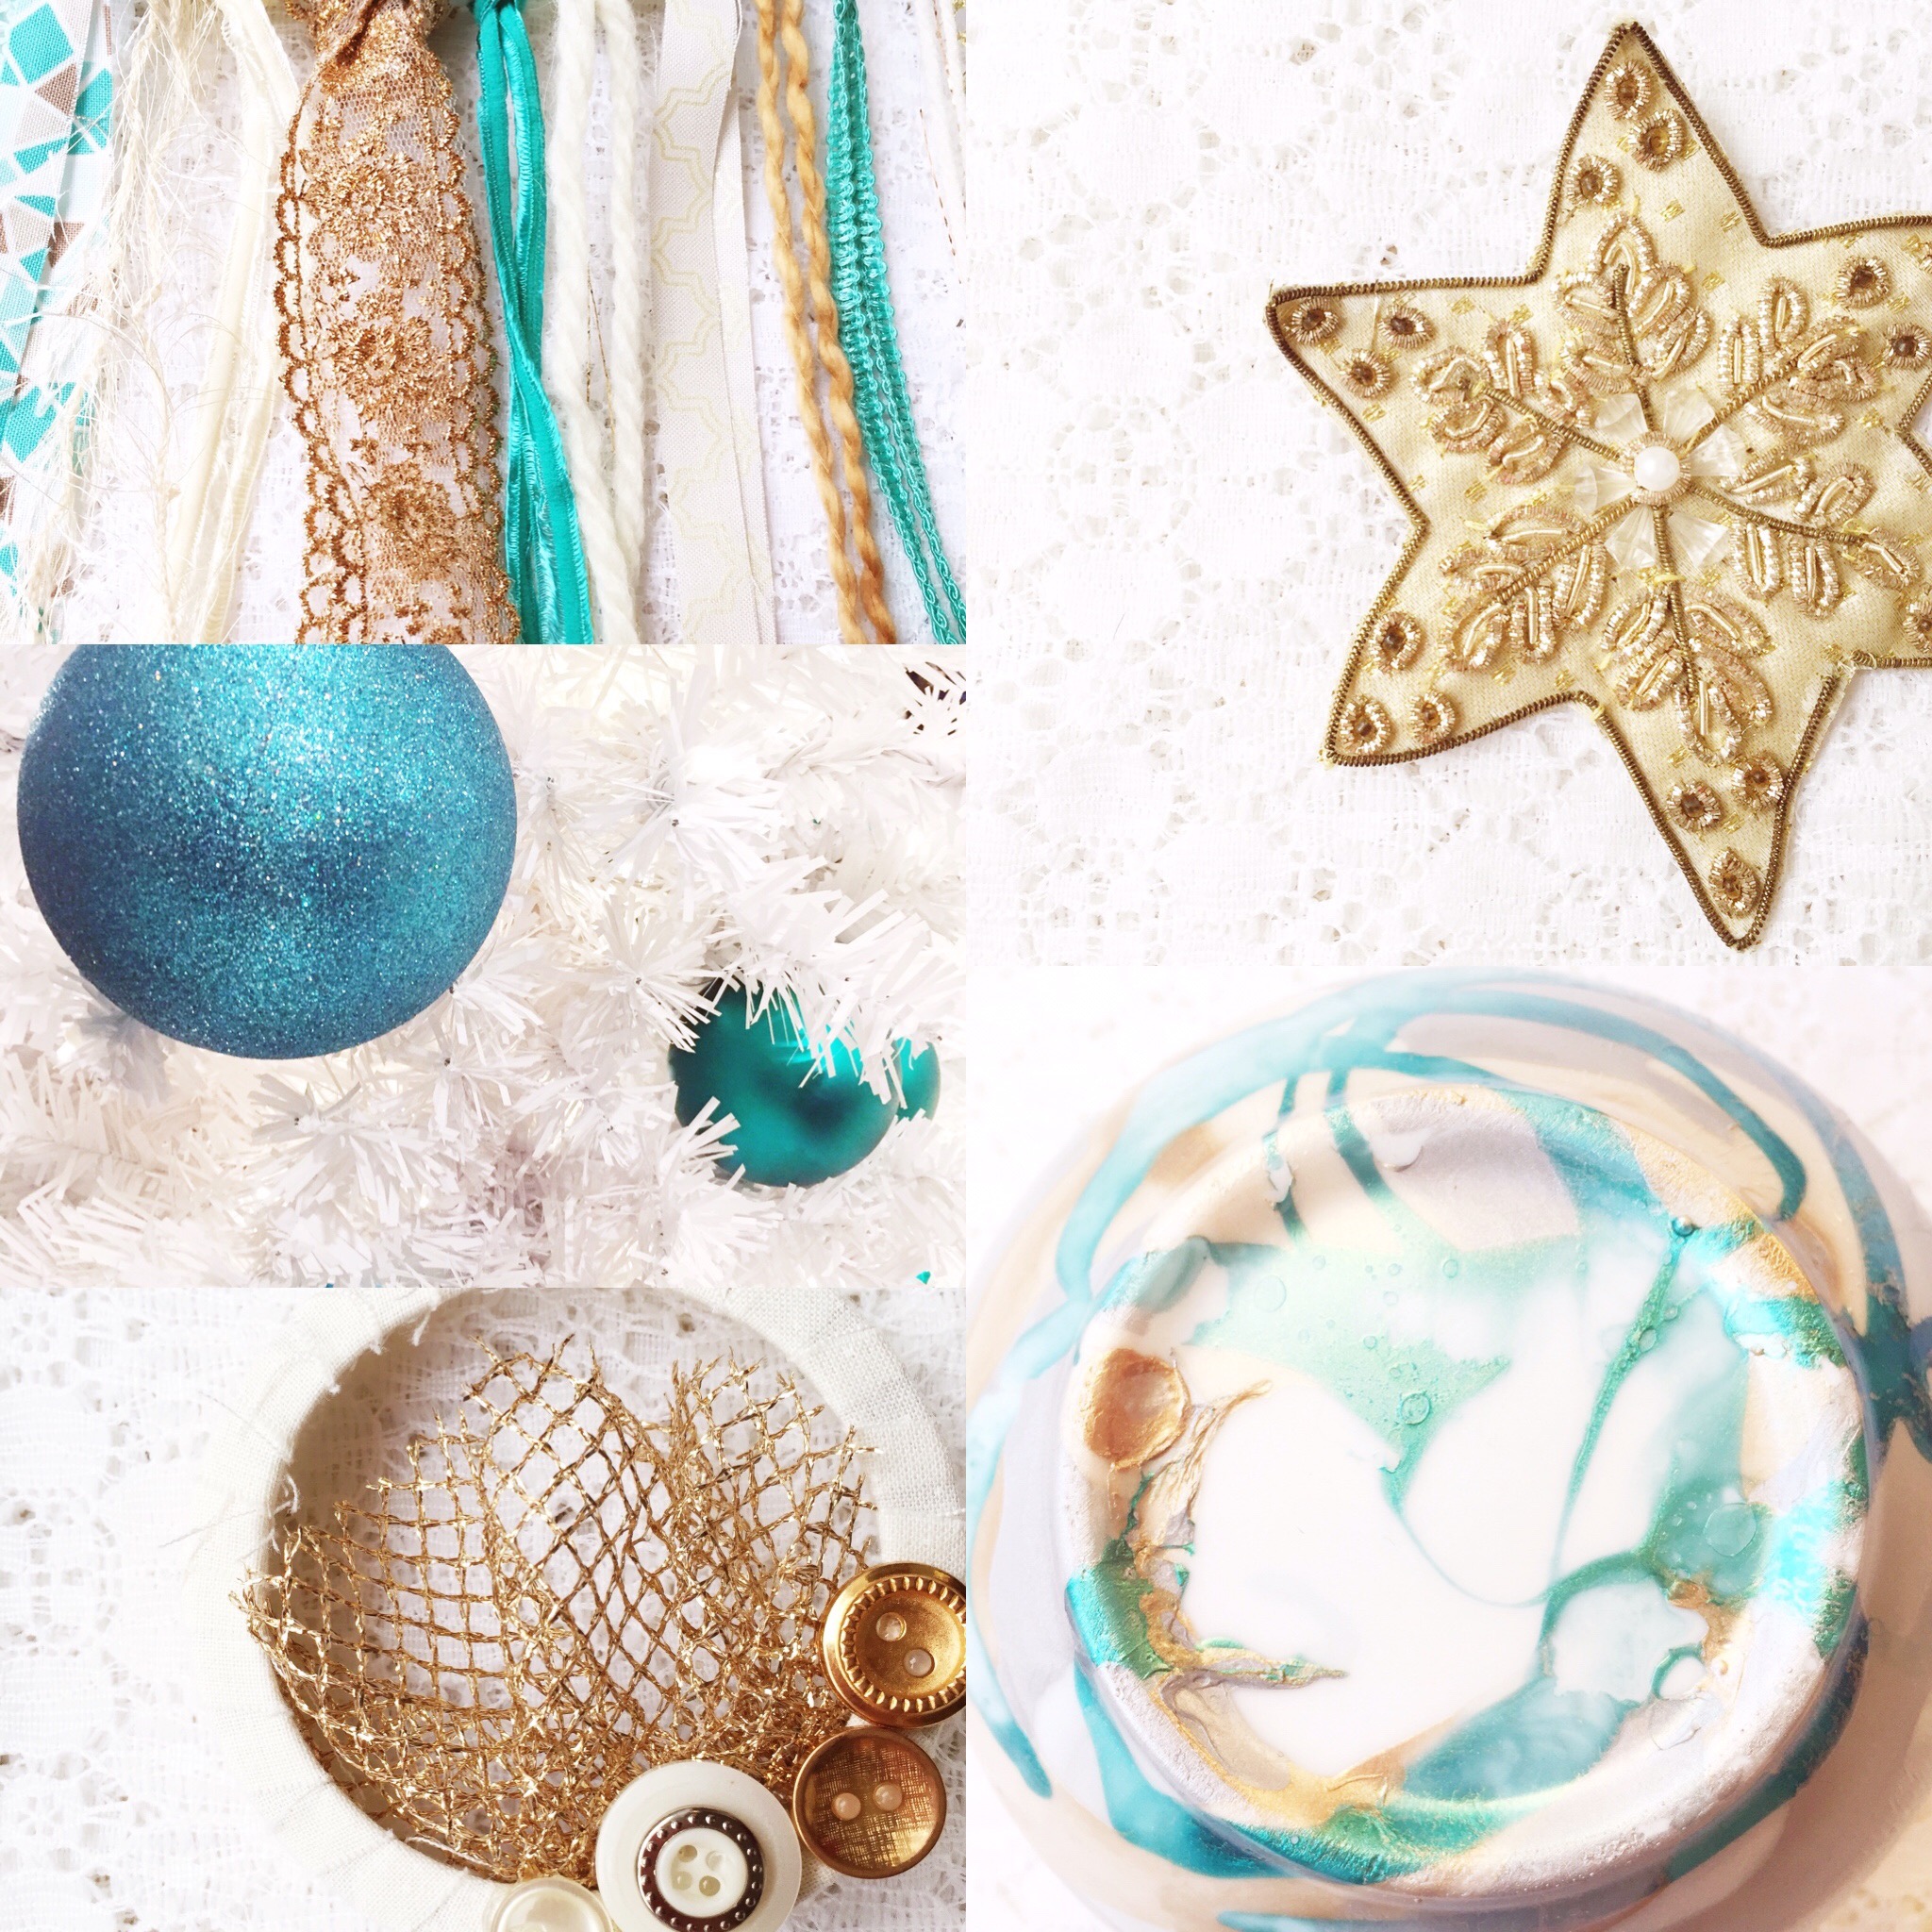
{Colour inspiration from my studio & home to yours…}
A very Merry Christmas, to you!
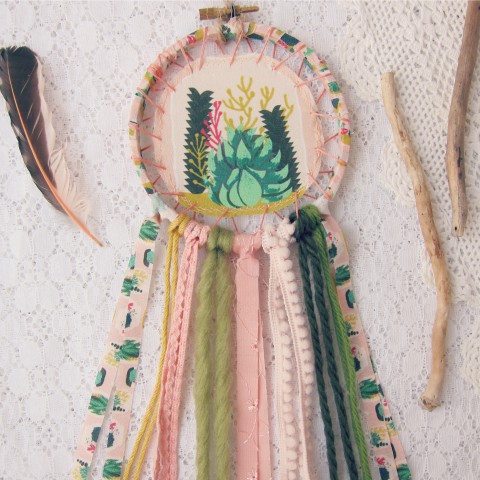
Another new line of Dreamcatchers is now available in the shop! There are three Terrarium Dreamcatcher designs to choose from. These will look wonderful, not just hanging in your baby’s room, but in your kids room {hey, a plant they can’t knock over} or in a front entryway {no special sunlight required}. Check out the other designs and colour combos:

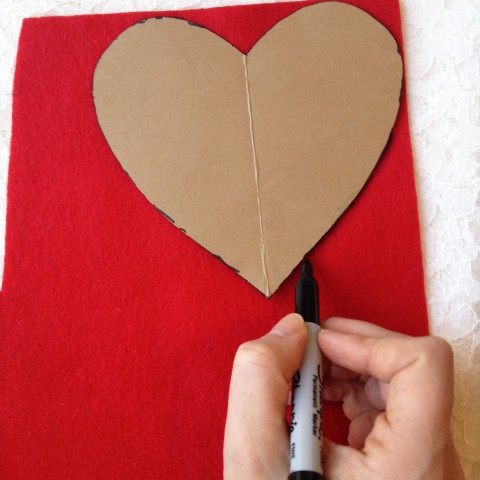
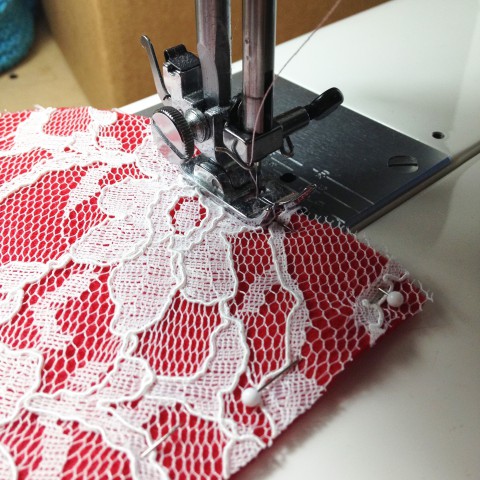
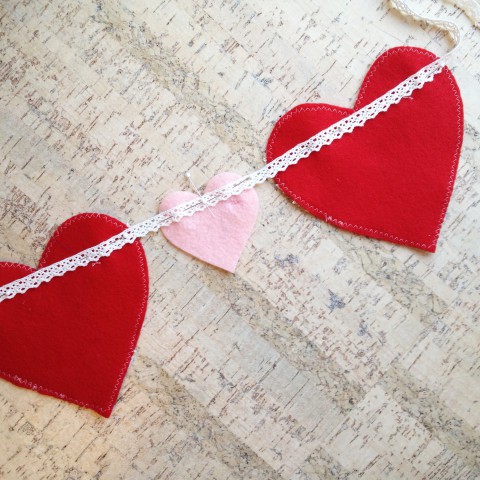
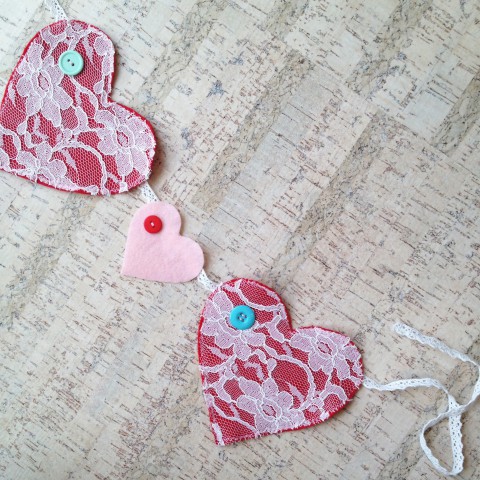
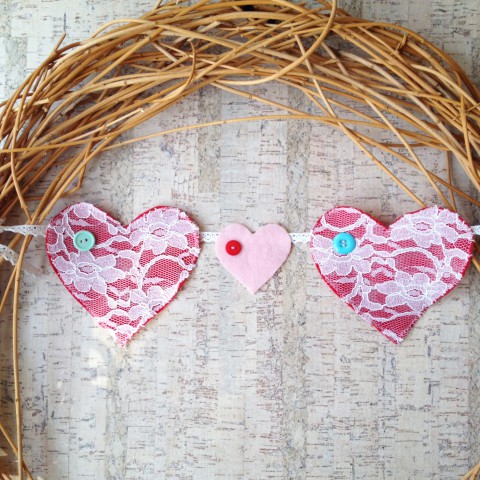
Although we don’t typically do a lot to celebrate Valentine’s Day at our house, we do decorate a wee bit. It’s nice to have a few pretty things around the house in the dead of winter. I especially enjoy a pretty wreath on the door (I get so sad when I take down my Christmas wreath). A wreath on the door always makes me smile when I arrive home. This year, I decided to spruce up our twig wreath with a shabby chic inspired garland. Annnd… I even remembered to document the process thoroughly so I could share it as a tutorial with all my lovely readers! That’s my bit of Happy Valentine’s to YOU!
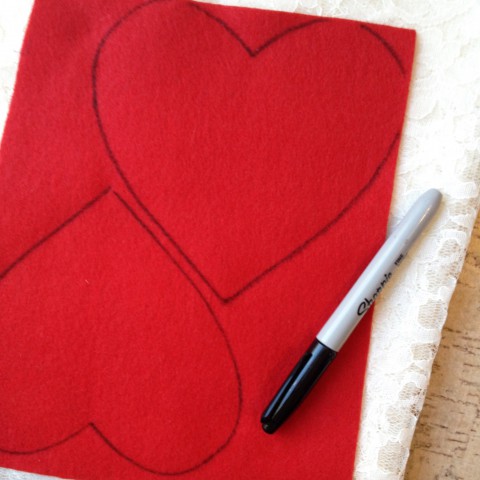
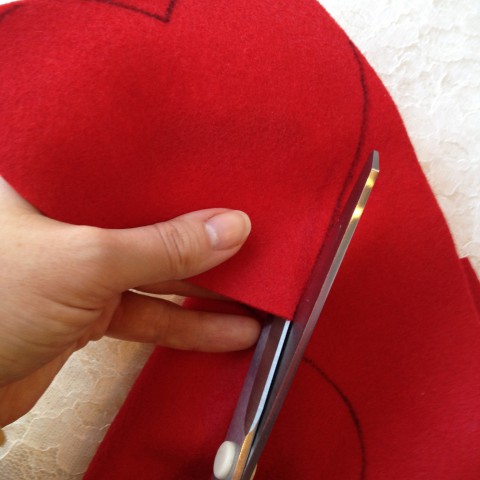
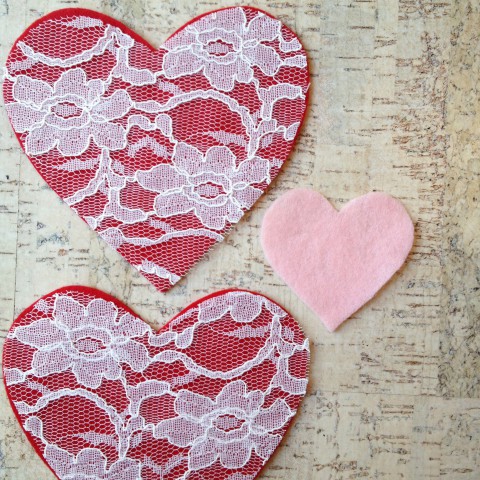
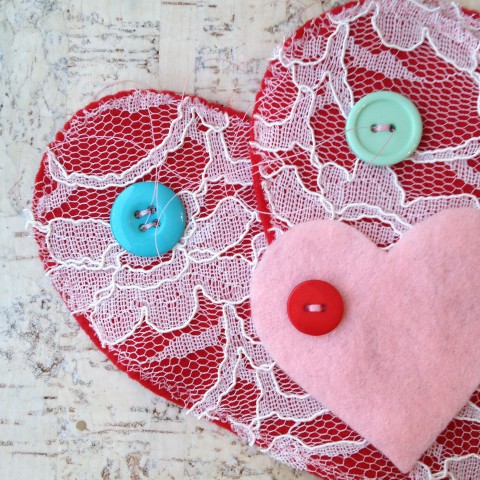
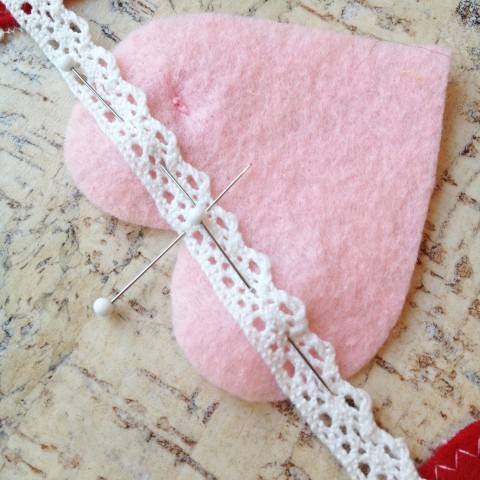
Now, the number of hearts to make for your garland is up to you (that’s why no material amounts have been given in the supply list below). I just made three (two large & one small) to symbolize my small family of three. Also, as you will see, I attached this short garland to a wreath. If you want a longer garland to hang, say from your fireplace mantel, then you will need to cut & stitch more hearts (you could alternate small & large hearts, some lace covered, some not).
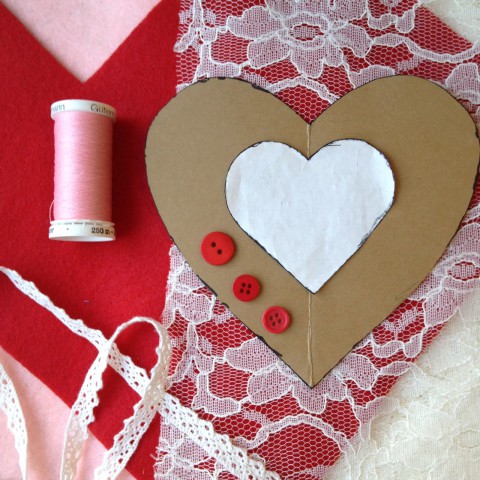 Here are the supplies you will need for this project:
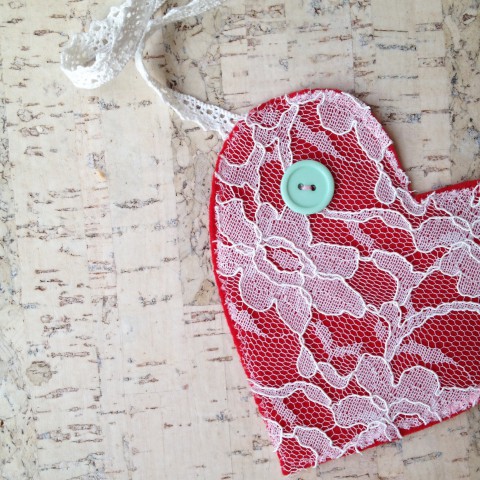

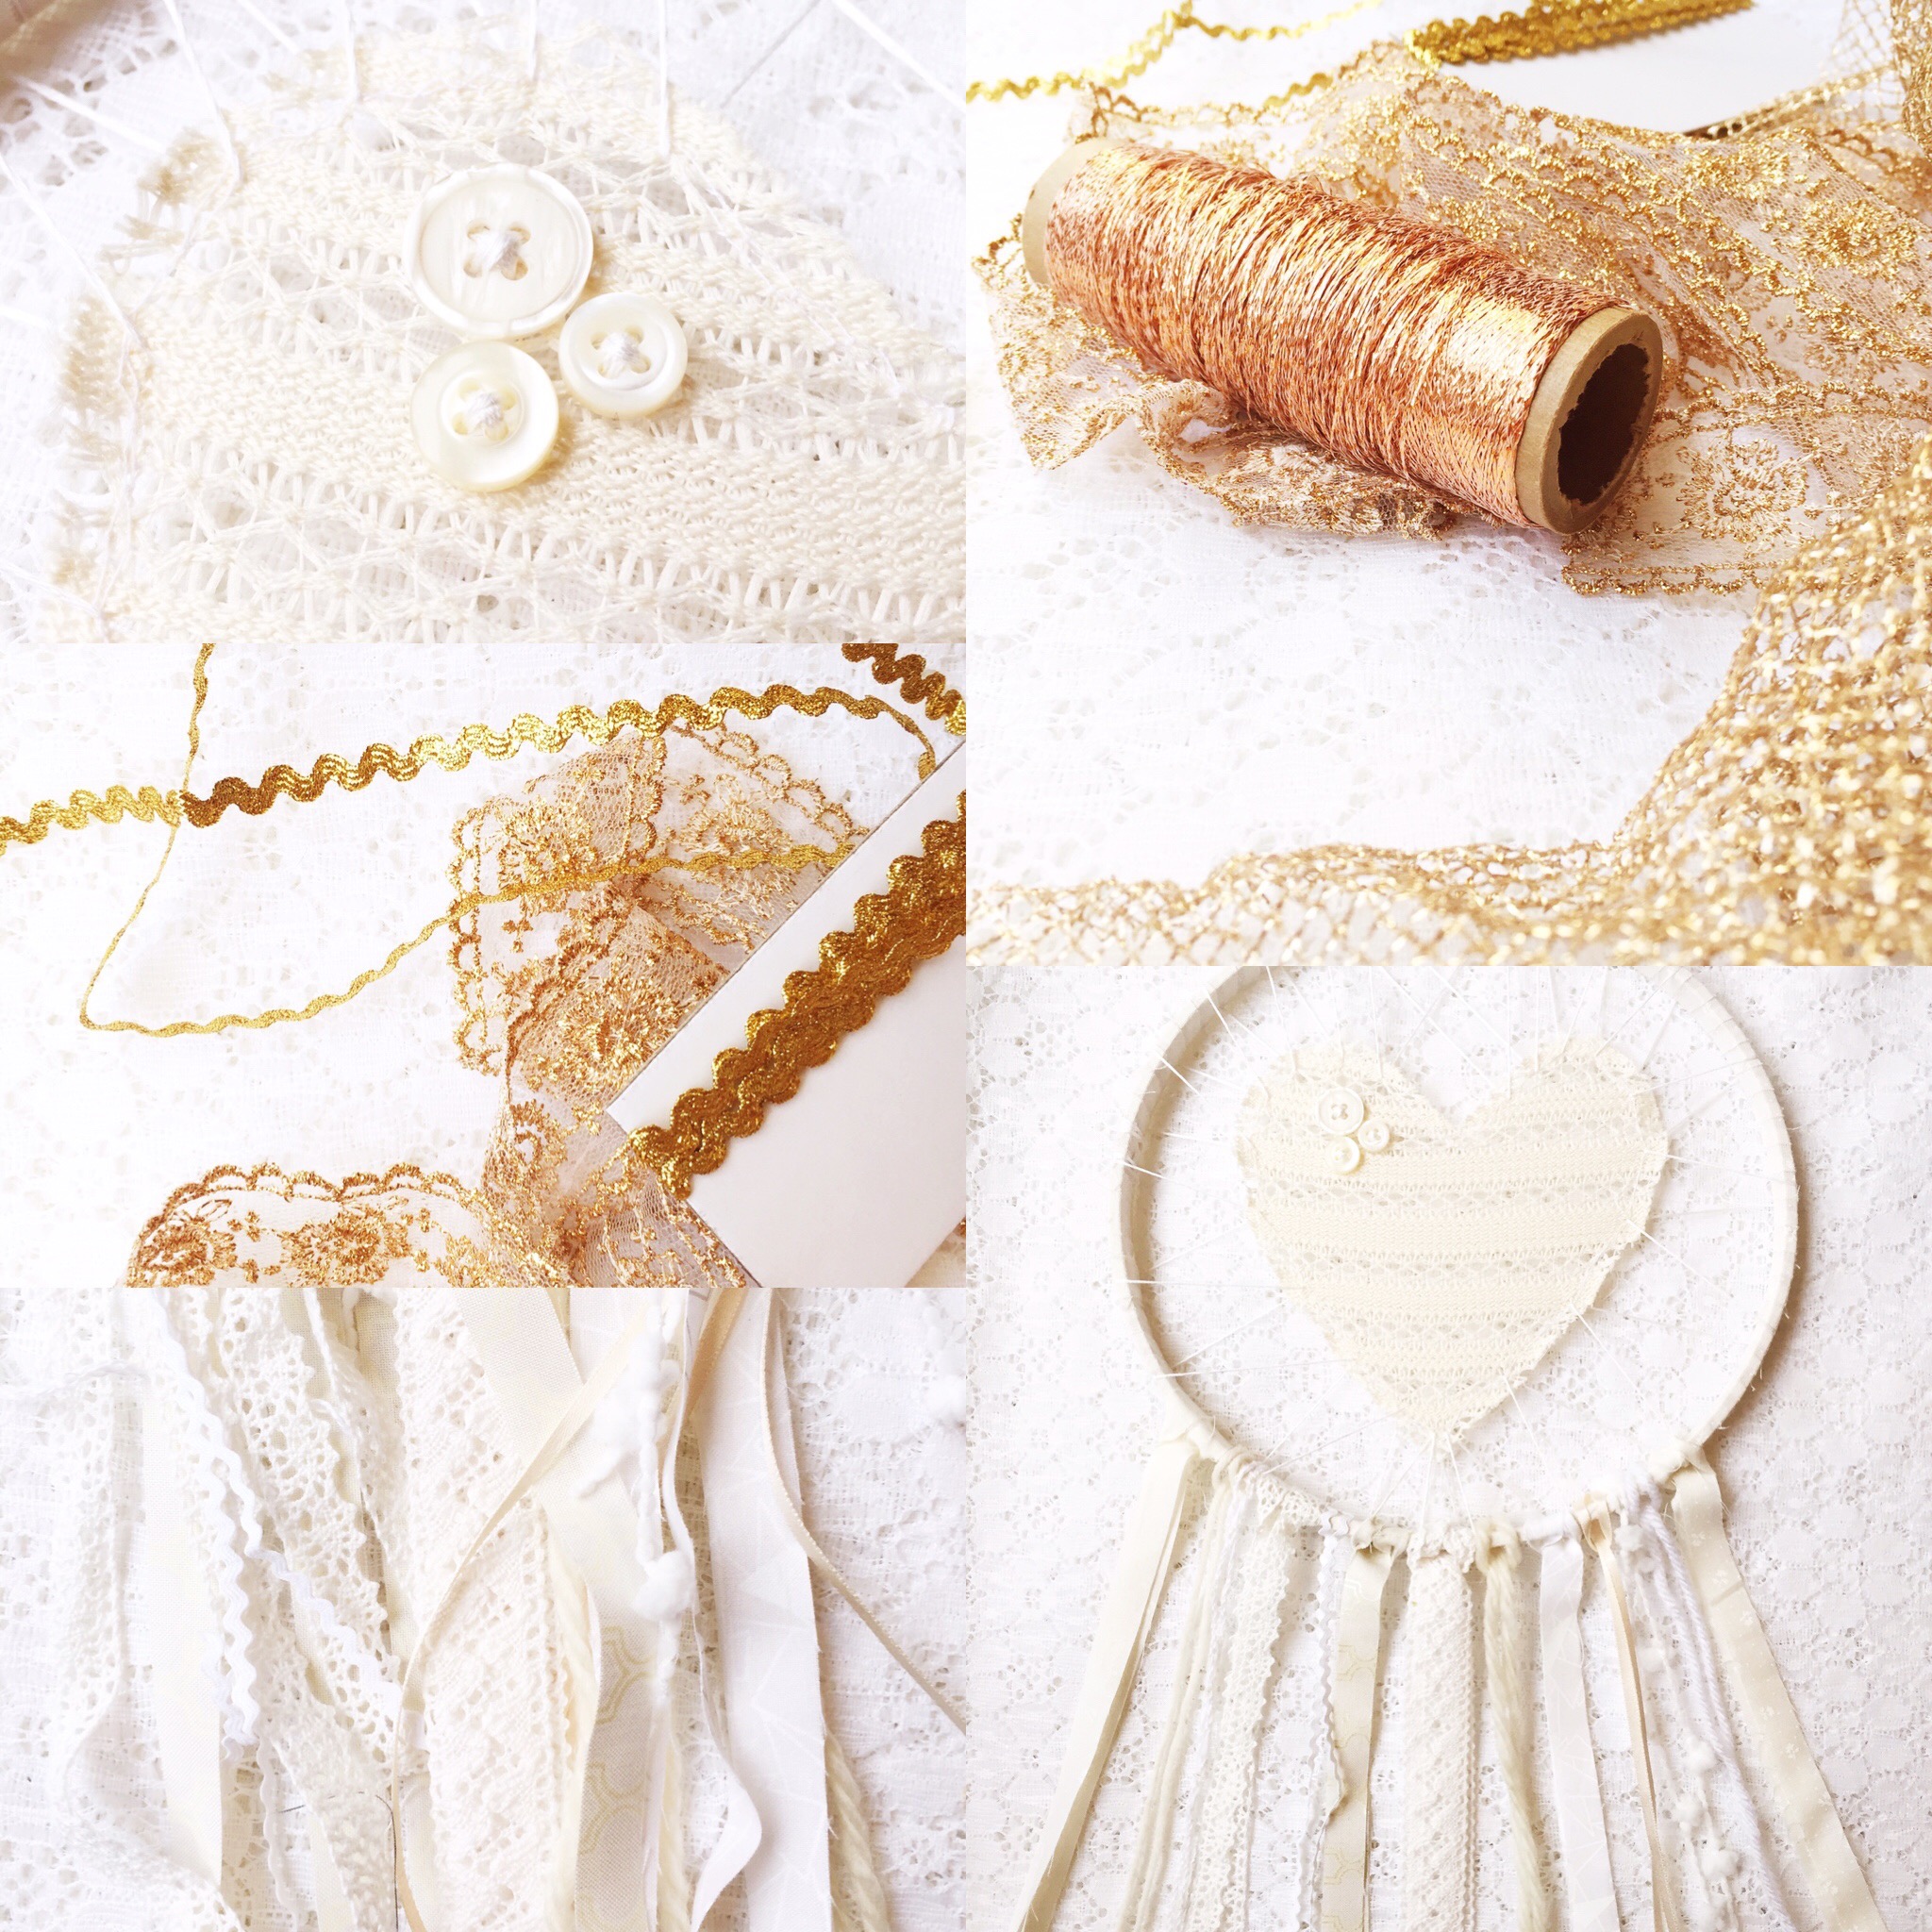
I realized early on in my making of the Love Catchers, that I was going to need a steady supply of lace trim to decorate them. Now, I try to use as much upcycled materials & materials that I have on hand as possible, but it’s hard to resist some new embellishments. It is possible to buy ready-made colourful lace trims (which I have done), but I felt a bit limited by colour choices and widths. So often I would find a package of lace trims online that were the perfect colour (there’s hardly any trim readily available locally), but the package would contain short lengths of various widths, many too wide for the Love Catchers.
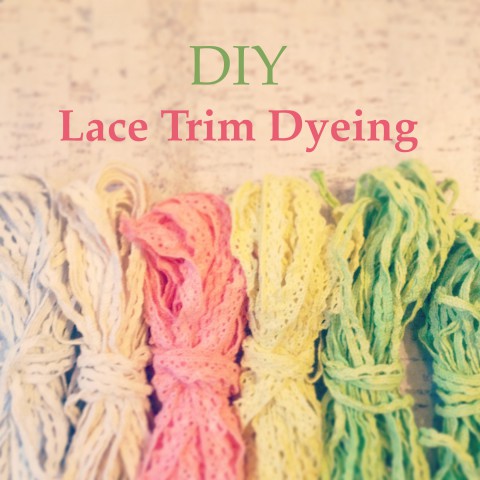
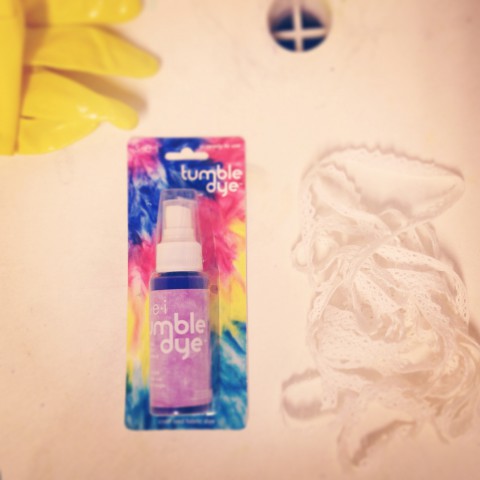
I finally decided that to flush out my selection of trims, I would purchase plain cotton, dyeable lace trim in large quantities and then dye them myself. Mostly I want to focus on making the Love Catchers themselves, and with limited time for all the crafting, I chose to purchase ready-made dyes to simplify the process. The supplies for this adventure were purchased online at the Dharma Trading Co. or were items I already had on hand. Dharma Trading Co. does offer natural plant dye options, if you would prefer to dive into that. I ordered a small selection of Tumble Dye. The fact that you could spray or dip dye with them appealed to me. Also, lovely selection of colours!
Suggested Supplies:
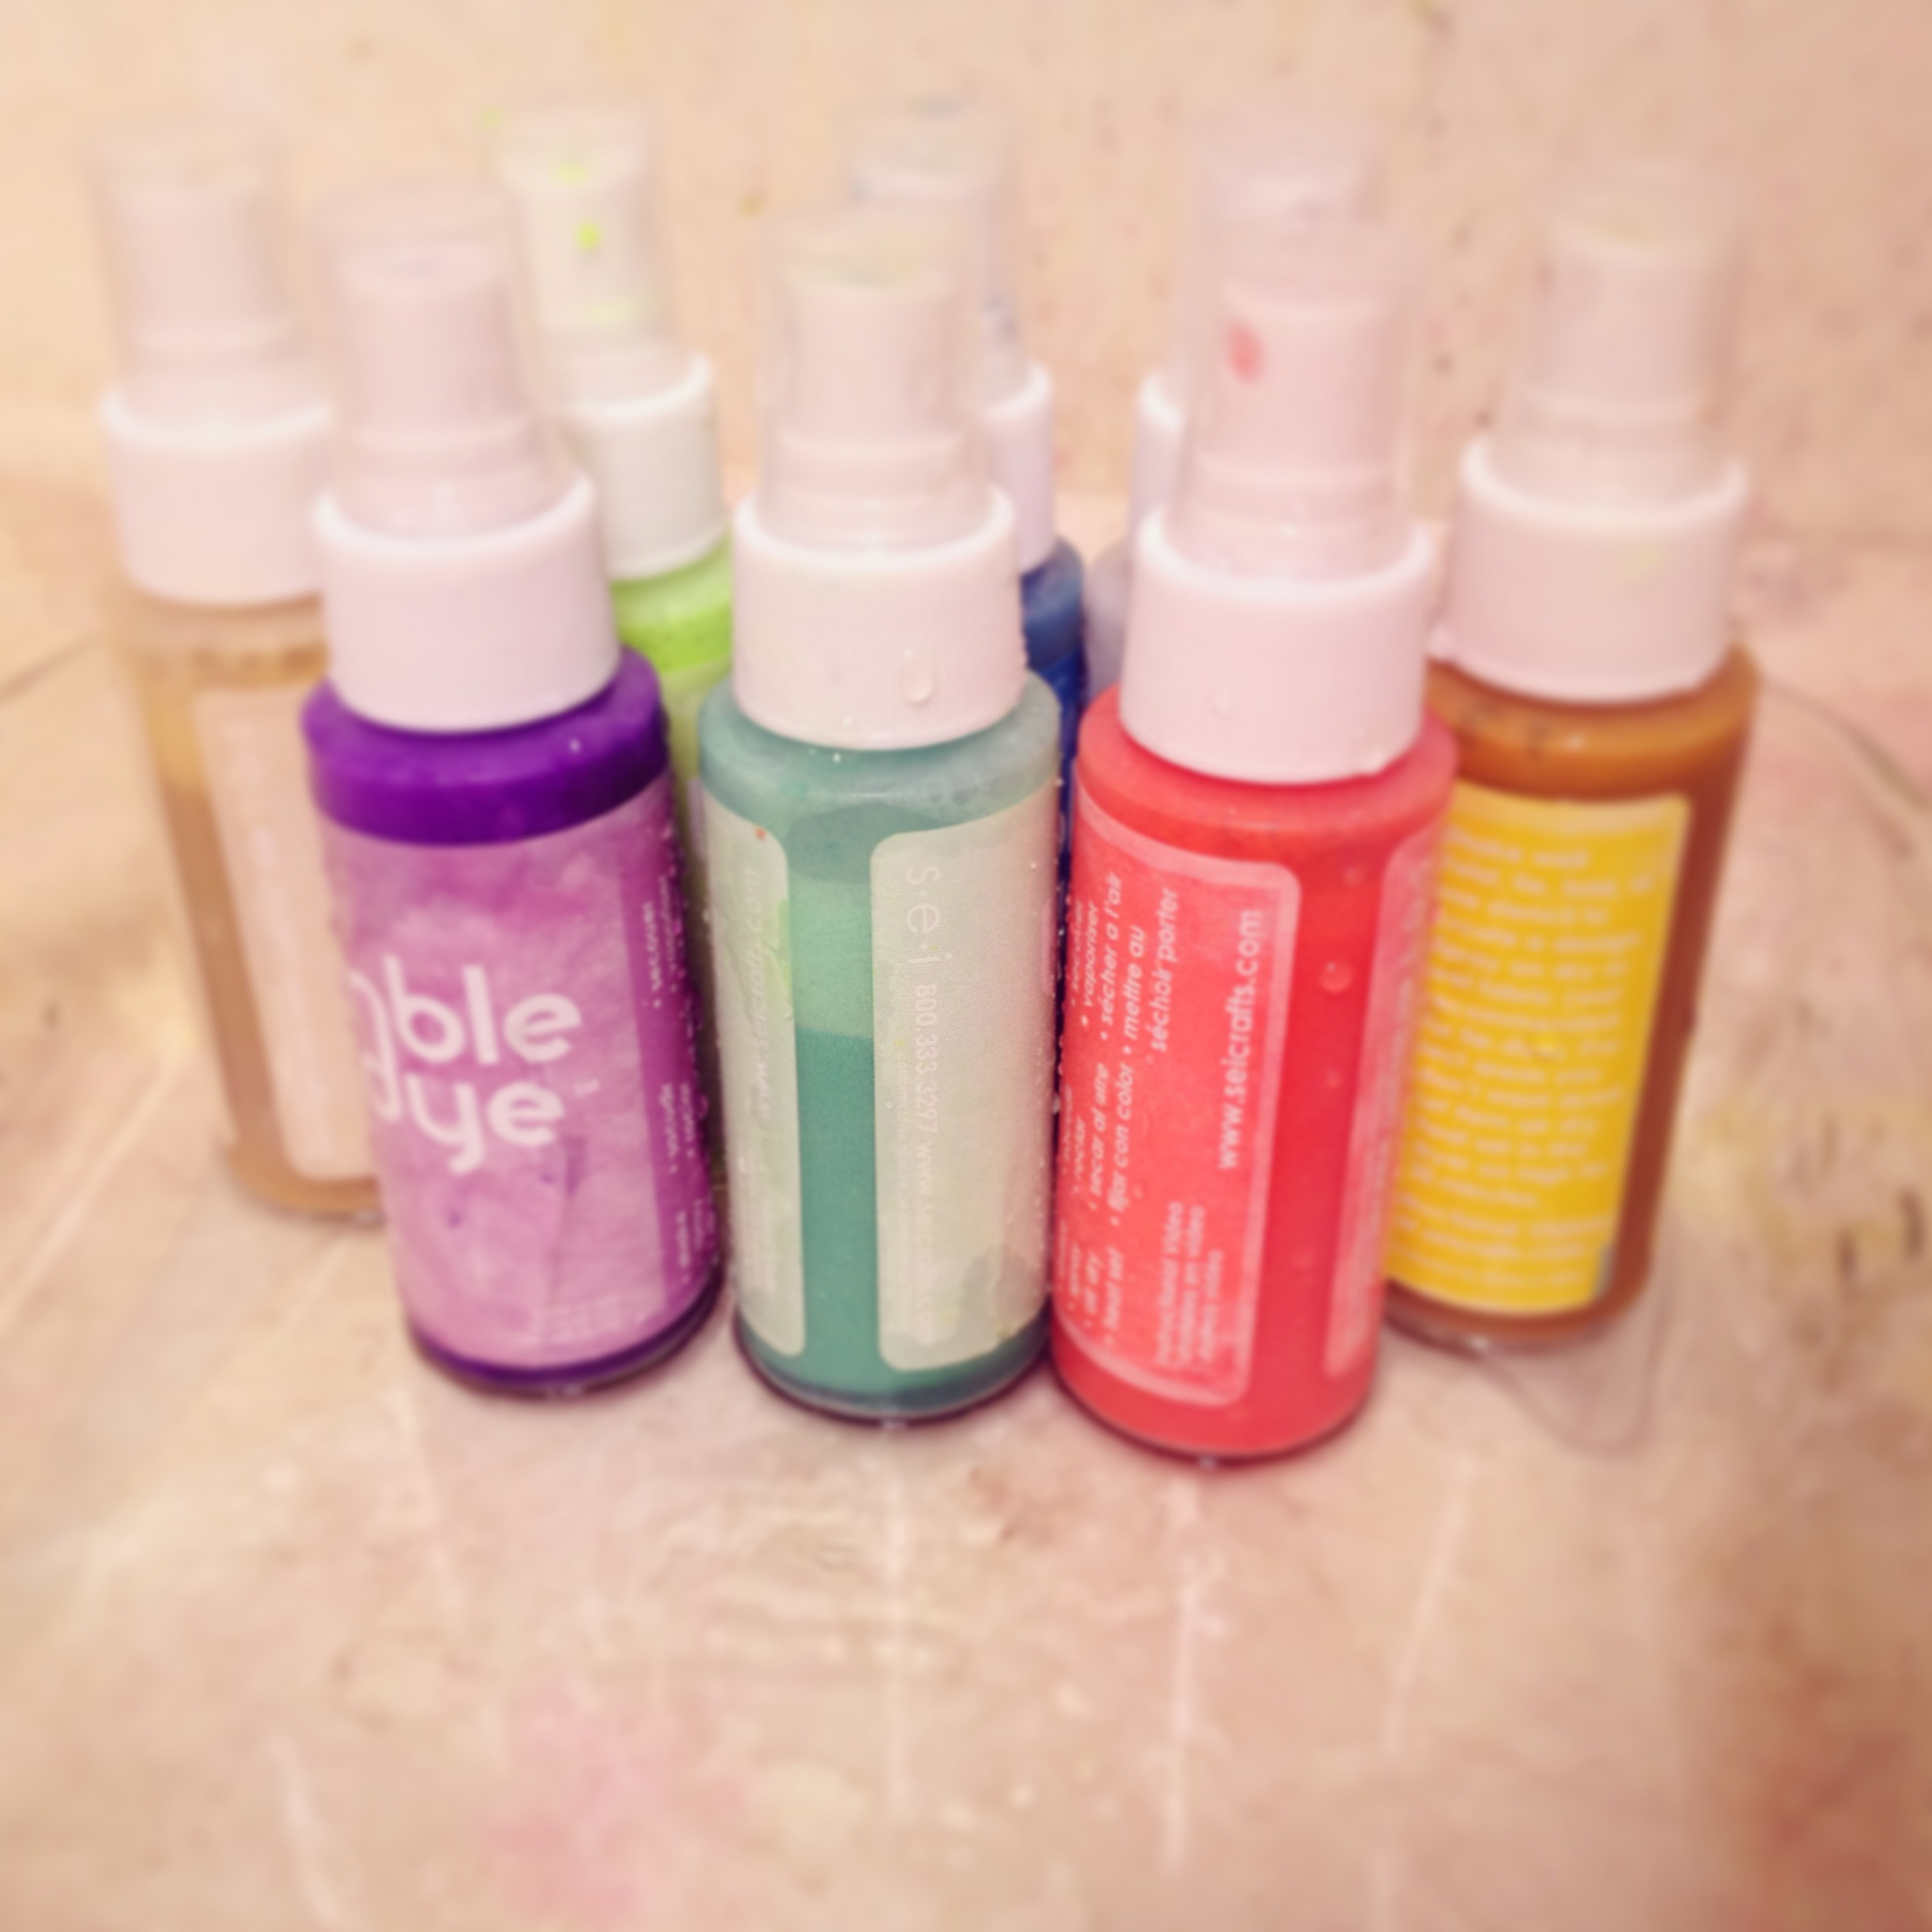
I wet the lace before applying any dye. Then I laid the lace out in the glass pan and sprayed it with the dye. Then I flipped the lace over and sprayed it a bit more. I didn’t pre-mix any dyes, but did combine some of the dyes simply by alternating which one I sprayed, to achieve desired colours.
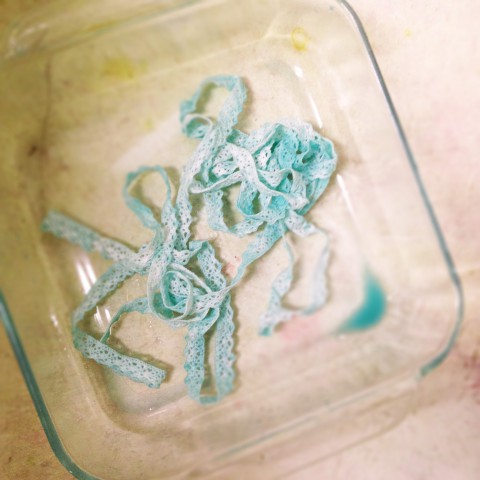
Once enough dye has been sprayed on, wring the lace trim, allowing the excess water and dye to fall into the glass pan. Then place the lace trim back into the excess dye, rub it in a bit, flip the lace over and rub in the remaining dye. I did this step, to ensure there wasn’t any large white spots on the trim. *see note below*
Once you’ve got the lace trim the colour & hue you want, lay it out on a plastic try or baking sheet and let it air dry completely. Once it’s dry, pop it into the dryer for about 20min (I just used our medium heat setting). So far I have just been using the lace trim for my Love Catchers, which do not go into the wash. According to the instructions, putting the dyed items into the dryer should set the colour, but I haven’t personally tried washing any of them yet.
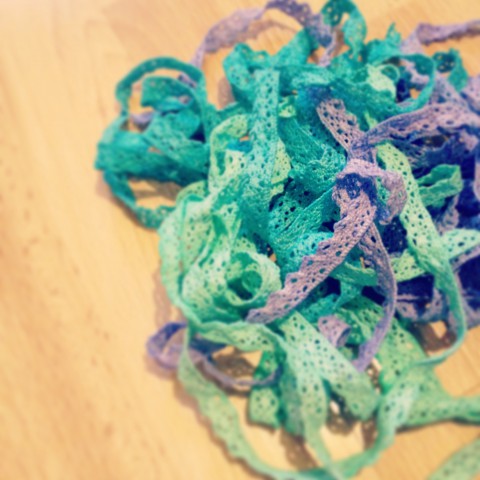
Viola! Pretty, pretty lace trims in a rainbow of colours, ready to be made into even prettier things!
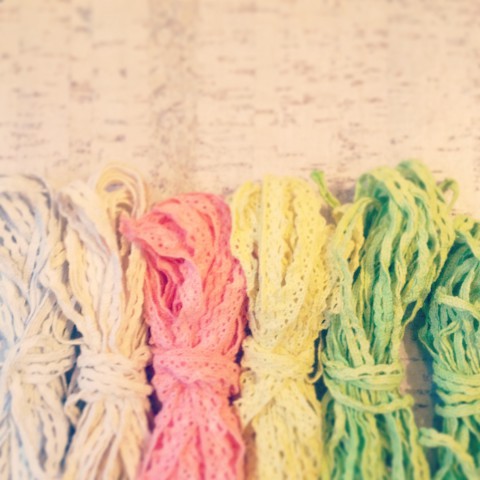
*If you wish to a achieve a much more even dye colour, just pour some of the dye into the glass pan, and do a dip-dye method instead of using the spray applicator. I prefer the spray applicator to achieve the vintage shabby chic look, but it’s up to you.*
Keep experimenting (I know I still am) and have fun with your dyeing projects!
A little bit of home:
1. Coffee Table by Dylan Design Co.
2. Fox Kit in Succulent Patch print by Seedling Shop
3. Feather Return Address Stamp by Native Bear
4. Modern Mustard Tea Towel by Amy Sullivan
1. Coffee table by Dylan Design Co.
2. Fox Kit in Succulent Patch print by Seedling Shop
I’ve been seeing a lot of twig inspired home decor around (for many months now). Recently some neat painted twigs on Etsy caught my eye and then I saw these! Painted, collaged and wrapped in twine with buttons! Lovely! A jar of these would be sweet as a Thanksgiving table centre piece, don’t you think?
Source: blog.crescendoh.com via Sarah on Pinterest