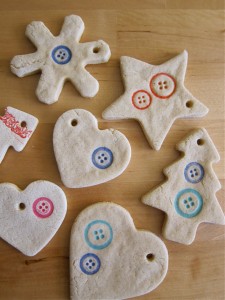
 I’ve really been trying hard to do more of the crafts I wanted to complete for Christmas this year. Yesterday afternoon, I managed to complete these salt dough ornaments (with boy in the Baby Hawk because he refused to nap). They aren’t as perfect as I want them to be, but they’ll have to do as a first attempt at salt dough. Of course, I got the idea from Pinterest (where else?!) and I actually used two tutorials for my inspiration. The first was from the Make It Give It blog and the second was from the Intimate Weddings blog (they used the salt dough to make wedding favors).
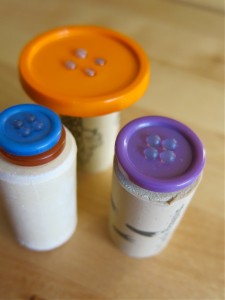
I loved the idea of using rubber stamps & ink to decorate the ornaments! Simple and yet it can make a traditional craft slightly more sophisticated. Of course, I immediately envisioned buttons stamped on these ornaments and since I don’t actually own a rubber button stamp (shame on me), I first had to set about making some stamps. Luckily, that was an easy fix! I glued some buttons onto old wine corks, which I’ve kept around for exactly that purpose. Easy-peasy, right?
Next, I mixed up the dough, using the following recipe (Please Note – in the future I will cut this recipe in half and make two separate batches of dough) :
2 cups flour
1 cup salt
1 cup water
I rolled the dough out to about 1/4″ thick (perhaps even slightly thinner, which I might regret). Then I inked & stamped the designs and used cookie cutters to cut the shapes. I used a straw to make the hole for hanging the ornaments. Then gently placed each one onto a cookie sheet and baked in the oven at 200 degrees for about 5.5 hours. Most tutorials recommend between 4-6 hours. I just pulled them out before I went to bed.
They are pretty darn cute! But I do have a few things I will attempt differently next time. Here’s my tips on this project:
- DO have all your stamps & inks & cookie cutters out and ready to go. The dough starts to dry quickly, so you want to do a lot of prep before you even mix the dough.
- DO make sure you have plenty of time to dry them in the oven. These aren’t going to be done baking in a couple of hours.
- DON’T mix the dough recipe that I have listed on the blog. Cut it in half and make two separate batches of dough. The dough starts to dry quickly (especially in our Alberta climate).
- DON’T try re-rolling the dough to use the left over bits. I think this is one reason why some of my ornaments have cracks. They are so much more pretty when they are nice & smooth.
- DON’T get too frustrated if some aren’t quite perfect. You can always make up more. Even though they take a while to bake, keep in mind that the dough itself is very inexpensive & easy to make.
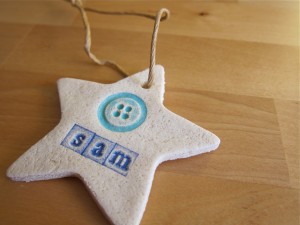
I would definitely like to make more of these as tags for gifts throughout the year. Love the way they look with names stamped on them! Sam’s first Christmas ornament. I hope he likes buttons as much as his mama…


Will definitely be giving these a try…next year at the latest! (what kind of ink did you use?)
I actually just used my rubber stamp ink pads. I didn’t really think too much about how “safe” that was to put in the oven and heat up. Might be worth looking into a different ink, although I didn’t notice any smell being given off by the ink while it was in the oven…